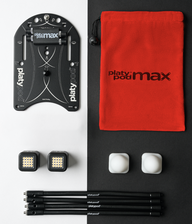
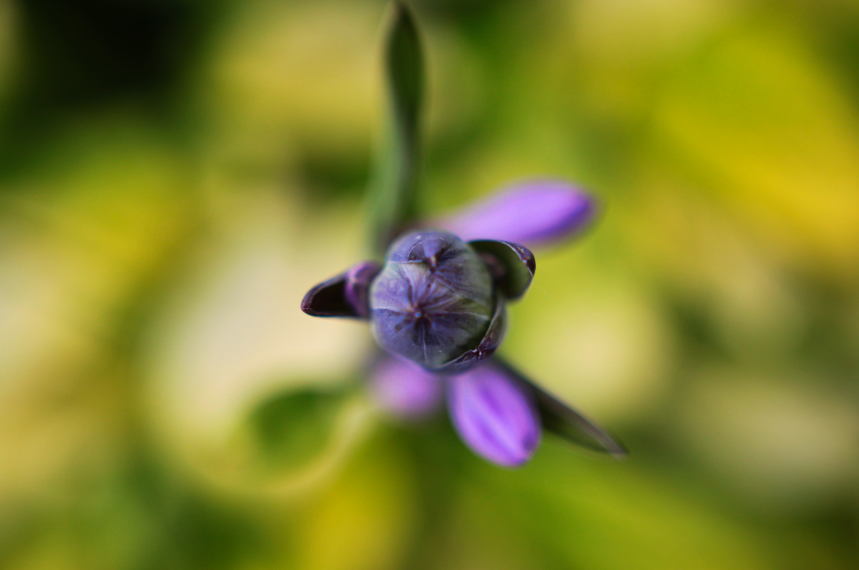
 by Skip Cohen Most of you know I don't make a living as a photographer. My passion is the business and marketing side, and that's where most of my career has been spent. However, hanging out with artists like Don Komarechka and Mike Moats over the last few years, I was bound to learn something. Both Don and Mike have had a significant influence on the way I look at things, paying more attention to tiny details in the world around me. The little guy above was at best 3/16 of an inch and was just sitting on the pool cage's frame. We've had a lot of storms lately, and at first, I thought it was a chunk of dirt! I missed the opportunity to get a shot to give you an idea of just how tiny this guy was. It's rare I've seen a frog this small, but here's roughly the size of the frog before the macro lens and enlargement.  The thumbnail on the right, with my new buddy next to a drop of water from the storm, shows how little he is too. I took off this week to chill and enjoy time with Sheila and the pups. A side benefit was seeing this guy and having the time I needed to grab a camera. And while my skill set is still work in progress, having the right tools sure helps. I should have used a tripod, but I didn't have a lot of time before "Kermit" took off. So, handheld and following him (or her) everywhere for about ten minutes was all I had. 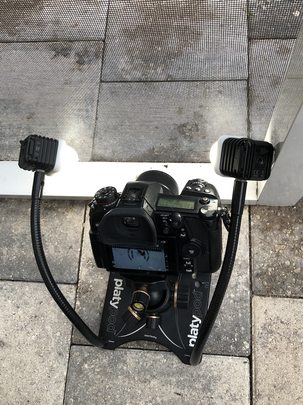 Back for a second visit, I was able to use the Platypod on the ground with more stability for the little guy's bigger 1/4" brother! Back for a second visit, I was able to use the Platypod on the ground with more stability for the little guy's bigger 1/4" brother! I love the LUMIX G9, and teaming up with the LUMIX G 30mm macro lens, a Playpod Max, the new goosenecks, and two Litra Torch 2.0s gave me what I needed. I also had some fun with Luminar, but only for minor tweaking. I lightened the image, sharpened slightly, cropped, enlarged, and erased a couple of distracting dirt spots. The short video clip below was simply for the fun of it. The LUMIX line makes it so easy to push a button and grab a few seconds of video. Shooting macro, handheld without a tripod, and having no video skills whatsoever, made focus a challenge. A tripod would have helped a lot, but at this point in my ten-minute adventure, I was standing on a ladder as my little buddy moved up the wall! We've all been in some form of lockdown for almost three months. That means lots of time on our hands to do something different. Playing in the macro world is a kick, and with every image I get, I start to understand Don and Mike's love for the craft just a little better. Click on any of the three thumbnails below for more information.
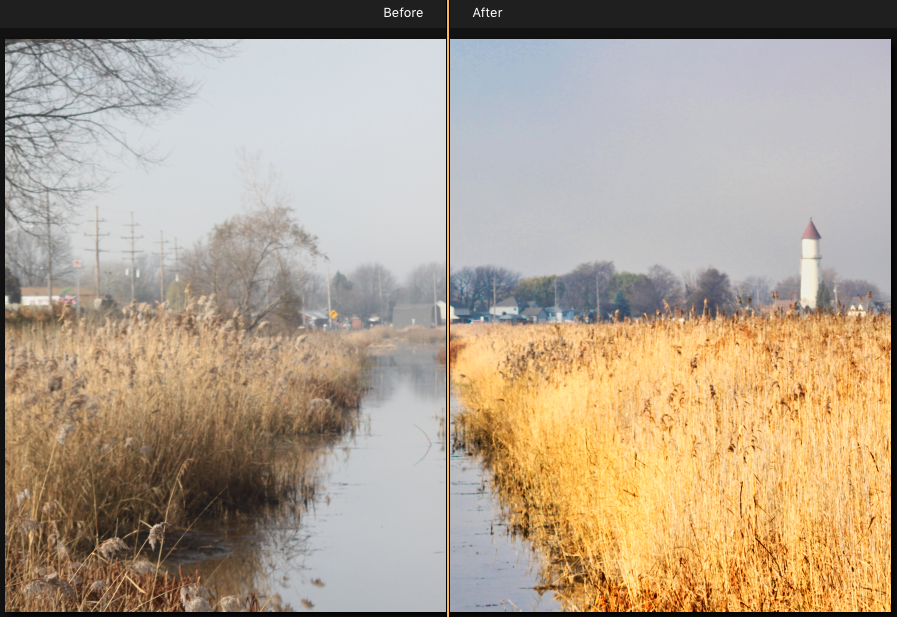
1 Comment
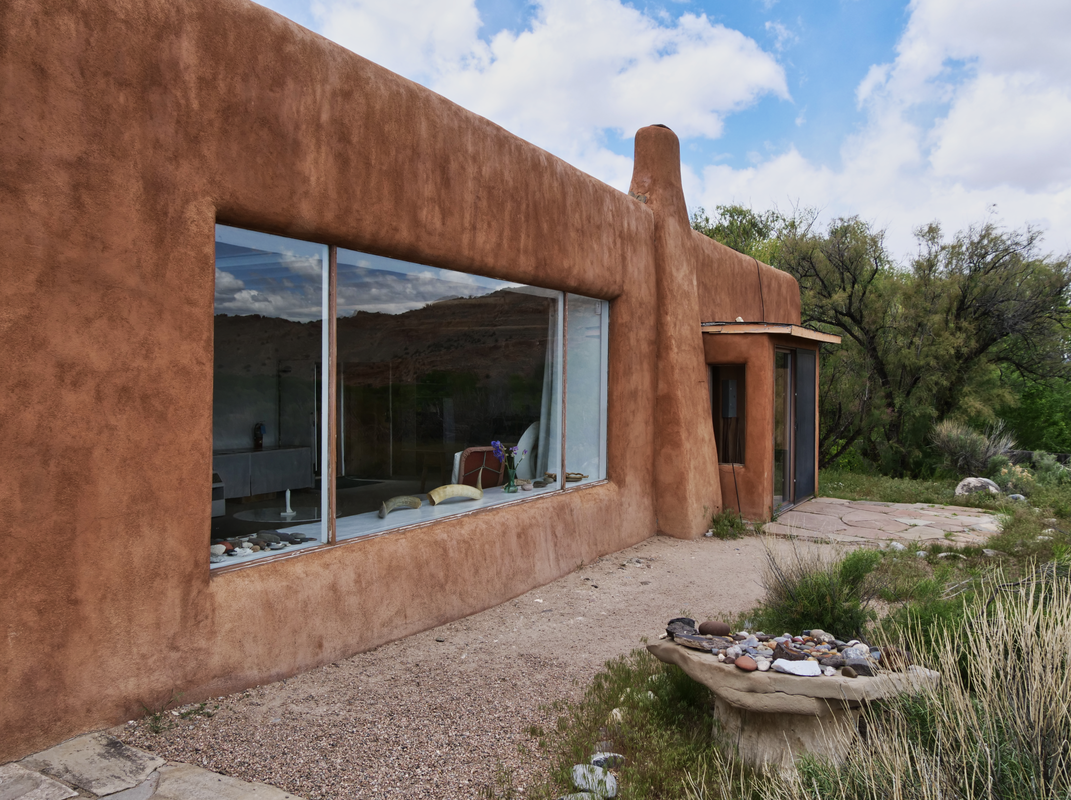
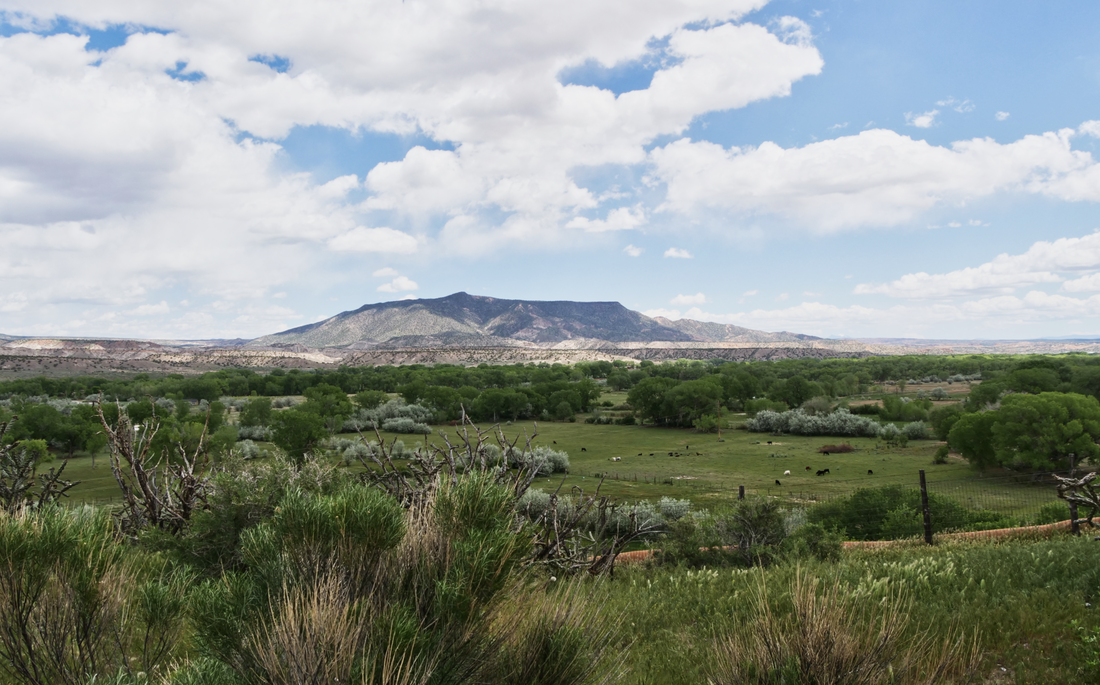
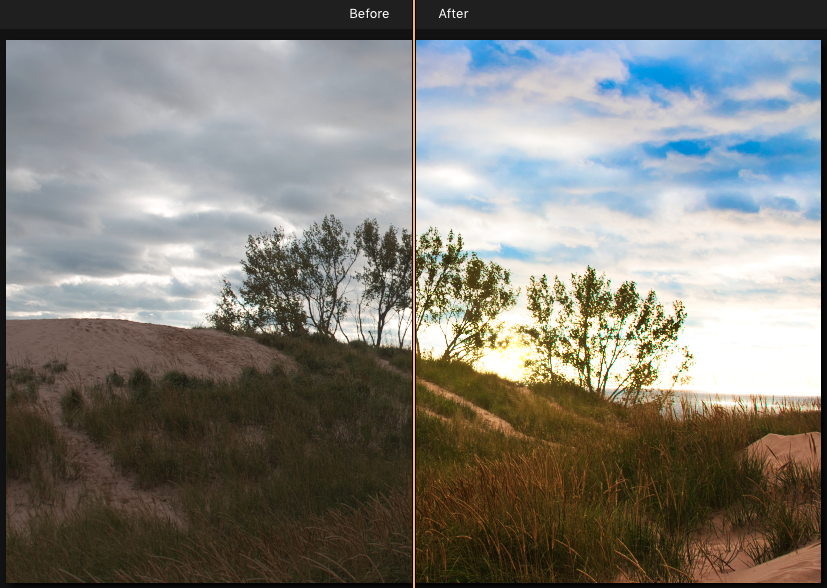
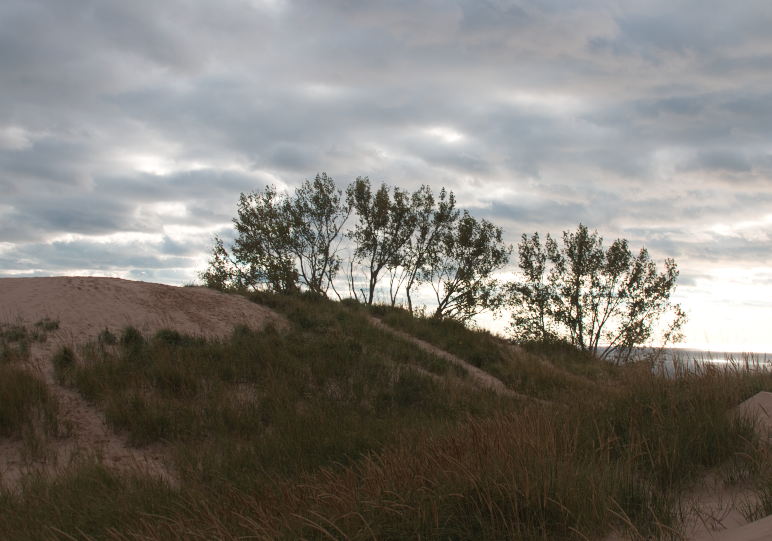
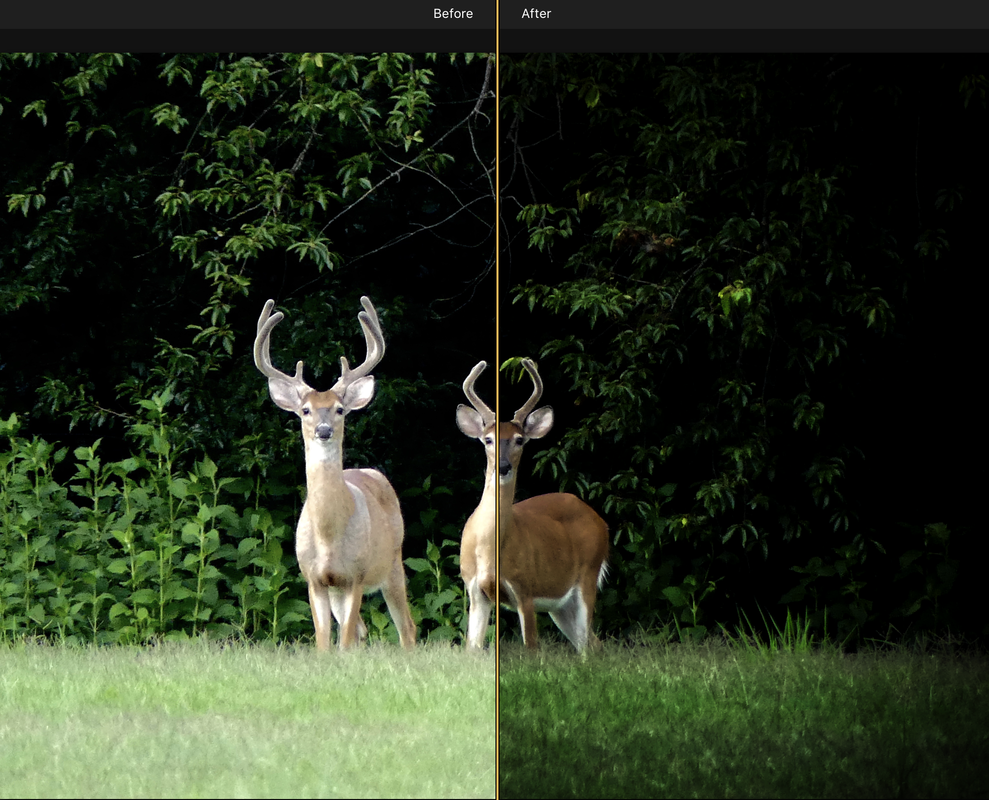
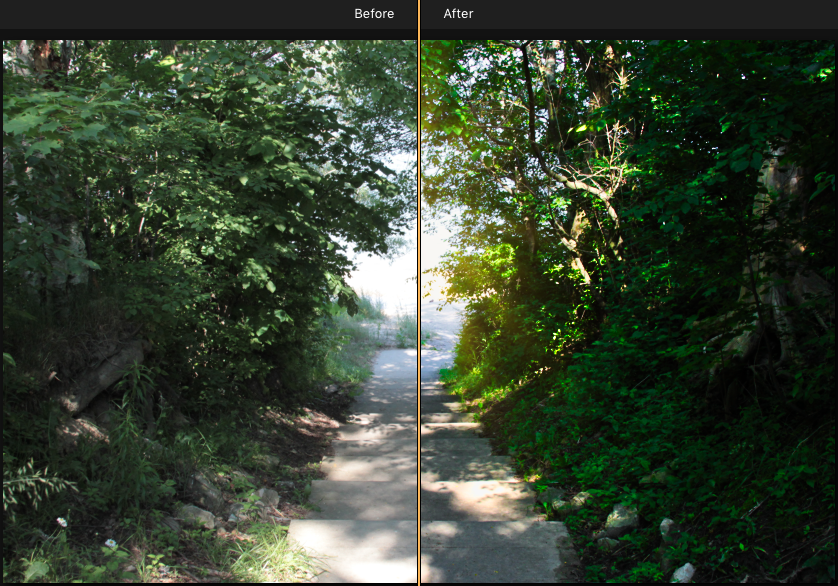
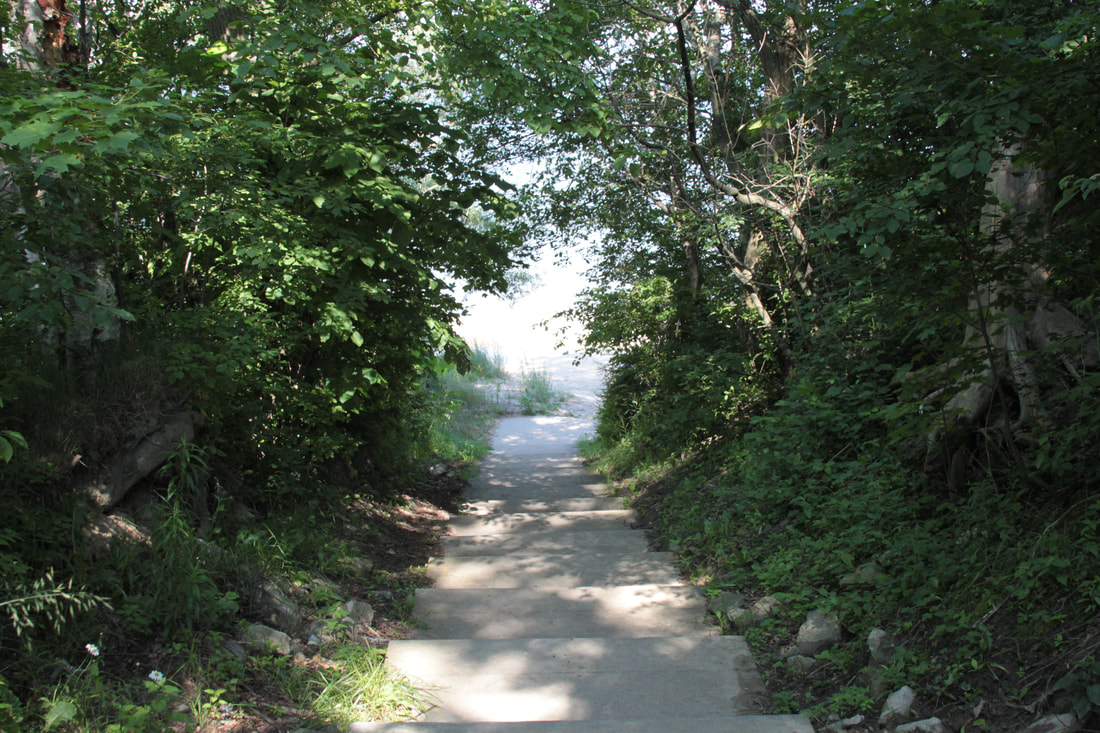
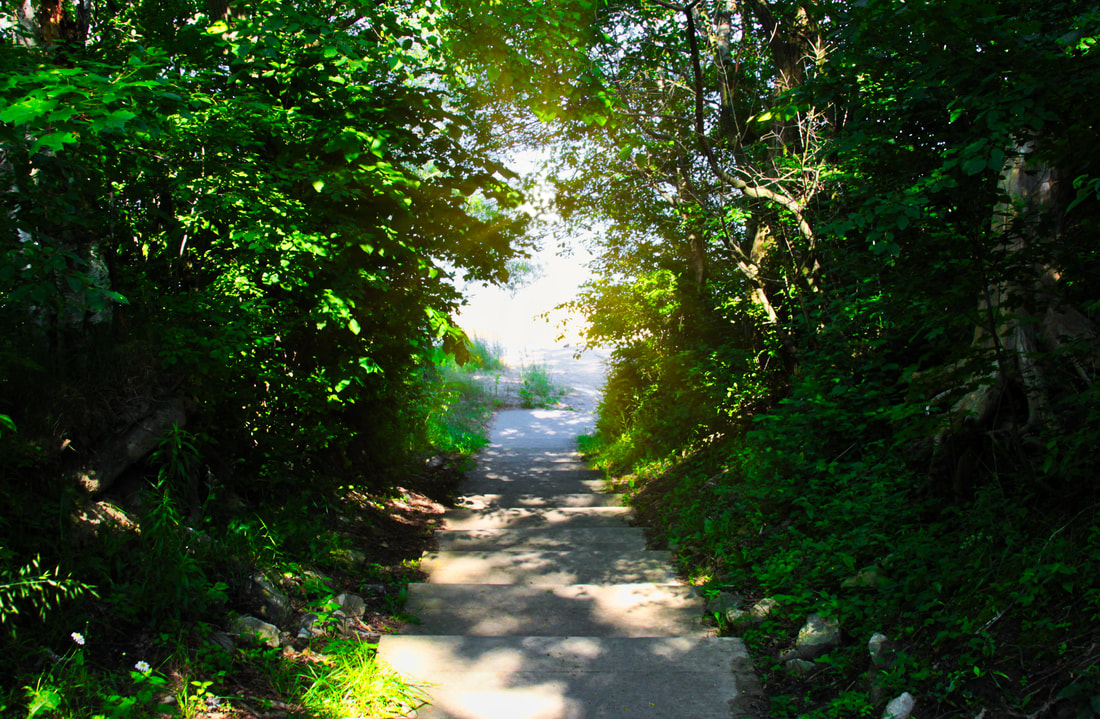
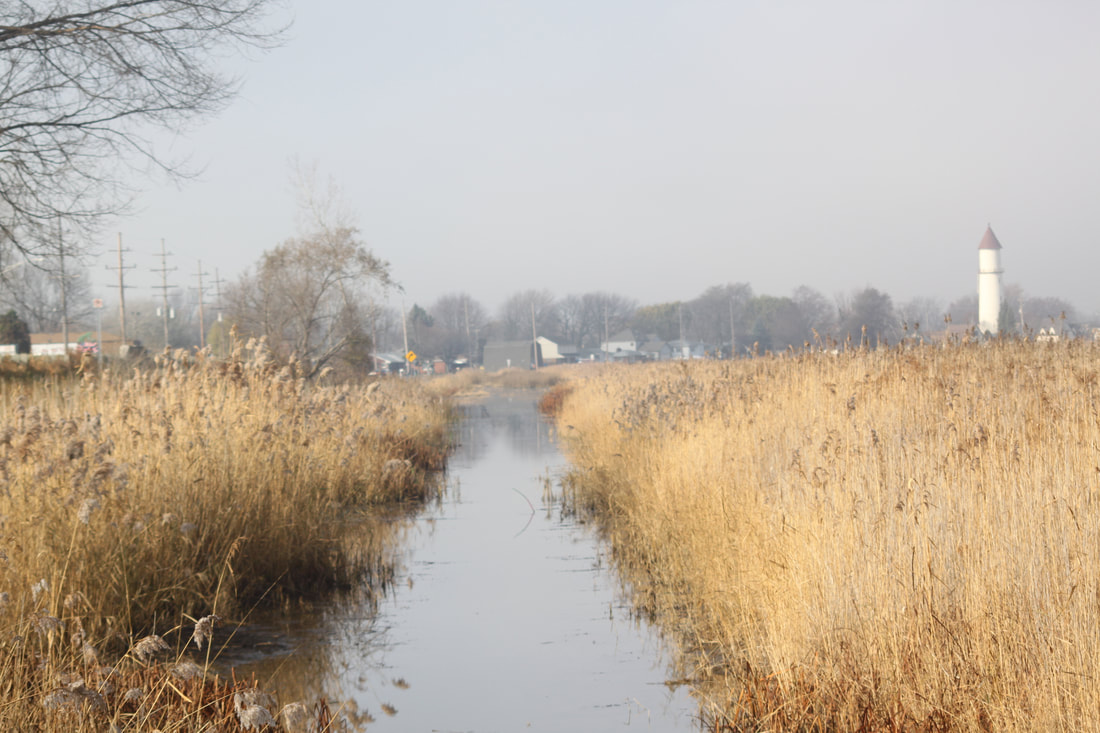
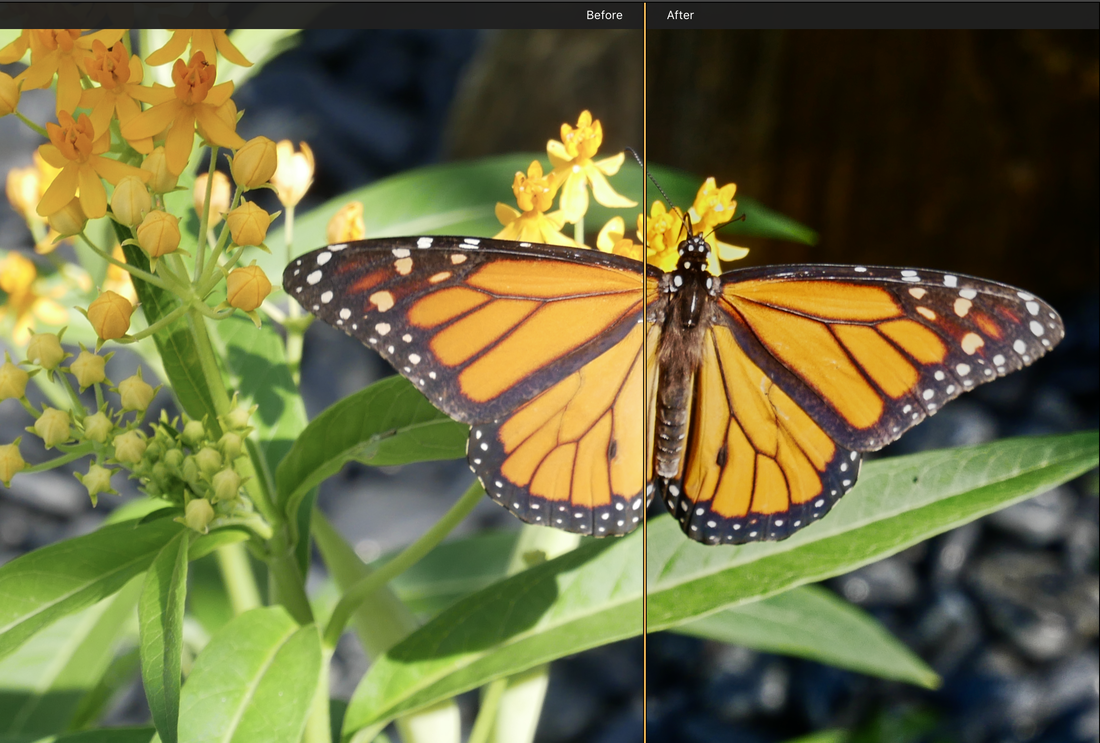
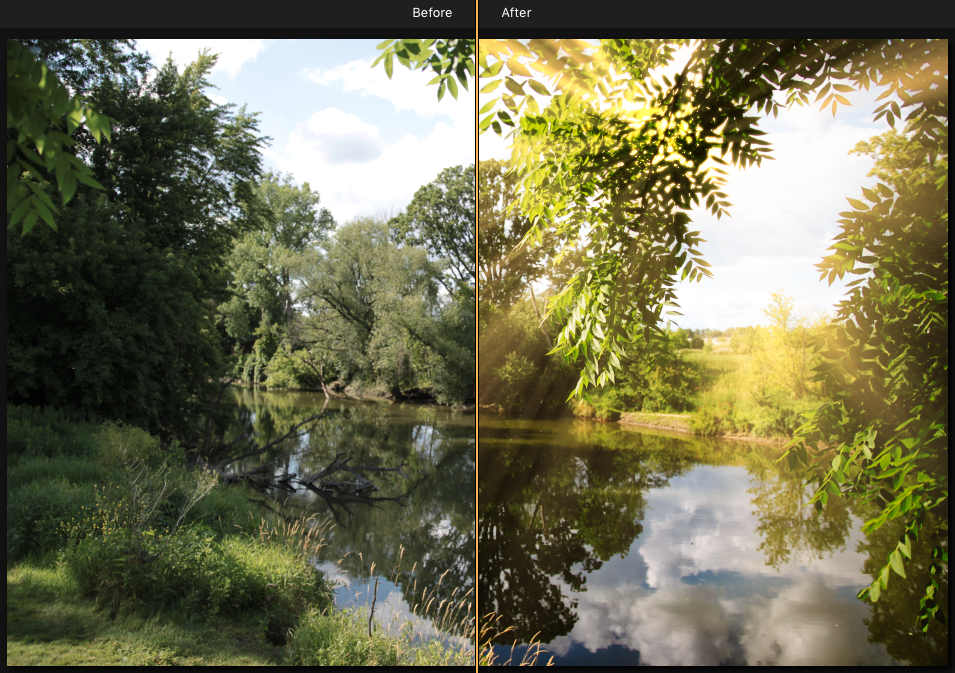
Nothing beats the color and fun of outdoor merchandising in Madrid, NM! Most of you know my passion for photography focuses mostly on the business and marketing sides. I don't make a living as a professional photographer, but that doesn't mean I don't appreciate great technology. I'll match my passion for the craft with anybody! Plus, having worked with so many professional photographers over the years, I know more than I let on. The difference is that it would take most of you ten minutes to light a great portrait, and I'd work on it all day! Last May, Sheila and I headed to New Mexico for a vacation. I've shared a few images here and there in past posts and tweets, but since it's Mirrorless Monday, I decided to share a few more. I took a lot of gear with me, but the LUMIX G9 with the 14-140mm lens wound up being my camera and lens of choice. From its incredibly sharp and quick focus accuracy to simply being lightweight with a focal range giving me everything I needed, it was a kick to travel with. Every night I'd download the day's images, blown away by the sharpness and the beauty of working with the technology Panasonic's put into this camera. So, at the risk of sounding like a kid doing a report for school called, "What I Did This Summer," welcome to New Mexico and the G9. The image on the left is without any post-processing. The right is using the preset "mild image enhancer" in Luminar. I shot in every mode from IA to P, A, S, and M. The touch screen adds to the accuracy and fun of this camera. All of the images in this post are mostly right out of the can. If there is any post-processing, it's in Luminar. Most often I use one of two presets, the clarity booster or mild image enhancer, and that's only because of personal taste. The images rarely needed any work. And remember, every image shared in this post is a screenshot too. Late in the day shot after a storm and enlarged 100%. B-Boys dancing in the Santa Fe plaza. The fun of traveling mirrorless, especially with LUMIX, is carrying a minimal amount of gear and weight. I added a MeFOTO carbon-fiber tripod to my gear, and it was perfect. Easy to travel and hike and with - Plus, with the range on the 14-140mm lens, I always had what I needed. One of the highlights of the trip was Georgia O'Keeffe's house, which is magnificent. You're surrounded by the beauty of New Mexico combined with the stunning simplicity of her taste. Because she passed away in 1986, you're struck by the contemporary beauty in the design of her home and the area around it. I loved the simplicity of this interior courtyard. Every corner of the house gives you a feeling of the love she had for this property. 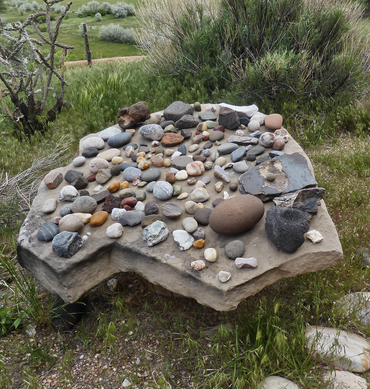 The picture window from her office was designed to capture the view below. That's only a fraction of the panoramic scene when looking out the window. The house is only accessible by guided tour, and there's no photography allowed inside her home. So, you shoot "neurochromes" inside and outside your camera's capturing images in every direction. One of the things that hit us early on was how the preservation team has kept everything as Georgia O'Keeffe left it. From many of her plants and flowers to the spices in the kitchen to rocks she collected outside. The home has been preserved as she left it, and you can't help but feel her love for Abiquiú. And as a side note - I bought Ansel Adams' '77 Cadillac back in my Hasselblad days, which we sold for charity. Knowing he was good friends with Georgia O'Keeffe, I couldn't help but wonder how many times he'd visited here in that same car that was parked in my garage for a month. If you haven't checked out the G9, it's time to visit your LUMIX dealer. Headed to PPE this week? Make it a point to stop by the Panasonic booth. Check out the LUMIX family, and not only the G9 but the incredible new full-frame S1. They're just inside the entrance to the main hall in booth 707, and I can promise you won't be disappointed! Plus, take the time to meet some of the LUMIX Ambassadors who will be at the show. They represent one of the most diverse teams in professional photography! Click on either thumbnail for more information as well as the S1 Series below. By Chamira Young If you've never been to the Sleeping Bear Dunes National Lakeshore on the west coast of Michigan, it's a lovely place to venture when you have the time. At nearly every turn there are countless possibilities to make both great memories and fantastic photos. The area is very picturesque, and today's featured photo is evidence of that. I snapped this photo years ago while hiking the dunes along the shore of Lake Michigan. The original image is a bit dark, but had a ton of potential. I couldn't resist taking it into Skylum's Luminar and seeing if I could add a dreamy quality to it. Check out the original image: Adding a Dreamy Quality in Luminar I've said it before, and I'll say it again: the entire process took me all of about five or 10 minutes. That's what I love so much about this software. First I selected the "Outdoor" category within the list of presets. Although there is a "Daydreams" preset, I decided I wanted to add my own dreamlike quality manually, so I selected the "Autosmart Enhancer" preset. From there, I raised the Vibrance to a value of 70, which was a little on the high side but like I mentioned before, I wanted to go for a dreamy quality. From there, I added the HSL Filter and raised the Blue slider to an aggressive value of 67, and the Aqua slider to 14, which effectively enhanced the sky. I also raised the Shadows slider to 11, which brought out just a bit more detail from the blades of grass. In order to add even more detail, I raised the Clarity slider to 43. And as a final touch, I used the Sunrays Filter to add just a hint of warm glow between the branches of the trees. Check out the final result below. I was quite happy with it! Still the Biggest "No Brainer" Decision in Photography!  Click to visit Skylum and check out Luminar 3 along with all their other amazing software! Click to visit Skylum and check out Luminar 3 along with all their other amazing software! Put in the special discount code of "SKIPCOHEN" and receive an additional $10 off. That means you can buy Luminar 3 for just $59 USD. The other day I shared a post about starting the year out right and making the first quarter of the new year a time to focus on fine-tuning different areas of your business. I started out comparing many of you to acting like "deer in the headlights." In my files, I had an image of the two deer above captured with a LUMIX FZ300 on a trip to Maryland last Spring. It's hardly an award-winner, but as an illustration, it was going to make my point just fine. All it needed to tie in better with the expression was a little more impact. So, into Luminar I went, and minutes later I had what I wanted. I brought down the exposure, changed the highlights/shadows slightly, added in a little vignette and just a touch of sharpening. I also love the Before/After tool allowing me to immediately compare where I've been to where I'm going. It gave me what I wanted to tie in with the blog post - in minimal time and with more impact on the image to better illustrate my point. Most of you know I'm not a professional photographer. My passion is the business and marketing side of the industry, but I'll match my love for the craft with a camera in my hands to anybody. Hanging out with so many of you my entire career I've learned a lot and know more than I let on. Often, I just want to capture good images, with minimal time in post-processing. Between Panasonic's LUMIX cameras and Skylum's Luminar, it's an exciting time for photography. With the images Chamira and I have been sharing in Luminar Corner, I'm blown away by how easy Luminar is to work with. It redefines the meaning of fast and user-friendly. So, if I can get great results, imagine what you, as a professional photographer, can do! If you haven't checked out, the new Luminar isn't time you found out what all the buzz was about? Still the Biggest "No Brainer" Decision in Photography Click for more info Click for more info Yesterday evening was one of those times when neither Sheila or I felt like cooking dinner. So we went for an early dinner at a favorite place called Dockside in Venice, FL. Sunset is early this time of year, and as we were ordering I looked out the window and the evening light show had begun. I grabbed a shot with my cell phone, but it just didn't capture the real beauty. Fortunately, my FZ1000 was in the car. The image above has only minor processing in Luminar. The camera truly captured the beauty of the marina at sunset. And there you have it, one of my resolutions for 2019 - to never be without a real camera. My cell phone is fine for food shots posted to Trip Advisor and Yelp, and a grabshot now and then, but they don't give me the quality I want. Last night's sunset was spectacular and is going to wind up as a print, maybe even on Performance EXT Metal! I know most of you are professional photographers, and the last thing you want to be carrying around is your full-time gear. At the risk of sounding like an infomercial, check out the members of the LUMIX "family." The FZ1000 is a personal favorite, because of the 25-400mm fixed zoom and weighing under two pounds. Had I not had a decent camera with me I would have been shooting "neuro-chromes," and sunsets in Florida this time of year are just too beautiful not to capture more permanently. By Chamira Young Sometimes increasing the shadows in an image can be a good thing. There's a concept I learned years ago in school called "chiaroscuro" in which you use the light, shadows, and overall contrast in an art piece in order to make it more dramatic. It's one of my favorite concepts and absolutely applies to photography. In today's image, I'm essentially going to do just that: increase the contrast and shadows in order to make it more visually interesting. There are always more than one way to do this, but I'll demonstrate a simple, straightforward way to achieve this using Skylum's Luminar. Let's take a look at our starting image. It was taken just off of shores of Lake Huron here in Michigan: The Process The first thing I did was straighten and crop the image by going to Tools > Free Transform, and then Tools > Crop. After that, I selected the "Vivid" preset. For my personal workflow, I find selecting an appropriate preset is still a fun way to start editing my landscape photos. It gave the image an immediate pop. From there, I made some quick adjustments to utilizing the concept of chiaroscuro. I lowered the "Shadows" slider to -47, which actually enhanced the shadows in the image. The overall affect was more of a 3D feel, and it was definitely an improvement. Then, I selected the "Sunrays" option from the list of filters to add a gentle glowing effect, which added further contrast to the image. Finally, I added a few final touches: I used the "HSL" filter to independently boost the saturation of the yellows and greens in the image. I also bumped up the Clarity slider to enhance the crispness of the leaves and branches. Let's take a look at our finished image: Luminar 3 - Now Available for Pre-Order It's the Biggest "No Brainer" Decision in Photography  Click to visit Skylum and check out Luminar 3 along with all their other amazing software! Click to visit Skylum and check out Luminar 3 along with all their other amazing software! Put in the special discount code of "SKIPCOHEN" and receive an additional $10 off. That means you can pre-order Luminar 3 for $49 USD and upgrade from the previous version for $39 USD. Please Note: For every purchase made between now and December 31, 2018, through the SCU link on the right, SCU will be donating $5 to Now I Lay Me Down To Sleep. By Chamira Young Despite the fact that winters in Michigan are considered gray and devoid of color, I firmly believe there are still interesting photos to be made. In today's featured photo for our Luminar Corner, it's a winter photo of the St. John's Marsh preserve area, located about 45 minutes northeast of Detroit. I used to live all of 2.5 minutes away from it, and it was one of my favorite places to hike through and explore. It was a walk down memory lane finding this image on my hard drive. Let's have some fun with it and see what we can do. Here's the original image: The Process I recall the day being so cold I was in a rush to take the image: hence it's crookedness. First I straightened out the image by using the Free Transform Tool. From there, I played it by eye. I applied the "Impressive" Preset from the Travel Category, which gave it some immediate pop. I left the Exposure the same, but decided to turn down the Highlights just a little. Then, I turned up the Shadows, which brought out the contrast in the golden marsh grass. I raised the Clarity, and raised the Vibrance ever so slightly. Finally, from the blue "Add Filters" button in the upper right corner, I selected the HSL filter, which allows you to control the Hue, Saturation, and Luminance (Brightness) of the individual colors in your image. I turned up the Aqua and Blue settings to bring out the blue hues of the sky a bit. Below is the final image. It definitely has fresh life breathed into it. Have you tried Luminar yet? Luminar 3 - Now Available for Pre-Order It's the Biggest "No Brainer" Decision in Photography  Click to visit Skylum and check out Luminar 3 along with all their other amazing software! Click to visit Skylum and check out Luminar 3 along with all their other amazing software! Put in the special discount code of "SKIPCOHEN" and receive an additional $10 off. That means you can pre-order Luminar 3 for $49 USD and upgrade from the previous version for $39 USD. Please Note: For every purchase made between now and December 31, 2018, through the SCU link on the right, SCU will be donating $5 to Now I Lay Me Down To Sleep. "Don't let yesterday take up too much of today." Will Rogers As I sat down to write Reflections this morning, I turned to Google for a little help, typing in "quotes about life." That lead me to Will Rogers' quote above, and that got me thinking about a series of events in my life. I found myself letting thoughts of the past take up too much time in the present. I understood what I was doing, and before the "dark side" consumed me, I chose to write about it this morning. One of Sheila's favorite expressions is "Don't should on yourself!" All of us do it, with a few people I've met over the years turning it into an art form. Instead of just appreciating the moment, they spend hours analyzing what they should have done instead. It's an analytical defense mechanism as they look at the results from a path they chose, instead of just appreciating what they did, learning from it, and moving on. Like most people, I have regrets for a few things I've done, but more for things, I didn't do. We all do a little Monday morning quarterbacking from time to time as we look at our decisions. It's okay to look in the rear view mirror as long as you appreciate everything you see is behind you! "In the end we only regret the chances we didn't take." Author Unknown For years I lacked the confidence to go out on my own. From Polaroid to Hasselblad, PhotoAlley.com and Rangefinder/WPPI I always worked for other companies. I lived vicariously through so many of you, admiring your drive and entrepreneurial spirit. Had it not been for Sheila, I doubt that I would have ever stepped outside my comfort zone almost ten years ago. And that brings me full circle with today's post. At the risk of sounding like a bad rendition of Frank Sinatra's "My Way," we all have regrets. We all have those chances we wish we'd taken and didn't. But here's one of the very best things about life...we've all got today and tomorrow! Wishing everybody a day with no regrets, time with the people you love and smile-making moments that help you build a never-ending supply of memories to cherish tomorrow. The year is quickly coming to a close and December is always an amazing month to spread a little cheer and pave the way for a new year. Go for those eleven-second therapeutic hugs, but at the same time, don't be afraid to tell the people most important to you how much you appreciate the role they play in your life. Happy Sunday - and if it's Monday where you are, I'm wishing you the best for the new week ahead. "Be spontaneous. Be crazy. Leave your comfort zone and live with no regrets." Author Unknown  Note: I never share a blog post without an image. I had nothing in my archives that I liked, so I grabbed a LUMIX FZ1000 and headed outside. There's a Powderpuff bush (Calliandra haematocephala) in bloom on the side of our house. I loved the fact that within eight inches on the same branch I had three generations of the flowers. Well, it fit with an underlying theme to this blog post of yesterday, today and tomorrow. It was shot at f2.8 at 1/60 ISO 1000. It's an overcast flat morning. So, I had some fun with the image boosting the clarity, tone and structure using Luminar 2018. #WhereLumixGoes #LumixFZ1000 #MadewithLuminar Chamira Young and I have been having fun with Luminar 2018, taking turns each week and sharing another tool we're working with. However, the true joy of the relationship with Skylum and this terrific software is our ability to direct a portion of sales through SCU to one of my favorite nonprofits; Now I Lay Me Down to Sleep. The original promotion was initially scheduled to end on November 30, but in all honesty, we can't come up with a reason to not let it run until the end of the year, at which time we'll direct help to another nonprofit. So, for every Luminar purchase through December 31, we're donating $5 to NILMDTS. Luminar Corner The image above is this week's pick and my final image - Instead of using a preset, I chose to use a couple of different tools. Here's the original on the right. Accent AI Filter: This filter is the first one on the filter selection list, and it's the perfect place to start. It automatically analyzes the image and makes the necessary adjustments. Remember with all the Luminar filters you can adjust the degree of impact on the image. Tone Filter: Next step was to adjust the "Tone" - which adjusts overall brightness and contrast. I also went a little deeper into "Smart Tone" along with playing with the highlights, shadows, blacks, and whites. Structure Filter: Last, I tweaked the image using the structure filter. It enhances clarity and micro-contrast in the surface areas between the edges detected in an image improving perceived detail. With what I felt was a minimal adjustment to the image, I chose to crop and enlarge the butterfly 100%. And, for those of you who don't know how to tell the gender of a Monarch butterfly, a male two black spots on either side of the hind wings. It's the speed and ease of use I love most about Luminar and obviously the results. But, every aspect of the image is adjustable and when you're done, you can click on the history of the changes you made, and they're saved in your archives. The image above is showing the original image along with the changes I made, except for cropping. Check out Luminar
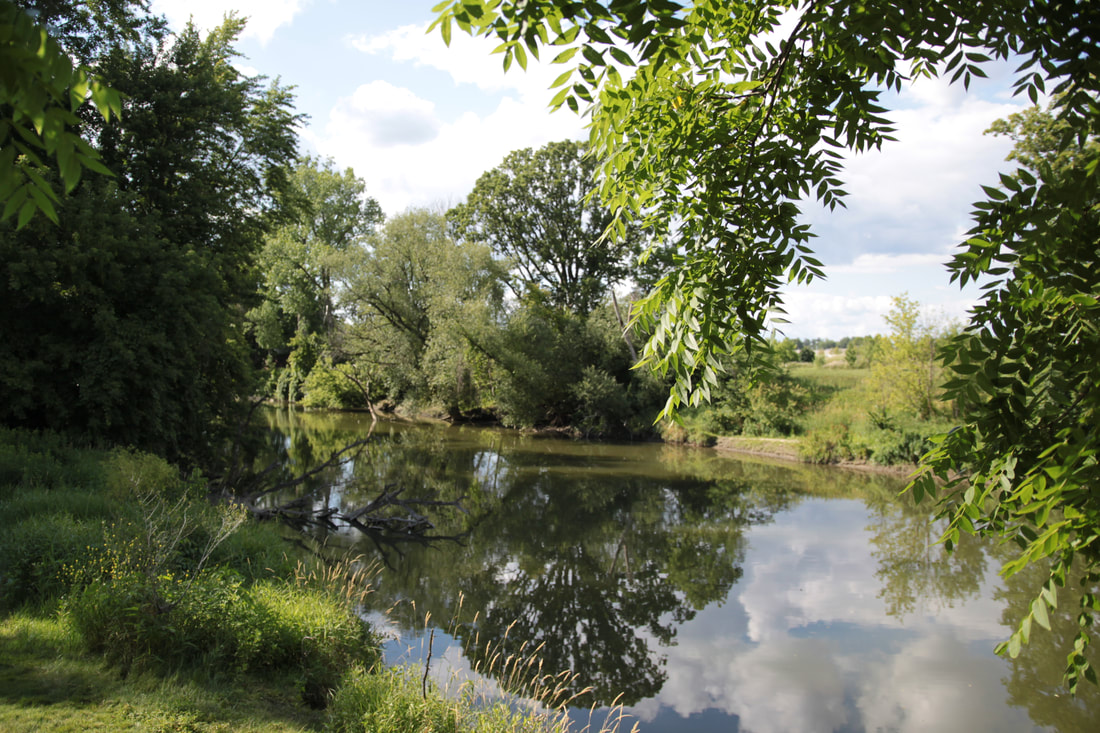
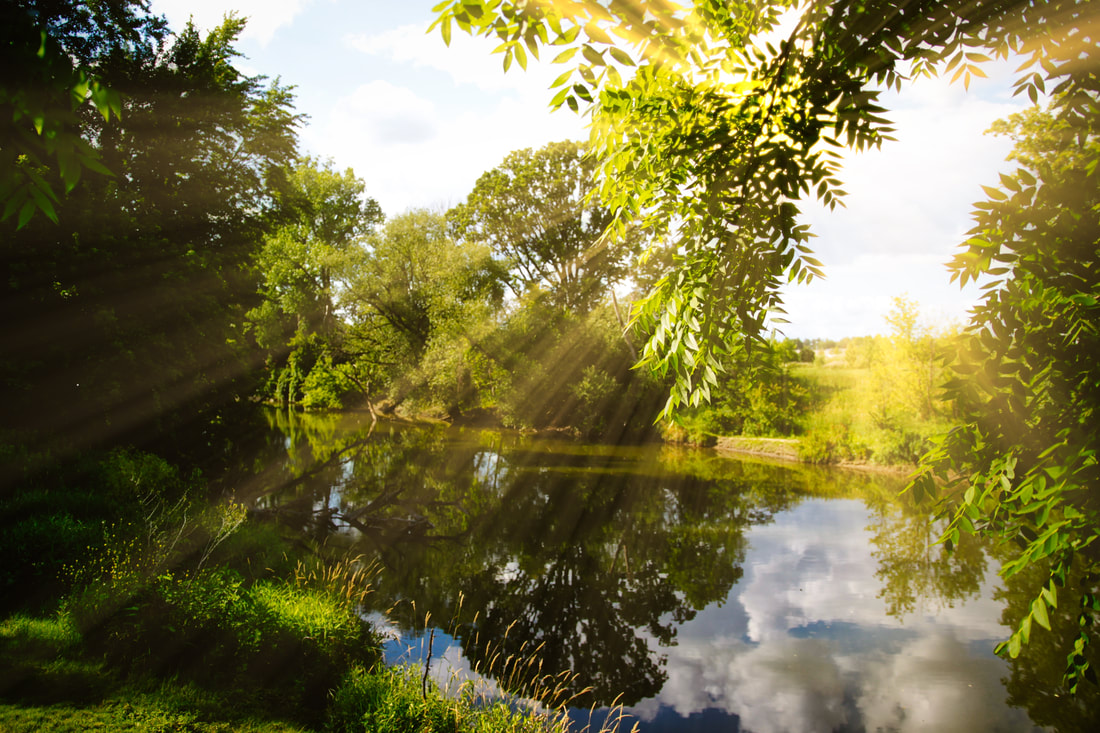
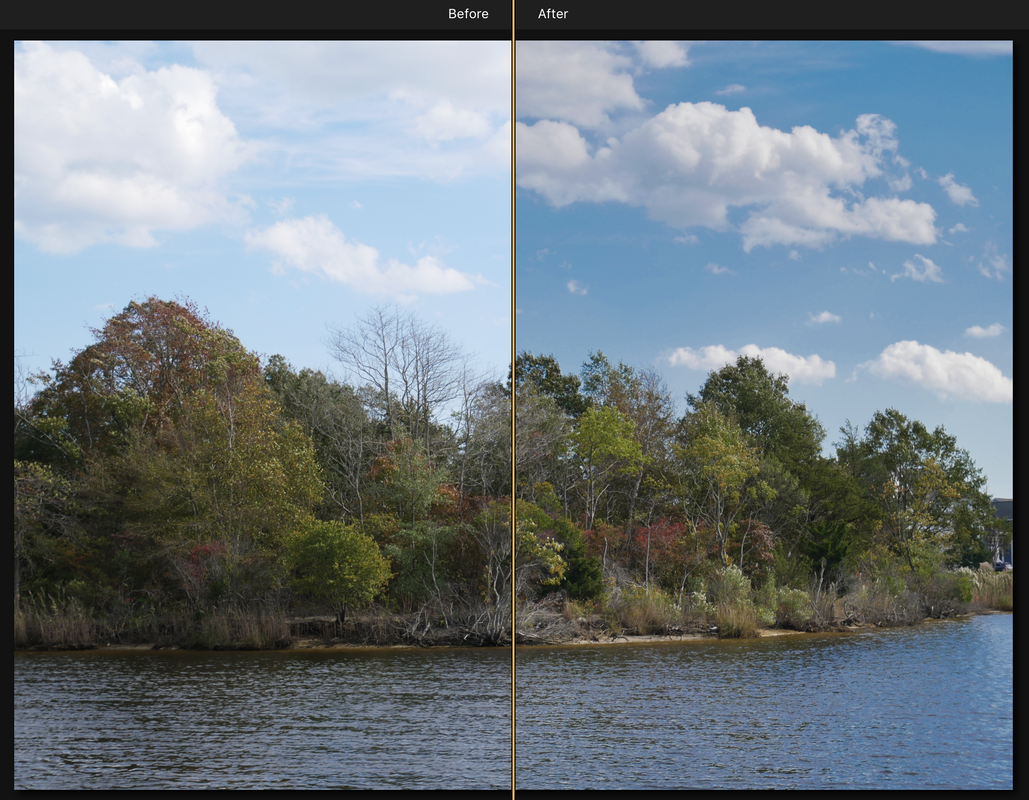
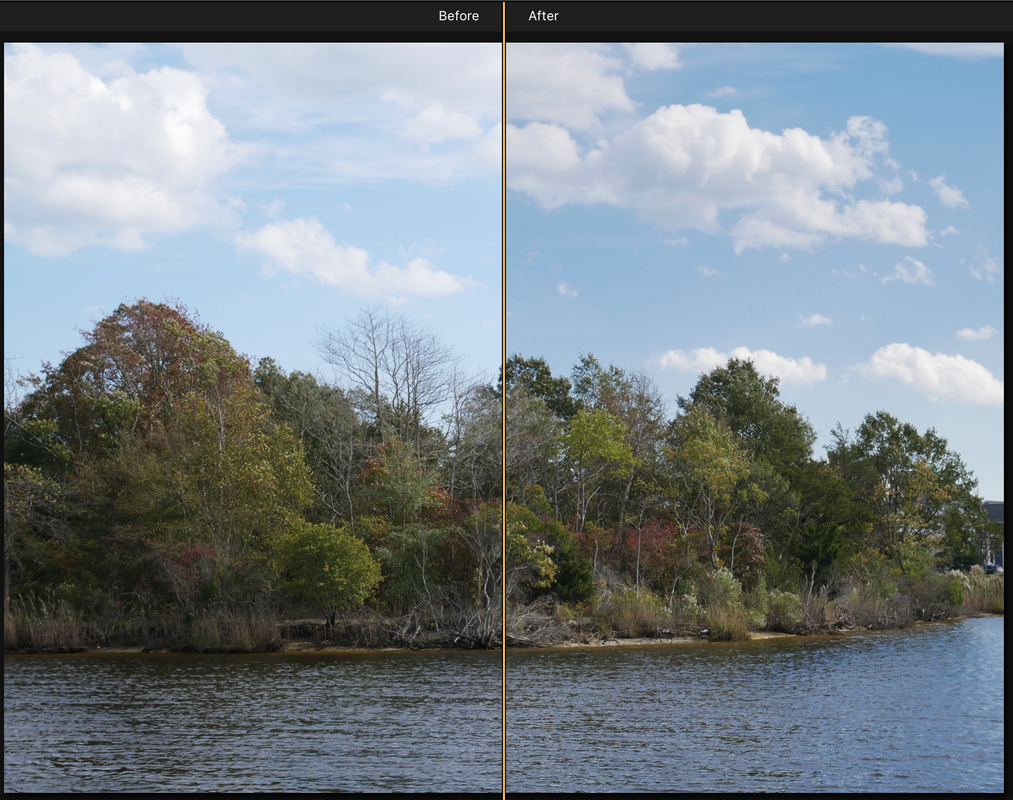
By Chamira Young One of the things I love about our Luminar Corner series is that it gives me an excuse to have fun and experiment with my images. Don't get me wrong, I love running a photography business and all, but sometimes it's fun to get creative without the pressure of having a client or deadline breathing down my neck. Introducing the art of experimentation is a great way to actually grow as an artist and stay refreshed. Skylum's Luminar in particular makes this really fun and easy. Having spent countless hours in other image editing software programs, I'm continually amazed at how quickly Luminar allows you to explore with various styles in literally minutes. In today's post, I want to share a feature that is as powerful as it is easy. Enter the "Sunrays" Filter: Powerful and Intelligent Let's take a look at today's original mage. Honestly, I can't remember where I captured it, or even when. All I can say is It was some years ago. While attractive, it could use a creative boost. After opening the image in Luminar, I quickly applied the "Marco Polo" preset from the Travel category. That took literally about 30 seconds. Then, I did something I've never done before: I clicked the bright blue "Add Filters" button in the upper-right hand corner. From the impressive list of filters that appeared in the drop-down menu, I chose the "Sunrays" filter. (As an aside, I love that when you hover your mouse over each filter, a short description pops up. Very handy.) Once you select a particular filter, its controls will appear within your Filters panel on the right side of your workspace. A Five Minute Process with Dramatic Results From there, it was simply a matter of adjusting various sliders within the Sunrays filter area. Just play it by eye. Clicking the "Place Sun Center" button literally allows you to click and drag where you want the sun to be. As you do so, Luminar intelligently adjusts the appearance of the sun and its rays based on where you place it. It doesn't just mindlessly place a glare on your photo. It also allows you to control the strength of the sun and rays individually. As you can see, I definitely went for a dramatic feel because, hey, like I said earlier, I'm experimenting and having some fun. Let's take a look at the final image. The process took all of about five minutes! It's the Biggest "No Brainer" Decision in Photography  Click to visit Skylum and check out Luminar 2018 along with all their other amazing software! Click to visit Skylum and check out Luminar 2018 along with all their other amazing software! Put in the special discount code of "SKIPCOHEN" and receive an additional $10 off. That means you can buy Luminar 2018 for $49 USD and upgrade from the previous version for $39 USD. The code also applies to the purchase of Aurora HDR 2019. Please Note: For every purchase made between now and November 30, 2018, through the SCU link on the right, SCU will be donating $5 to Now I Lay Me Down To Sleep. Three weeks ago were in New Jersey and there's very little that beats one of the gorgeous 75 degree days on the ocean. We were out with friends on their boat on Barnegat Bay, and the clouds just kept rolling by. I was traveling light when it came to camera gear, but that's the fun of virtually EVERY LUMIX camera. Had one of my favorite cameras with me, a LUMIX GX85 with the 12-32mm kit lens. Nothing fancy - but perfect to travel with! Click on either thumbnail of the GX85 or 12-32mm lens for more information. I wasn't out to capture a masterpiece, just looking for a few good examples of clouds to share one of Skylum's newest features in Luminar 2018, the new Sky Enhancer. The image above is with the Sky Enhancer at 100% and the comparison, before and after screenshot is below. Remember, the fun of Luminar Corner is being able to demonstrate so many of the creative tools Skylum has created. Obviously I could enhance the image further with an infinite combination of filters, but I wanted to share the Sky Enhancer by itself. 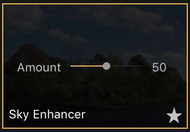 But here's the beauty of Luminar's presets - you can adjust the level you want. So, just to share here on Luminar Corner, I took it to 50%, and the image is below. A little less clarity and saturation, but again it's all personal taste. It's what you like or more important what appeals to your clients. As Dean Collins loved to say, "Beauty is in the eyes of the checkbook holder!" It's the Biggest "No Brainer" Decision in Photography
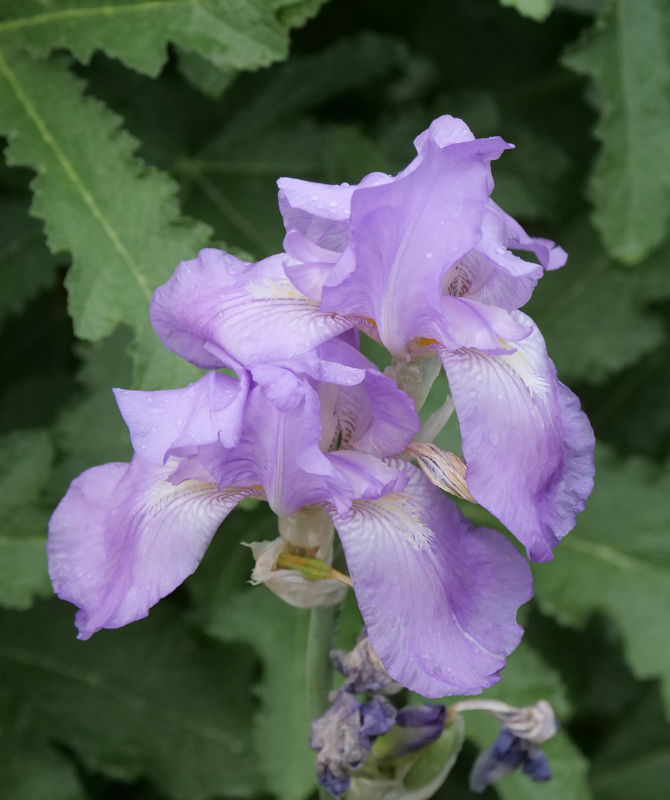
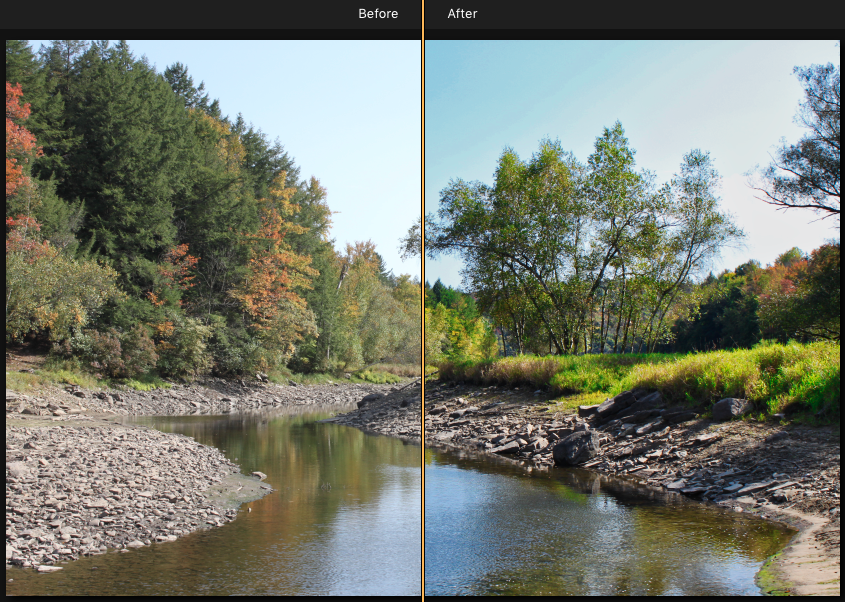
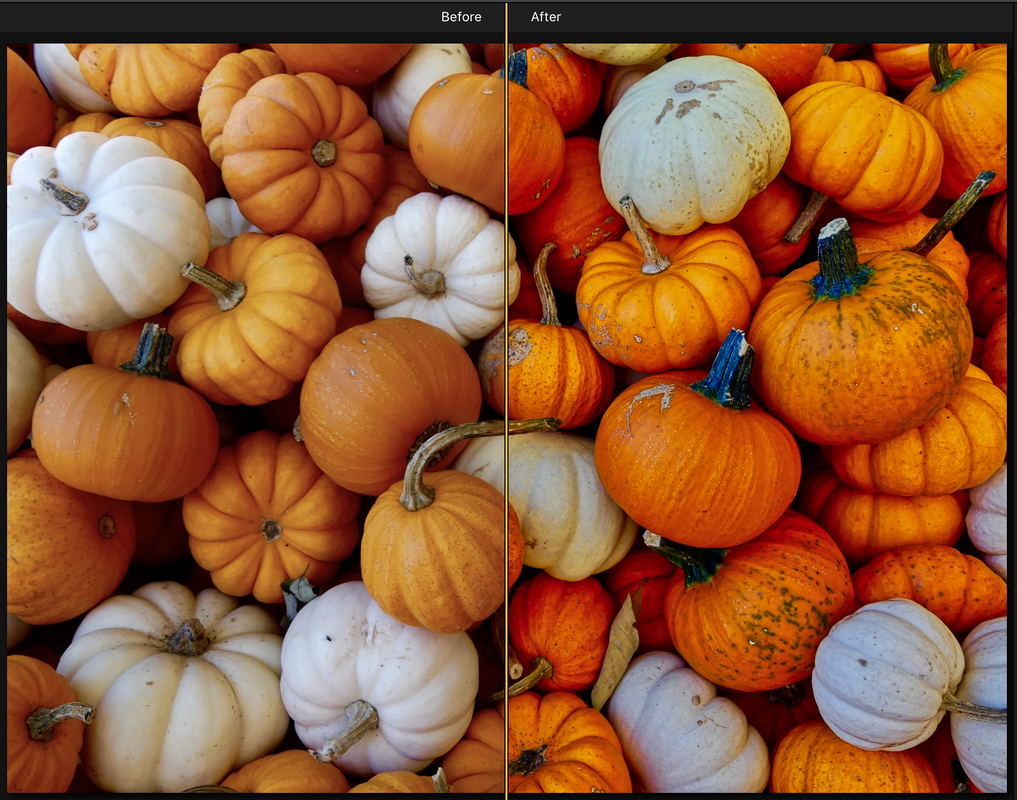
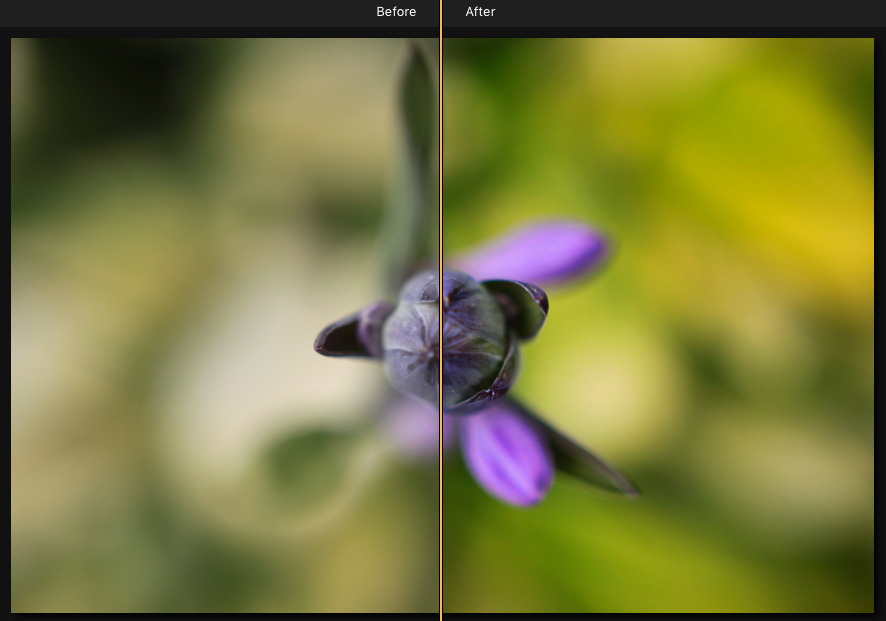
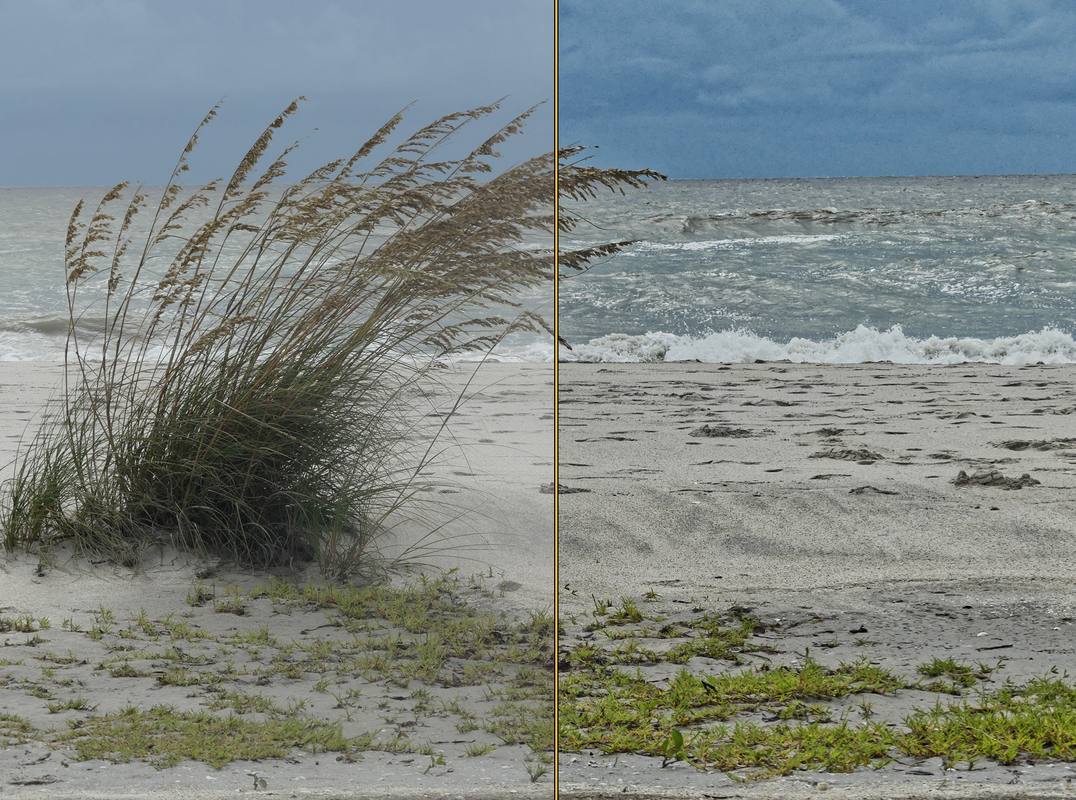
By Chamira Young As much as I love focusing on portrait photography for my business, there's nothing like taking peaceful landscape images while on vacation. It's a great way to refresh my creative juices and also serves as a nice pool of images to print later on and hang on the walls of my home. This is one of those images and has yet to be printed. It brings back a flood of warm memories because it was taken on my honeymoon near the Poconos mountains in Pennsylvania. Since I'm still learning my way around Skylum's Luminar 2018 photo editing software, it seemed fitting to have some fun and see how much of a visual kick the popular software could give this photo. The Result After 10 Minutes in Luminar... After importing the image into Luminar, I was pleased to discover they have an entire set of "Outdoor Presets" to choose from. After having some fun clicking around and watching the effects of each preset, I finally decided on the "Autosmart Enhancer Preset". However, I raised the Clarity slider from its initial setting of 16 to 42, just to get the edges of the rocks and foliage to pop a bit more. I also lowered the Shadow slider from 51 to 6, thus visually enhancing the existing shadows ever so slightly and giving the image more depth. Finally, I raised the Vibrance slider to 15 because I'm a sucker for rich color. I was quite pleased with the result, and it took about 10 minutes. Below is the final result. Have you tried Luminar yet? It's a NO-BRAINER!  Click to visit Skylum and check out Luminar 2018 along with all their other amazing software! Click to visit Skylum and check out Luminar 2018 along with all their other amazing software! Put in the special discount code of "SKIPCOHEN" and receive an additional $10 off. That means you can buy Luminar 2018 for $49 USD and upgrade from the previous version for $39 USD. The code also applies to the purchase of Aurora HDR 2019. Please Note: For every purchase made between now and November 30, 2018, through the SCU link on the right, SCU will be donating $5 to Now I Lay Me Down To Sleep. 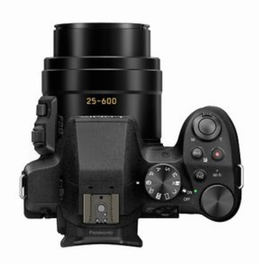 Click for more information Click for more information Remember the word "fun?" It's one of those very special, easily understood words that are too often lost in business today. "Fun," often disappears under the baggage of business and the stress of responsibilities and commitments. We forget to make the time for fun. A month ago I was introduced to Luminar 2018, and it's added a new dimension of fun to my images. Two weeks ago I shared the first post in Luminar Corner, a new SCU feature. Chamira Young and I are taking turns every other Wednesday having fun with Skylum's Luminar 2018. Each week we're sharing a different tool or combination of filters and then using the before and after slide bar. I pulled today's image from my archives going back to Szalay's farm stand in Akron two years ago. It was about this same time of year and loaded with pumpkins and the typical fall collection of squashes, dried corn, and a harvest theme. The original image was shot in 2016 with one of my favorite cameras to travel with, the LUMIX FZ300. It was shot at f3.2 @ 1/160 ISO 100. I combined two of Luminar's tools. First, I used the "Tonal Compressor" preset. While it's easily adjustable, I left it at 100%. It recovers highlights and opens the shadows and adds a hair of contrast, saturation and clarity. Second, I love the "Structure" filter which I pushed just a little. The definition of what it does, right from the drop-down box in Luminar 2018 is: "Enhances clarity and micro-contrast in surface areas between edges detected in an image improving perceived detail and making photos stand out." I know everybody has their own opinion on stuff like this. For me, it was fun giving a flat, boring image a little more personality and a stronger illustrative look. It's what I was going for, and it's an especially good way to demo what this amazing software is capable of doing! It's a NO-Brainer! Click to visit Skylum and check out Luminar 2018 along with all their other amazing software! Click to visit Skylum and check out Luminar 2018 along with all their other amazing software! Put in the special discount code of "SKIPCOHEN" and receive an additional $10 off. That means you can buy Luminar 2018 for $49 USD and upgrade from the previous version for $39 USD. The code also applies to the purchase of Aurora HDR 2019. Please Note: For every purchase made between now and November 30, 2018, through the SCU link on the left, SCU will be donating $5 to Now I Lay Me Down To Sleep. By Chamira Young After hearing all the buzz about Skylum's Luminar 2018, I couldn't help but become at least a bit curious. For an editing software to become so popular so quickly, I knew there had to be a reason. And when Skip suggested we start this "Luminar Corner" to have some fun testing it out, I nearly jumped at the chance. While I pay the bills doing mostly portrait photography and have an editing workflow I'm quite comfortable with, I believe it's important to periodically experiment with new software and re-evaluate your workflow. You might discover something you like better! Today's image: Because this was my first time dipping my toe into the waters of Luminar, I chose a simple flower photo to enhance. The irony is I couldn't keep a plant alive to save my life, and yet this image is one of my favorites. I also couldn't tell you what kind of flower it is, because I simply have no idea. I still love it though! Getting started with Luminar 2018 was very easy in that the presets give you an easy avenue to start experimenting and having some fun right away. While it was a toss up between the "Image Enhancer" preset and the "Vivid" preset, I ultimately choose the "Vivid" preset and made some custom adjustments, all by eye. I lowered the Shadow slider a bit, thus increasing the appearance of shadows, and also raised the Contrast slider by about 16 points. And tempting as they were, I chose to leave the Saturation and Vibrance sliders alone, because I didn't want to overdo the image. My goal was to make it pop a bit while still being tasteful. While I thought the original image was lovely enough, I was quite pleased with the quick boost I was able to give it in, all in about 2.5 minutes. Oftentimes, especially with nature, it can be tough to capture an image the way you saw it. Being able to easily restore those visual qualities in the editing phase is awesome. Let's take one more look at the finished product. I may very well print that on a canvas and put it on my wall! To check out the complete Skylum lineup and learn what all the buzz is about, just click on the banner below my flower image.  Click for more info Click for more info It's a NO-BRAINER! Put in the special discount code of "SKIPCOHEN" and receive an additional $10 off. That means you can buy Luminar 2018 for $49 USD and upgrade from the previous version for $39 USD. The code also applies to the purchase of Aurora HDR 2019. Please Note: For every purchase made between now and November 30, 2018, through the SCU link on the right, SCU will be donating $5 to Now I Lay Me Down To Sleep. A few weeks ago I was introduced to Luminar 2018 and it's had a significant impact on my images, but let's set the stage. I do not profess to be a professional photographer. However, having hung out most of my career with some of the finest photographers in the world, I know more than I let on. My passion is helping you with the business and marketing side of imaging but I'll match my love for the craft with anybody when it comes to enjoying life with a camera in my hands and having fun. Remember "fun?" It's one of those words too often lost today in the stress of running a business. Using Skylum's Luminar 2018 I'm back to having more fun with my images. But I refuse to become a filter junkie, and most of the photos I've been sharing I'm only using one or two of their presets, most often for better clarity. We're launching "Luminar Corner" this week as Skylum becomes a new partner with SCU. Every Wednesday Chamira Young and I are going to share one new image using a different Luminar tool. Today's Image: I'm featuring two Luminar tools - first I love the slider bar that allows you to see the before and after on every image. I used two filters on the original image, the "clarity" preset and the "structure" filter. I liked the result, and when I shared the image in one of the Facebook forums I got the following response: I'm afraid you went a bit too far on the sharpening, look at the grain in the clouds. If you would have pushed your aperture to about 11 and put the camera on a tripod, you could have gotten a cleaner image. Here's my point...first the image was in my archives from two years ago, captured with a LUMIX FZ300 during a walk on the beach after a storm. I was pulled it into Luminar and found a look I liked. The grain and exaggerated sharpness were part of the way I wanted it to look. I know what I could have done to make it stronger at the point of capture, but this image was the look I was going for, and I'm reminded of my favorite quote from Dean Collins: "Beauty is in the eyes of the checkbook holder!" To check out the complete Skylum lineup and learn what all the buzz is about, just click on the banner below.  Click for more info Click for more info It's a NO-BRAINER! Put in the special discount code of "SKIPCOHEN" and receive an additional $10 off. That means you can buy Luminar 2018 for $49 USD and upgrade from the previous version for $39 USD. The code also applies to the purchase of Aurora HDR 2019. Please Note: For every purchase made between now and November 30, 2018, through the SCU link on the right, SCU will be donating $5 to Now I Lay Me Down To Sleep. |
Our Partners"Why?"Check out "Why?" one of the most popular features on the SCU Blog. It's a very simple concept - one image, one artist and one short sound bite. Each artist shares what makes the image one of their most favorite. We're over 100 artists featured since the project started. Click on the link above and you can scroll through all of the episodes to date.
Categories
All
|
© 2019 Skip Cohen University

























 RSS Feed


