|
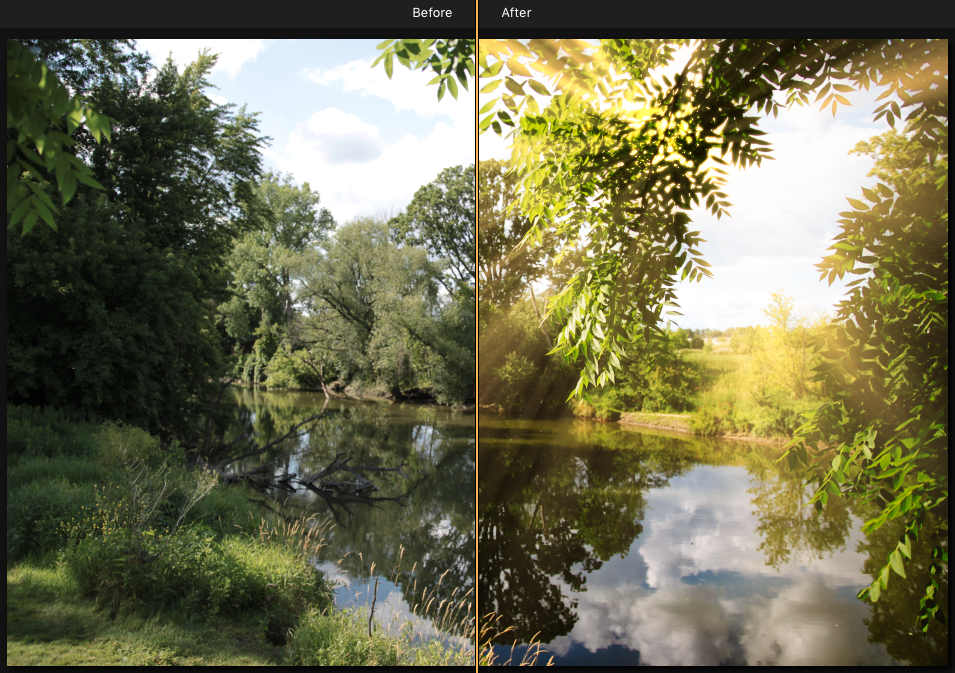
By Chamira Young One of the things I love about our Luminar Corner series is that it gives me an excuse to have fun and experiment with my images. Don't get me wrong, I love running a photography business and all, but sometimes it's fun to get creative without the pressure of having a client or deadline breathing down my neck. Introducing the art of experimentation is a great way to actually grow as an artist and stay refreshed. Skylum's Luminar in particular makes this really fun and easy. Having spent countless hours in other image editing software programs, I'm continually amazed at how quickly Luminar allows you to explore with various styles in literally minutes. In today's post, I want to share a feature that is as powerful as it is easy. Enter the "Sunrays" Filter: Powerful and Intelligent Let's take a look at today's original mage. Honestly, I can't remember where I captured it, or even when. All I can say is It was some years ago. While attractive, it could use a creative boost. After opening the image in Luminar, I quickly applied the "Marco Polo" preset from the Travel category. That took literally about 30 seconds. Then, I did something I've never done before: I clicked the bright blue "Add Filters" button in the upper-right hand corner. From the impressive list of filters that appeared in the drop-down menu, I chose the "Sunrays" filter. (As an aside, I love that when you hover your mouse over each filter, a short description pops up. Very handy.) Once you select a particular filter, its controls will appear within your Filters panel on the right side of your workspace. A Five Minute Process with Dramatic Results From there, it was simply a matter of adjusting various sliders within the Sunrays filter area. Just play it by eye. Clicking the "Place Sun Center" button literally allows you to click and drag where you want the sun to be. As you do so, Luminar intelligently adjusts the appearance of the sun and its rays based on where you place it. It doesn't just mindlessly place a glare on your photo. It also allows you to control the strength of the sun and rays individually. As you can see, I definitely went for a dramatic feel because, hey, like I said earlier, I'm experimenting and having some fun. Let's take a look at the final image. The process took all of about five minutes! It's the Biggest "No Brainer" Decision in Photography  Click to visit Skylum and check out Luminar 2018 along with all their other amazing software! Click to visit Skylum and check out Luminar 2018 along with all their other amazing software! Put in the special discount code of "SKIPCOHEN" and receive an additional $10 off. That means you can buy Luminar 2018 for $49 USD and upgrade from the previous version for $39 USD. The code also applies to the purchase of Aurora HDR 2019. Please Note: For every purchase made between now and November 30, 2018, through the SCU link on the right, SCU will be donating $5 to Now I Lay Me Down To Sleep.
0 Comments
Your comment will be posted after it is approved.
Leave a Reply. |
Our Partners"Why?"Check out "Why?" one of the most popular features on the SCU Blog. It's a very simple concept - one image, one artist and one short sound bite. Each artist shares what makes the image one of their most favorite. We're over 100 artists featured since the project started. Click on the link above and you can scroll through all of the episodes to date.
Categories
All
|
© 2019 Skip Cohen University


 RSS Feed


