 Images copyright Kevin A. Gilligan. All rights reserved. 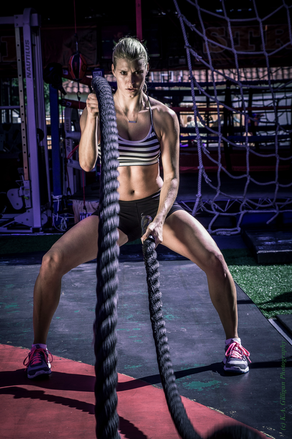 Intro by Skip Cohen Before you read on - this is the longest post I've ever shared on the SCU Blog, but it's for a great reason. We're back into great weather, summer, and many of you are going to think about showing your work in local galleries, shows, and community events. Even if you just scan the title of each tip, you're bound to find something relevant to help you raise the bar on showing your work. In 2015, Kevin Gilligan did a guest post that's been one of the best we've had. Initially, I ran it in three parts. Today I'm putting all three of them into one post. And while here and there something might sound a little dated - there is no expiration date on relationship building as an artist with your target audience. There's an incredible amount of helpful advice here as Kevin shared sixteen tips on doing a solo exhibition. Even if you have no intention of doing a photography show or gallery event, there's one tip after another to help you show your work better. About Kevin: The real fun of this industry is the friendships that come from everyone's love for the craft. Ever had a friend who feels like they've been in your life pretty much forever? Well, that's Kevin A. Gilligan. We met in a phone call around 2014, and the friendship continued to grow, even though we didn't meet face to face until years later. I'm not sure there isn't anything Kevin can't photograph, but the secret ingredient is his love for the craft. He's a writer, educator, artist, and a great buddy. Click on any of his images in this post to visit his website. What I Learned From My First Solo Photography Show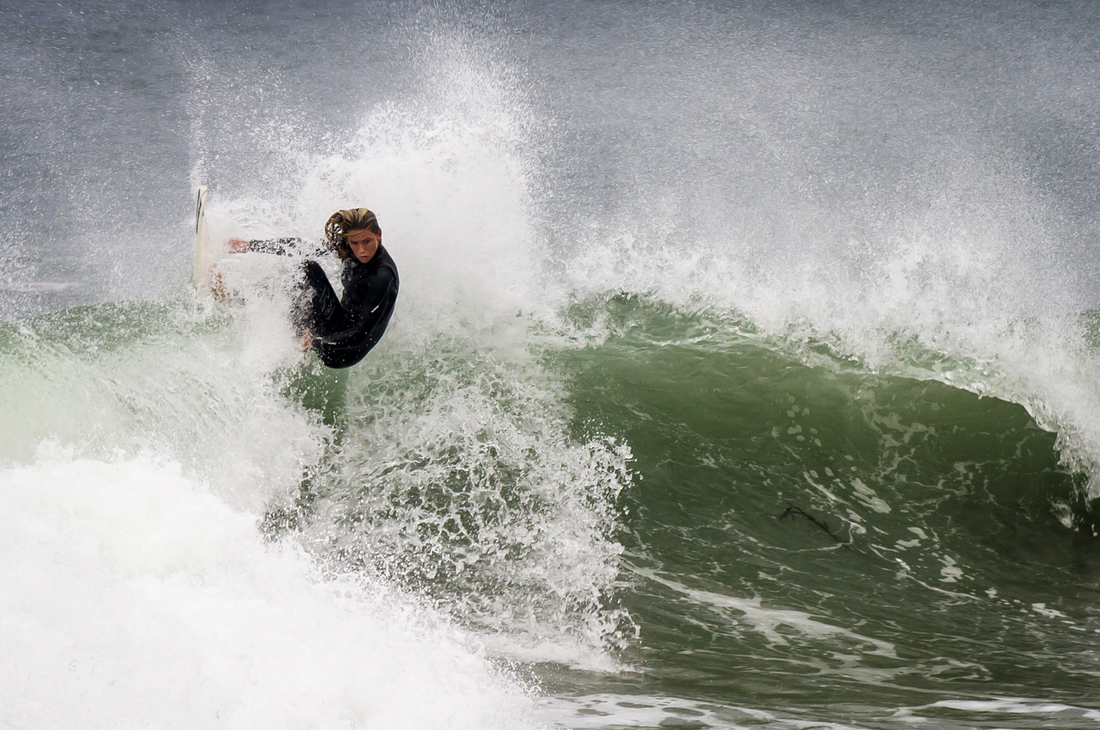 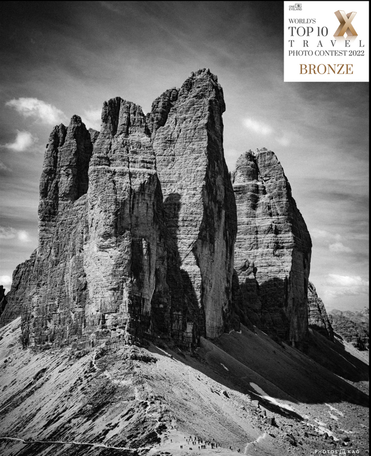 by Kevin A. Gilligan
Landscape photography is one of my passions. I love the feeling of capturing a great scene, especially if I get to explore somewhere new while doing it. Photographers love to share their best images. We want others to enjoy and appreciate them, and hopefully, buy them. In the past five years, I’ve shown my landscape and travel photography in a half-dozen group shows, and two museums. Last year I began to feel it was time to have a solo exhibit. I’m a self-taught photographer, and I was not planning to wait around for a gallery to offer me a show. I made up my mind that I was going to create my show. Over the course of six months, I planned and executed every detail of a solo show. Deciding to do a solo exhibit is a large commitment of time, resources, and ego. Yep, ego, you are putting yourself out there, and saying come look at my work. You have to have the confidence to show it, and a thick skin for those who won’t like it. Photography is art; you won’t please everyone, nor should you try to. The opening night of a solo show is exhilarating and worth all the work that goes into it. I learned a ton in the process. Here are a few tips I can share for those who are committed enough to put on their first solo show. Tip #1 Try a Group Show First Group art shows are a perfect way to ease your way into showing your work. You don’t need many pieces; you can often show just one. It takes less time and less money, and there is less pressure because much of the logistical work is already done. You don’t have to book a gallery space, and often someone will hang the images for you. The theme may already be selected. The group shows help you build your network of contacts: collectors, framers, printers, public relations folks. Hand out your cards, get the cards of others, send thank you notes. Tip #2 Select Your Best Images Learning to select your best images and editing them for a show is a big first step. You must learn to be ruthless. I have over 40,000 images in my catalog. I showed 27. If you are thinking about a solo show, I am assuming you are already proficient in post-production using Lightroom/Photoshop, etc. Selecting your images for a show is much more than just processing your images. It involves selecting a group of images that go together in the show. You might have several groupings of images. For my exhibit, I had 27 images in three groups. The first were aerial images of Los Angeles. I printed those on metal. The second were black and white photographs of Rocky Mountain National Park; those were printed on paper and framed and matted. The third group included some of my favorite water-related images, and a few black and white, or dark themed landscapes that complimented the Colorado images. Tip #3 Print A Test Book Once I had a semi-final selection of images, I printed a high-quality test book. The book was about 5x7 inches, and I did not spend a lot of time on the text. The point of the book was to see how the images looked together and to have the book to take with me when I met with galleries. It was also an inspiration to me to keep going. When I was tired or frustrated, I could look at the book and remind myself of my purpose. The book was something tangible I could hold in my hands. I also showed it to a lot of potential guests for the show. Printing the book shows you are serious, and it elicits a different reaction than, “Hey, look at these pictures on my iPhone.” Everyone has pictures on their iPhone, this is different, print a book. You will look at your images differently. It pushes you to do better. Tip #4 Theme/Artist Statement You need a theme. Your exhibit will need a name. Give some thought to what will describe your show to guests. This was hard for me, really hard. It took me a while. I read photography books, listened to podcasts, talked to my wife about it. I won’t lie, this took me months. Finally, I figured out something that worked for the collection of images I had in mind. ELEMENTS: SEA – AIR – LAND. Was it the best name ever, probably not, but it told the viewer what to expect, images of the sea, air, and land. As I got closer to the exhibit I wrote an artist statement incorporating the theme, and what I wanted to convey with this collection of images. Personally, I think this is an indispensable step to solidify your thoughts and connect with potential collectors. The theme was done early in the process; the artist statement came much later. Tip #5 Find a Place to Show Your Images Obviously, this is very important. You might even want to determine this first. Many decisions spring from this decision. You need to know what this space will look like so you will know how much space you have for images. How many can you show? How will you present them? The location is also an important consideration for your audience. How far will they travel to see you work? When the venue is available will affect how much time you have to prepare everything. If the location is a gallery or museum, it will likely have a lot of lighting, and it will be flexible to highlight best your art. If the location is not a gallery, you may need supplemental lighting. How much will the location cost to rent? Will you pay a flat fee or a percentage of your sales? Do they allow food and alcohol? Will they do marketing for you or will you be expected to do all of your marketing? Do they have a mailing list to promote you? Finding the right space took months for me. I had been paying attention to the galleries during my group shows. I was ready to book one gallery and it closed. I was disappointed, and had to start my search over. I contacted real estate agents about vacant spaces, but that never panned out. The real estate agents always wanted too much money for a short exhibit, and they also wanted me to get insurance and pay for electrical hookups and the like. The logistics didn’t work out. Ultimately I found a local gallery and was able to pay them a flat fee. They had lots of lighting, and they even helped me hang my images, which was great. I also found a very supportive group of artists who were interesting and fun. Tip #6 Seek Show Sponsors Putting on a show is expensive. Printing, framing, gallery space, public relations, food and beverages, a catalog….they all cost money. It’s thousands of dollars any way you cut it. Seek sponsors to help you reduce your costs, and give your sponsors billing on your public relations, social media, and gallery space. Hopefully, you have been building your connections as you have exhibited in group shows to this point. Sponsors can also include local food and beverage companies who may be new and want to expand their client base. I was grateful to have Tamron USA, Pelican Products and a local brewery and chocolatier as my sponsors. You don’t have to provide a full dinner, but some wine and cheese, or beer and chocolate is in order. I did not drink during the show so I could stay sharp and attend to my guests. Tip #7 Create a Show Flier Once you selected the show name, images, location, and dates, it is time for a show “flier.” My flier had a key image for the show that would be on all the advertising, dates and times, and names of my sponsors, my website, and email address. I printed several hundred 4x6 postcards and carried them with me all the time. I handed out hundreds of these over the course of 3-4 months and left them at key places like my local photography shop. Tip #8 Social Media As soon as you book the date of your show, send out a “SAVE THE DATE” on social media. Use the show flier on social media. Send it out to all your outlets: Facebook, Twitter, Google+, Instagram, your mailing list. Your sponsors will appreciate it. Vary the message, talk about the process, show the location, your printing, and framing. Don’t overwhelm but give periodic updates. Ask your friends and sponsors to help spread the word. Post images of the show itself, friends having fun, and perhaps even images you sell. Be sure to reach out to people individually before and after the show. Take the time to demonstrate that you are looking forward to people coming to the show, and say thanks to those who do come. Tip #9 Be Humble and Ask For Help You are going to need help, probably a lot of it. So be humble and ask for help. I’ve always been a believer in shopping locally. I buy a lot of my camera equipment from local camera stores. Yes, it costs me a bit more in the short run, but in the long-run the help with equipment and questions is invaluable. Plus I like to support my local community. For this show, I spent quite a bit of time working with an extremely talented photographer and printer from my local camera store. She helped me with paper selection, printing and gave me many helpful suggestions. One of the best suggestions she gave me was to create a replica model of the show space. Tip #10 Create a Replica of Your Exhibit Space Grab a legal pad, a few pens, and a tape measure and go visit your exhibit space. Measure the dimensions of ALL the walls and draw a diagram while you are there. Next create a model of the space out of foam board. Make every foot equal to one inch and be sure the model is to scale. Height of the walls and distances included. Write the height and width on each wall. Connect the foam board pieces using clamps and/or nails. You will want to be able to take the walls apart and put them back together again. You are going to print super-small copies of your pictures and post them to the walls using pin cushions. By doing this, you will be able to see which images go together on a wall, which images should be vertical or horizontal. You are going to measure out the distances exactly. Did this take a lot of time….yes. Did I get frustrated doing this….yes. Was I delighted when I got to the gallery, and I knew exactly where each piece was going to go……? Absolutely. It cut down on a lot of stress on the day of installation. Tip #11 Test Prints This will be obvious to some, but test prints are critical. You need to know how your image will look on the particular medium that you are using. Half of my images were printed on metal for this show. I ordered several metal prints (dye fused on metal) from several print labs before the show. I experimented with several different finishes on the metal as well i.e. glossy, matte, etc. The paper prints were even more complicated. Each paper has a different print quality, price and displays the ink differently. “HELP”….my head was spinning. I spent many hours working with a printer to get each shot right. Finding the right framer, at the right price, can also be challenging. Your network can be invaluable here. Tip #12 Installation/Hanging Your Images Hanging images can be very challenging. Honestly, I hate doing it. Give yourself enough time. At least a day. If you have done your model (tip #10), then this will be much easier, you already know which images go together as a group, and where specifically each will go. Ask for help, bring a friend who has done this already if you can. Keep in mind that some galleries will hang images with wires and some galleries only want “D” rings. You should ask the gallery how they want the images before you frame them, assuming the gallery is going to help you hang the images. Tip #13 Create a Catalog Create a catalog of your work for the show. Include your artist statement, pictures of the images, the size of the images, the medium, and the price. I made 250 copies of the catalog, and it was well worth it. Hand it out at the show and let people take it home. This will help with your follow-up sales. Tip #14 Sign-In Book Purchase a nice leather bound book for the show and have people sign in and provide their name and email address so you can thank them for coming and invite them to future events. Tip #15 Follow-Up Follow up with your prospective purchasers after the show. Thank those who came to the show and especially those who purchased an image. Tip #16 Hire a Photographer Hire a photographer for the day, so you get images (with you in them for a change) and you can relax. You’ll be happy to have the images of your friends and for use in future marketing and social media efforts. Conclusion: Having a solo exhibition is a landmark in your professional photography career. It says you are serious about your photography and willing to put in much more time and effort than the average photographer. Give yourself lots of time, six-nine months and enjoy the learning process. Nearly 250 people attended my exhibit, I sold a third of my images during the show, and even more after the show. I met collectors and I'm building my mailing list. It was an exhilarating and somewhat exhausting experience. I couldn’t be happier I did it. I hope you do it too.
1 Comment
|


Our Partners


"Why?"Check out "Why?" one of the most popular features on the SCU Blog. It's a very simple concept - one image, one artist and one short sound bite. Each artist shares what makes the image one of their most favorite. We're over 100 artists featured since the project started. Click on the link above and you can scroll through all of the episodes to date.
Categories
All
|
 RSS Feed
© 2019 Skip Cohen University