SkipCohenUniversity
  • Home
  • SCU Blog
  • Our Podcasts
  • About Us

The Profoto Showcase

Welcome to one of the most informative resources on the Internet, especially when it comes to a better understanding of lighting, composition and exposure. The Showcase features some of the most creative and talented photographers in the industry.  Just click on any of the images on the left and you'll have a chance to check them out for yourself with links to great videos, guest posts, images and their websites.

Profoto's new off-camera flash systems, the B1 and B2, have been referred to as "game-changers". Click the link below to find out why and then visit a Profoto dealer to check them out for yourself!
Button Text

Another Outstanding Lesson in Using Gels

10/10/2016

0 Comments

 
Intro by Skip Cohen

Once again, Jared Platt does an outstanding job with another lighting tutorial from Profoto's blog archives. 

There are still too many of you who don't understand lighting and Jared, together with Profoto's dedication to education, are here to help you raise the bar on the quality of your images. This isn't just about chasing the ultimate image, but making your work the very best it can be. Understanding lighting, no matter what the source, gives you the freedom to shoot anywhere at virtually any time! Plus, there's no better way to separate yourself from your competitors.

Jared's using Profoto's B1 Off Camera Flash system in this tutorial. If you haven't taken one out for a test drive yourself yet, then it's time to visit a Profoto dealer. Also, check out their blog, there's new content almost every day introducing you to some of the the finest artists in the world with the lighting gear to match.

Check out more of Jared's work and pay attention to his workshop schedule. He's an outstanding educator and if he's teaching at any 
Find a Profoto Dealer
Picture
by Jared Platt

What’s the Difference? is a series of lighting tutorials. Each article responds to a single question. In this post, Jared Platt explains the difference between using a CTO gel and no gel.
​
In the past few blog posts, I have been detailing various scenarios where I use a gel to color the light coming from my flash to match the ambient light, or to contrast against it with an opposite color gel. In the first post, we dealt with a cloudy, rainy, cold day where the sun’d ambient light was very blue because it was blocked by the clouds. In that case, the ambient light was at approximately 6500 kelvins, which is very blue in color. In our second challenge, we photographed indoors and battled it out with a 1960s army of 5000 kelvin florescent lights in an AmTrack train car. But in today’s example, we will race the sun for a portrait with an ambient light temperature of close to 1800 kelvins.
Picture
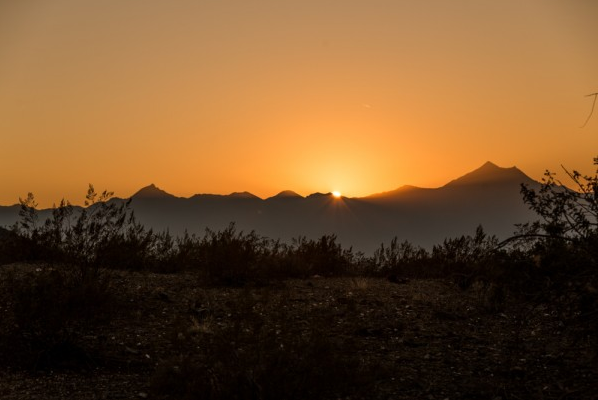
Now, the lower the temperature of light gets, the warmer it appears. And the sun, which never changes in its spot 93 million miles away, changes drastically in color temperature depending on what it has to go through to reach our eyes. The sun on a bright, clear day will be a slightly blue color and measure at around 5500 K, but on an overcast day, the light that reaches us will be much more blue, measuring at around 6500 K and on a dusty day in Phoenix, Arizona, the sun’s rays will travel through hundreds of miles of dust and atmosphere to give us a golden warm light that measures only 1800 K.​ 
Picture
​Now, you have heard that a flash has the same color balance as the sun. But this is only true when measuring the sun in the middle of the day on a bright clear day. As the sun is modified by clouds and atmosphere, the temperature will change up to one thousand three hundred degrees kelvin. So if you think your flash will always just match the sun, you are going to be shocked when you have to start monkeying around in Photoshop to correct for massive differences in your flash and the sun. This is why we have flash gels!
Picture
Correcting with gels
By adding a colored gel over the flash, we are able to change a fairly blue 5500 K light source and make it match the temperature of whatever ambient light source we are dealing with. In this case, the sun is just about to set, so it is traveling through a lot of dust and atmosphere, so the light is getting extremely warm. 1800 degree kelvin warm! Because we wanted both of our shots to have the same sunset glow, the entire shoot had to happen in mere minutes. From the first shot at 5:15 to the last shot as the sun dropped below the mountain at 5:28, the sun maintained that perfect fiery warmth. To show you the best comparison possible, we shot a couple frames without a gel and then ran to our lights, added our gels and ran back for a few more shots. And then, the light was gone.
Picture
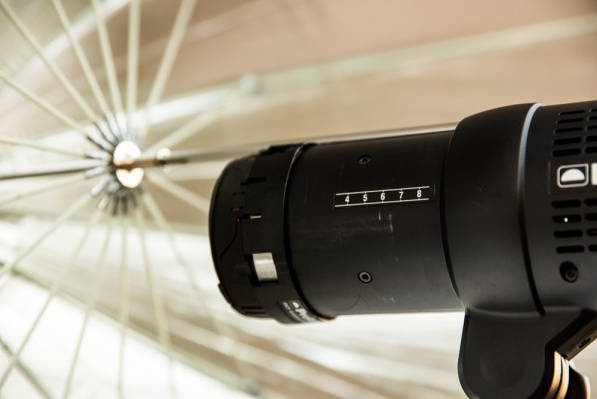
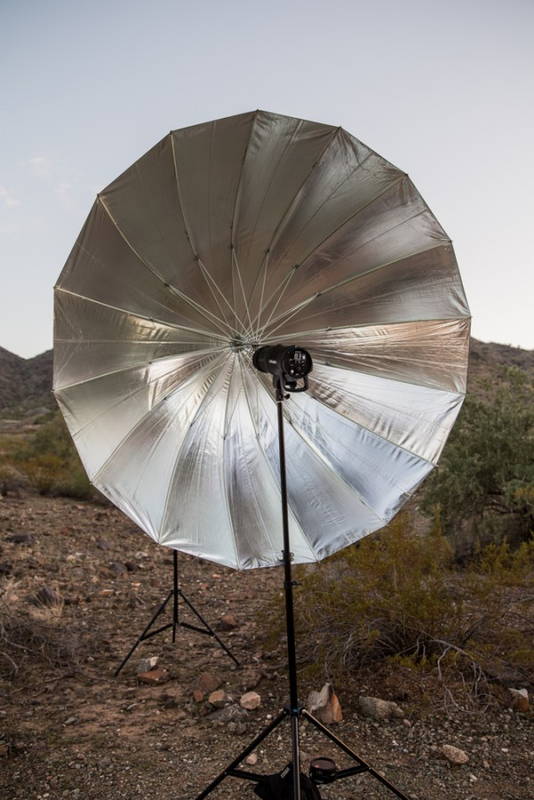
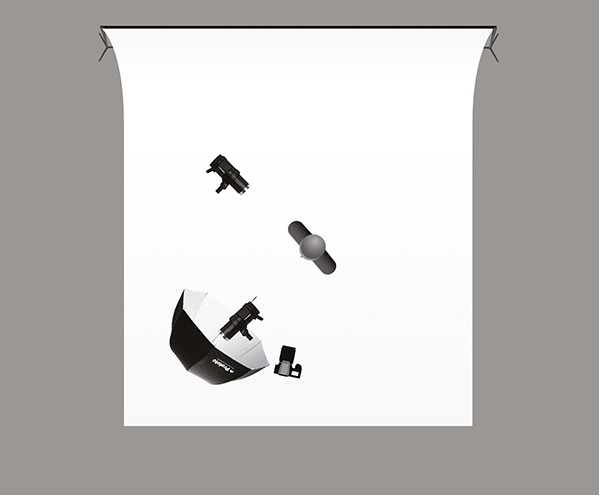
We used a Profoto B1 Off Camera Light for our main light, just to the left of the model, which was modified by a Profoto Deep Silver Umbrella XL. I chose the Deep Silver Umbrella because it puts out a lot more light and I needed all the power I could get to do battle with the sun that was directly hitting the model’s left side. An additional B1 was placed to her left and slightly behind to help augment the natural hair light from the sun. The camera (a Canon 5D Mark III) was set at ISO 100, 1/100 sec at f 5.6 with a 70-200 2.8 L IS II lens at 95 mm.

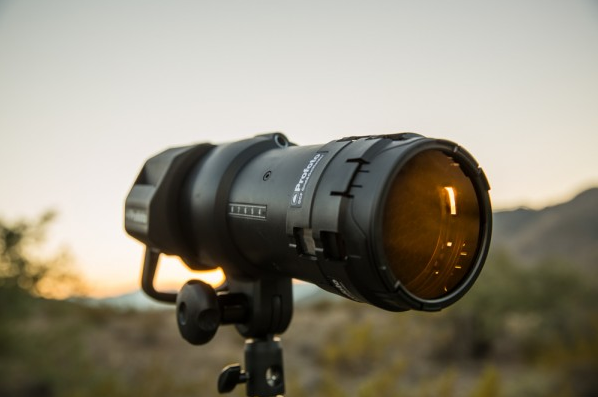
There are two shots, one with and one without a gel. The Profoto OCF Gel Kits come with a full compliment of corrective gels and a gel holder that can fit on the flash head in conjunction with your various modifiers. In this case we used a bare head on one light and an umbrella on the other.
Picture
​Notice the gel holder on the bottom of the stand ready to be thrown on in an instant for the second shot. This is the preparation needed to get a comparison like this done when racing the sun.

The comparison

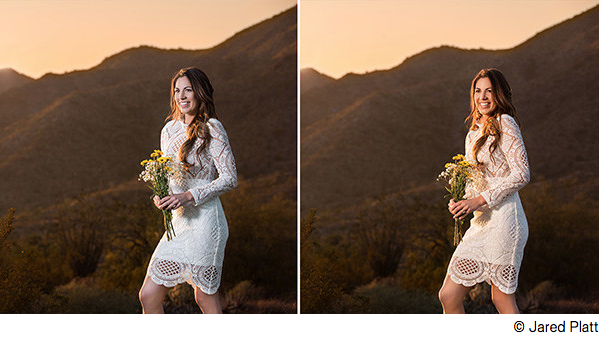
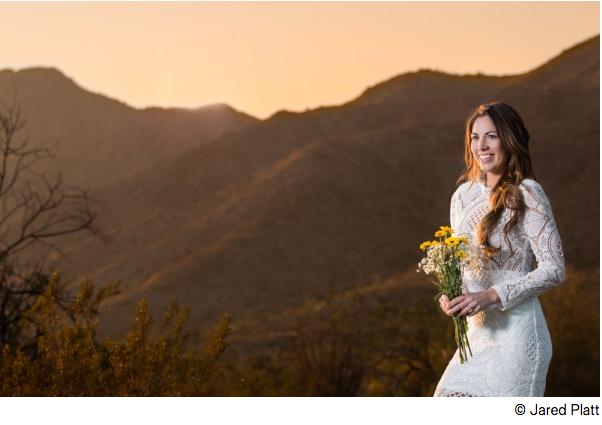
The first shot was taken with no gels. Keep in mind that the flash itself is a blue light source (5500 K) and matches the sun’s light temperature only at midday on a clear day. So when we use a flash to light someone against the extreme warmth of the sunset, there will be a big difference in the color of the two lights. If I use the white balance setting for flash, or daylight, the flash on the model will be neutral, but because of the extremely warm light coming from the sun, the neutral light will actually appear to my eye to be a colder or blue in color. This may or may not be the look you are attempting to produce. Make your subject look neutral and your background will go even more orange!
Picture
Picture
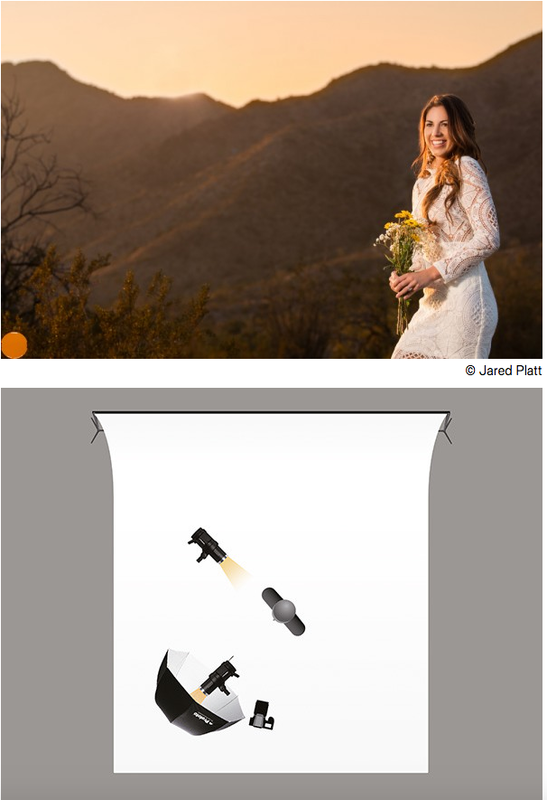
​The second shot only has one change, and that is the addition of a Full CTO, or Orange Gel. By adding the CTO to both flashes, we match the warm light coming from the sun, so that there is no hint of a color difference between the two light sources. Because the colors are the same, there is less attention drawn to the flash itself and it is more likely that the viewer will believe that the light is natural. Plus, because the two light sources match in color, I can change the temperature of the entire shot to add more warmth or to completely neutralize the warmth without a second thought. Keep in mind that you can use a Full CTO, 1/2 CTO, 1/4 CTO, etc. This means you can pick and choose the exactness of the match. Typically a 1/4 CTO is enough to keep the subject looking natural in a sunset situation, we were more aggressive with a Full CTO so you could really see a difference.
Picture
The conclusion

Most photographers seek out the sunset shot for weddings and engagement portraits and yet, they never give a second thought to the difference between their flash and the sunlight. From the image at the top, you can see the intense difference in the color shift on the model. So now it is time to up your game and do a better job at identifying the color of the ambient light you are shooting in and either match it with a gel on your flash, or at least know why you are not using a gel. Getting a cool blue bride on accident is just not a professional thing to do.

​Location: South Mountain, Phoenix, Arizona

The gear
1 x B1 Off-Camera Flash
1 x Umbrella Deep Silver XL
1 x OCF Color Gel Starter Kit
1 x Air Remote TTL-C
0 Comments

Your comment will be posted after it is approved.


Leave a Reply.

    Picture
    Picture
    Picture

    Archives

    November 2017
    October 2017
    September 2017
    August 2017
    July 2017
    June 2017
    May 2017
    April 2017
    March 2017
    February 2017
    January 2017
    December 2016
    November 2016
    October 2016
    September 2016
    August 2016
    July 2016
    June 2016
    May 2016
    April 2016
    March 2016
    February 2016
    January 2016
    December 2015
    November 2015
    October 2015
    September 2015
    August 2015
    July 2015
    June 2015
    May 2015
    April 2015
    March 2015
    February 2015
    January 2015
    December 2014
    November 2014
    October 2014
    September 2014
    August 2014
    July 2014
    June 2014
    May 2014
    April 2014
    March 2014
    February 2014
    November 2013
    October 2013
    September 2013
    July 2013

Categories​

Business
Marketing
Technique
Sales
Fast Food Fridays
​

Podcasts

Tamron Recipes 
Beyond Technique
Why?
Mind Your Own Business
Pro Photographer Journey

 Partners

Tamron
PhotoTexting

​Lumix

Marathon Press
​Platypod
©  2019 Skip Cohen University
  • Home
  • SCU Blog
  • Our Podcasts
  • About Us