SkipCohenUniversity
  • Home
  • SCU Blog
  • Our Podcasts
  • About Us

The Profoto Showcase

Welcome to one of the most informative resources on the Internet, especially when it comes to a better understanding of lighting, composition and exposure. The Showcase features some of the most creative and talented photographers in the industry.  Just click on any of the images on the left and you'll have a chance to check them out for yourself with links to great videos, guest posts, images and their websites.

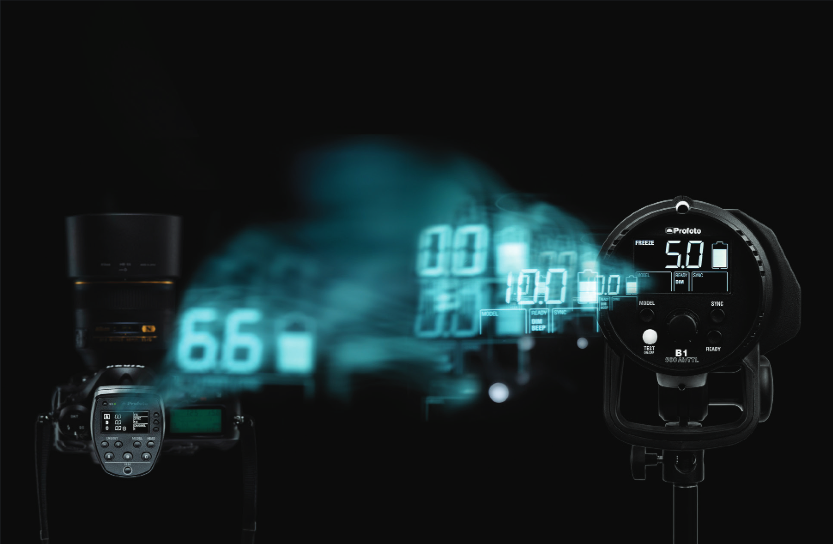
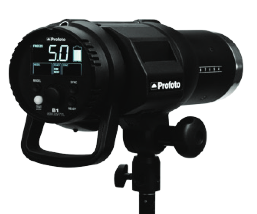
Profoto's new off-camera flash systems, the B1 and B2, have been referred to as "game-changers". Click the link below to find out why and then visit a Profoto dealer to check them out for yourself!
Button Text

Recreating a Classical Painting with Derek Galon

12/19/2014

0 Comments

 
Intro by Skip Cohen

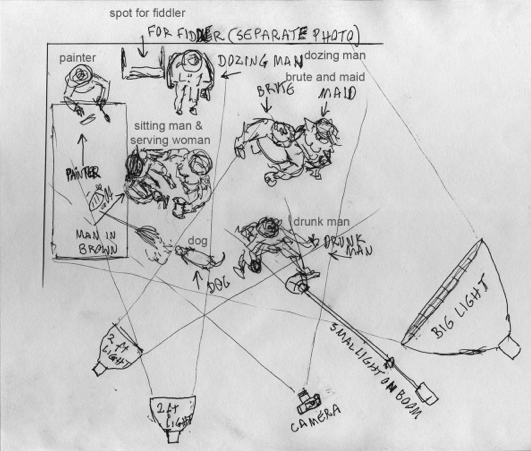
It's Profoto Friday and as always, a trip through Profoto's archives produced only gold! Take the time to read through this post by Derek Galon and pay close attention to the work he's put into recreating a classical painting with the use of contemporary lighting tools and a lot of his own creative ingenuity. While I love the way he shares his thought process through the project, the most fun section for me is his lighting diagram and how he put it all together.

I've said this with just about every Profoto Friday post - their archives are an incredible resource, focusing on creativity, education and their never ending quest to help photographers raise the bar on the quality of their images. If you haven't been on the Profoto blog before, it's time you wandered through. There's no shortage of great information and solid "how-to" content.
Click to Visit Profoto's Blog

Picture©Derek Galon
by Fredrik Franzén 

Canadian photographer Derek Galon has always been fascinated with classical painting. But it wasn’t until a friend of his had a crazy idea that he realized how to use flashes and softboxes to combine his fascination with painting with his love for photography. Here is the story of how he did it, in his own words.


I love old paintings and have been fascinated with them for many years. But only recently, after decades of photographing, did I feel confident enough to try and recreate the type of light and mood such paintings have. It started with a suggestion by a friend, professional model Michael Ward, who wanted to shoot a Bacchus scene similar to those painted by Titian. At first i thought it may be an overwhelming project, but I decided it will be a fine challenge worth a try. All next shoots followed thanks to this first one being a success.

I’ve been lucky to have access to a large studio necessary for such multi-model setups. The studio is owned by my friend, a brilliant photographer and a lighting wizard: Jon Hoadley. Thanks to his kindness I also have access to high-end lighting system: the Profoto D1 Air and plenty of Light Shaping Tools. Without his generosity, none of these images would exist today. Casting models for this series has been easy for me. I mostly use my friends as models, experienced art photographers along with some younger aspiring models and friends from art industry, a stage makeup artist, costume designer, a fine painter, and so on.

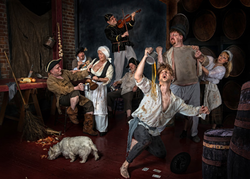
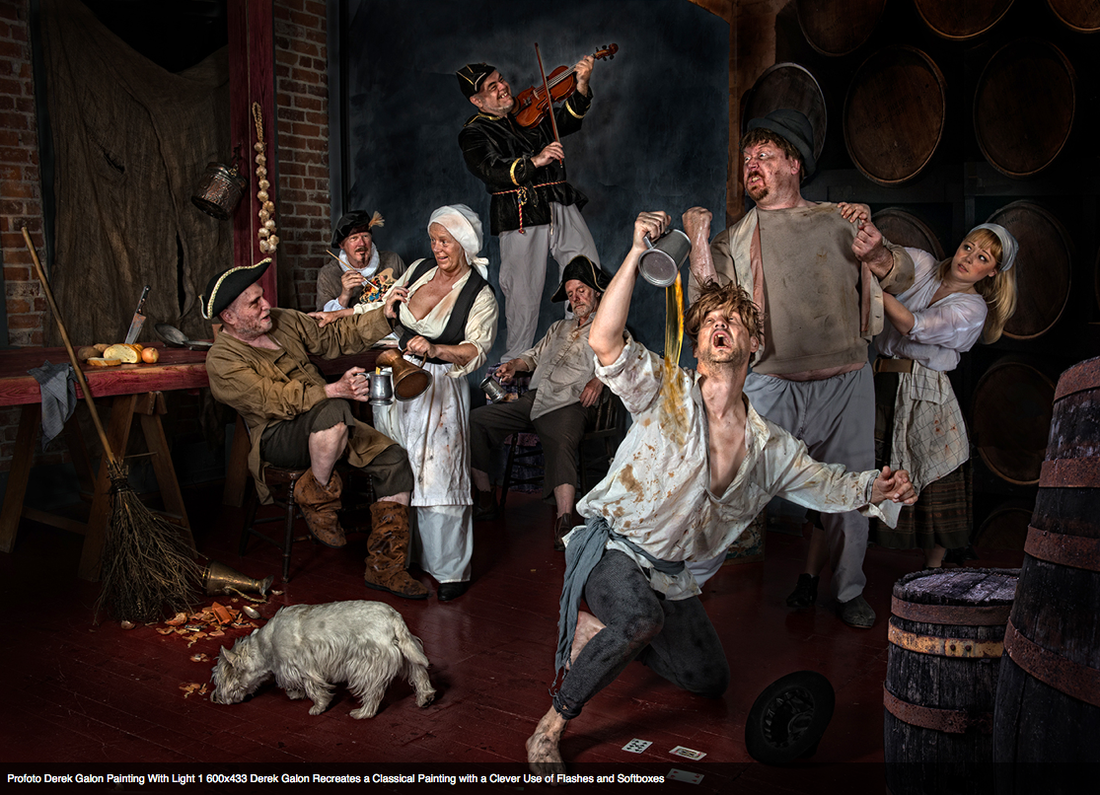
The whole Painterly series is rather diversified, but several images are shot in style of old Flemish paintings. The one we use here as example for my lighting, is my homage to Adrjaen Brouwer – a fine painter who specialized in rough tavern scenes. He was well respected and one of Rembrandt’s favourites. To create image with distinctive feel similar to these paintings, one needs to study them and analyze separate elements. I would use a somewhat simplified list of these elements: styling, the whole scene composition and micro-scenes, plot and interactions, 

1. Styling

Picture
By styling I mean finding models fitting the desired theme, dressing them in properly looking clothes, applying professional makeup and other body effects, and finding the correct props for the scene.

This can be quite a task, but thankfully I do have access to a costume rental shop, and I work with a fine makeup artist, who became with me great with “uglyfying’ my models as needed.

2. Composition

Picture
Next, the composition. I need to imagine the whole scene as if it was a ready painting. I need to see in my imagination how people are composed, their expressions, what happens on the whole stage. That goes hand in hand with micro-scenes. When you study old multi-model paintings, you will notice that often bigger scenes are created by several smaller scenes put together. The same goes for this image that I shot – you can split it into micro-scenes. The woman serving the sitting man and accepts his crude flirtation, they make a fine pair. Young maid tries to tame an aggressive redneck fellow. That’s another separate scene. The drunkard on the front, dog sniffing through rubbish, and three background characters (one being the impersonation of Brouwer) are another group. Then, there are further micro-scenes done with props. The still life with bread and knife is set in such way that it can be a separate, fine image in itself. Details around the front drunkard make him set in another micro-scene, and so on.

3. Plot and Interactions

Picture
Closely related to these scenes is the plot and interactions. Looking at the scenes you know that the lady now is flirting with the sitting man, but she just served the drunkard spilling his drink. You can imagine that the aggressive brute on the right may be simply jealous of that flirt on the left side. Is the younger girl (my makeup artist “uglyfying” all models) just trying to avoid a scuffle, or she may actually have a soft spot for the brute (and some power over him)? Whatever happens, it can’t disturb the front drunkard who is too intoxicated to care, or the old man dozing off (my friend-photographer Jon Hoadley) in the back, clearly after a few drinks too. The musician (myself) has to play whatever happens, and the guy in the corner paints the scene, clearly enjoying the rough folklore of it. You can guess he is not really one of them, but they got used to him and don’t really notice him any more. Such interactive plots are typical of many old paintings like that, and give lots of narration detail for your imagination. That makes the image rich in a multilevel story.

4. Lighting

Picture
The last element is the lighting, which helps building the scene in the proper way, showing you what is the most important in the whole plot. So, the strongest, brightest spot is on the drunkard, a separate light goes on the flirting couple and the painter, yet another on the brute and the girl, and the background is visible thanks to the ambient light filling the whole tavern.

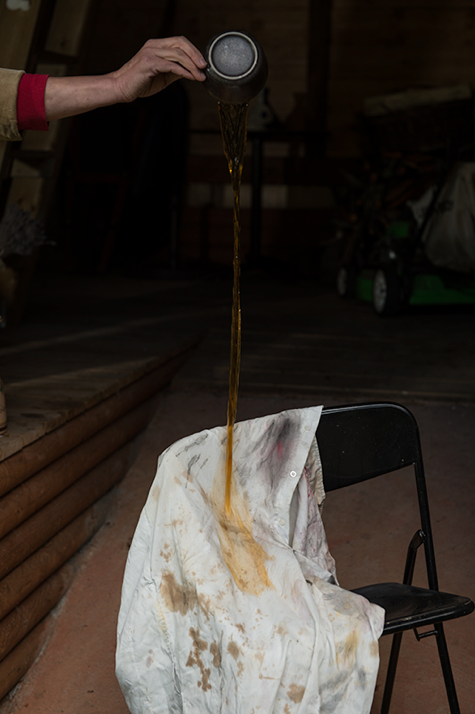
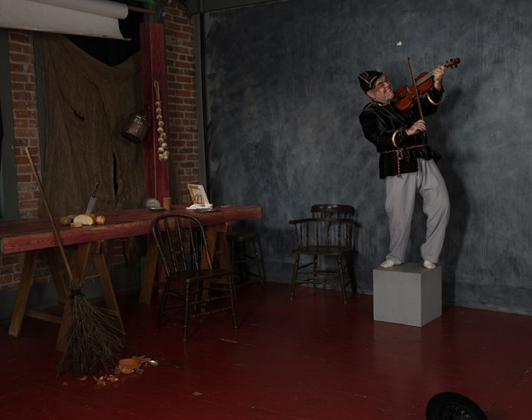
But how exactly was this scene lit? Well, the final image has been composed of seven separate photos. Me playing fiddle, the best of all pics showing the left group, the best of all pics showing right side trio, the best of the dog, front barrels and background barrels – which I just happened to have from some previous architecture shoot, and lastly the spilling drink which i photographed in my garden later on.

First, we shot me acting the role of the fiddler. I had a large Softbox RFi 5´Octa with a Softgrid on the righthand side, set to a low power. This was the ambient light, the fill. Then we had the second fill light: a smaller Softbox RFi 3´Octa, also with a Softgrid. When the lights were set, I had Jon photograph me while I was playing the fiddle.

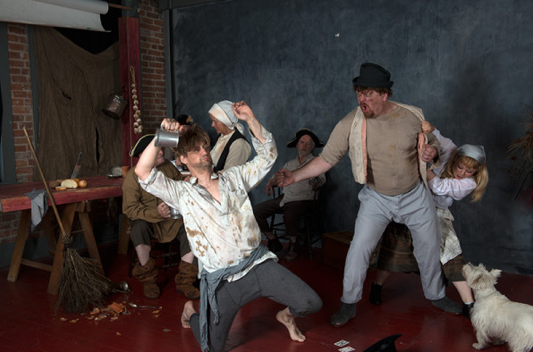
Next, together with Jon lending me some of his lighting expertise, we had to set lights on the whole group. The large Softbox RFi 5´Octa was once again our ambient light. We had a smaller Softbox RFi 3´Octa on the lefthand side lighting up the flirting couple, set from a distance and at a higher power. This light was spreading enough to also cover the painter in the back, and feather the dozing man and the dog, broom and still life on the table.. Another Softbox RFi 3´Octa with a Softgrid was placed even further to the left (look at shadows of dog and shadow of drunkard’s leg and you’ll see it) also from a distance, but a bit closer, so it would lit the drunkard but fall off a bit on the brute and the girl. Additionally, there was a fourth, tiny Softbox RFi 1×1.3′ with a Softgrid on a boom on front/above the drunkard, set to low power and giving just a bit of extra detail on him.

The main idea behind this setup was to use the smaller softboxes to separate the scenes from each other, while using the larger softbox to tie it all together. Of course it was not perfect from the first photo, and tethering on a large monitor we had a chance to correct and improve lighting and scene details. I took a dozen of photos, then checked them on screen, did some lighting corrections, and shoot again.

Using small gridded softboxes is absolutely vital for such images, to avoid light spillage and bouncing, which could ruin the whole setup. It is better in my opinion to have more dark spots than a light too widely spread over all scene. Only with well-controlled light you can create that painterly feel, chiaroscuro with lots of deep shadows. Don’t forget the background separation too.
Picture
©Derek Galon
Shooting such painterly multi-model scenes has lots of challenges. One of them is the simple fact that it is hard for all models to perform at their best on a single photo, so I usually have to combine best scenes from several photos into one. But perhaps the biggest challenge here is the lighting of all characters on a tightly packed stage. You think all is ok, and then it turns that someone’s hand will put unwanted shadow on another model’s face or torso. This takes the most fiddling around. Sometimes you can move a model or prop a bit, sometimes you need to move your lighting around. Look again at dog’s shadow and drunkard’s shadow. You will see the light on drunkard comes from farther left than that on the dog. We had to move the light, as drunkard created too much shadow on the couple behind. Painters can and sometimes do cheat, softening or modifying shadows, camera has no mercy.

Creating the whole series is a real challenge, steep learning process, and fun, and i hope to do several more images in this style. I hope you enjoy seeing them. Thank you!

See more of Derek’s work at his website.

0 Comments

Walk Through a Wedding - Shooting the Couple When It's Dark

12/15/2014

4 Comments

 
I'm having some fun experimenting with something a little different this week. 

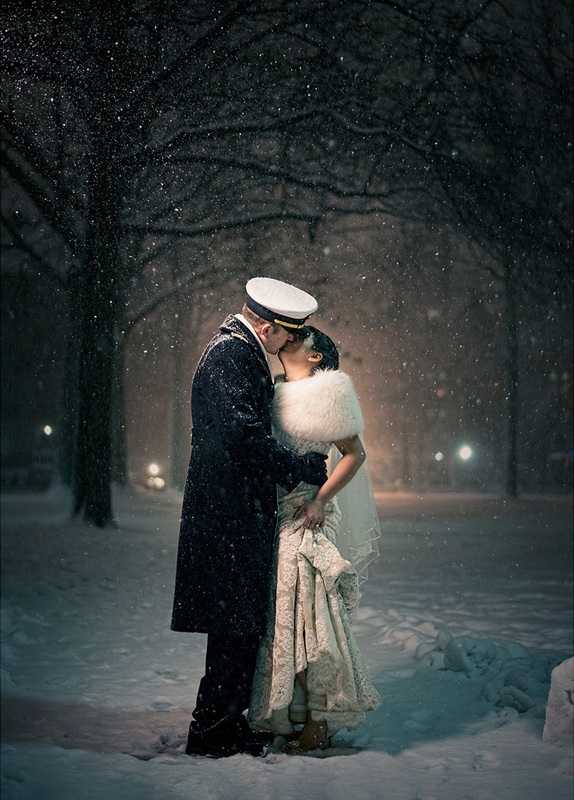
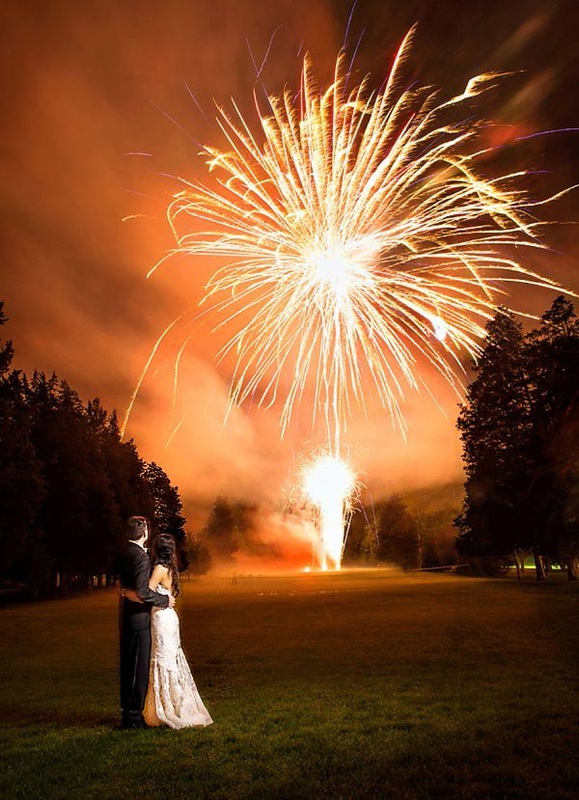
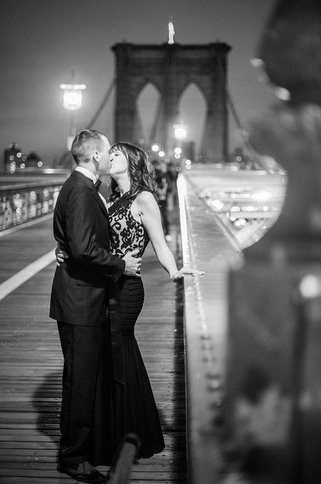
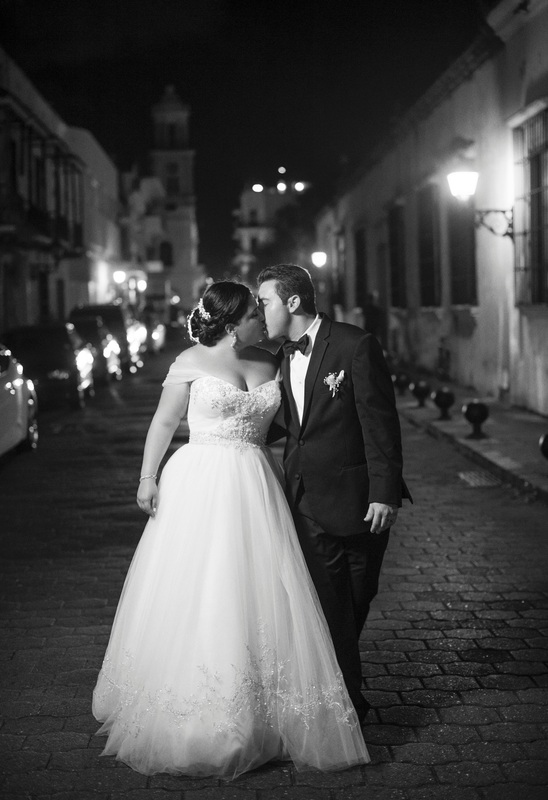
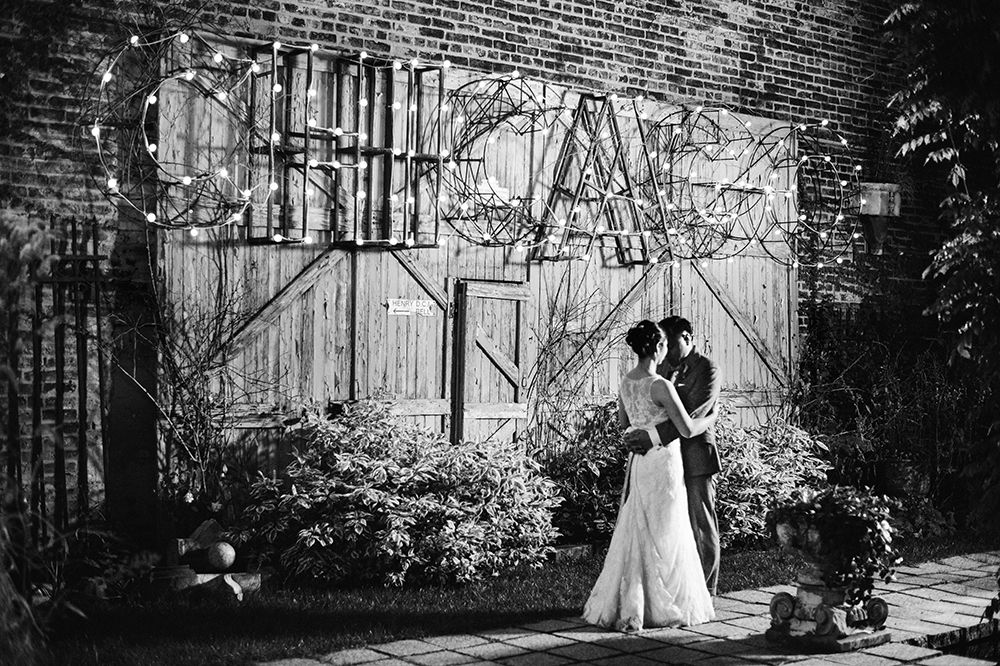
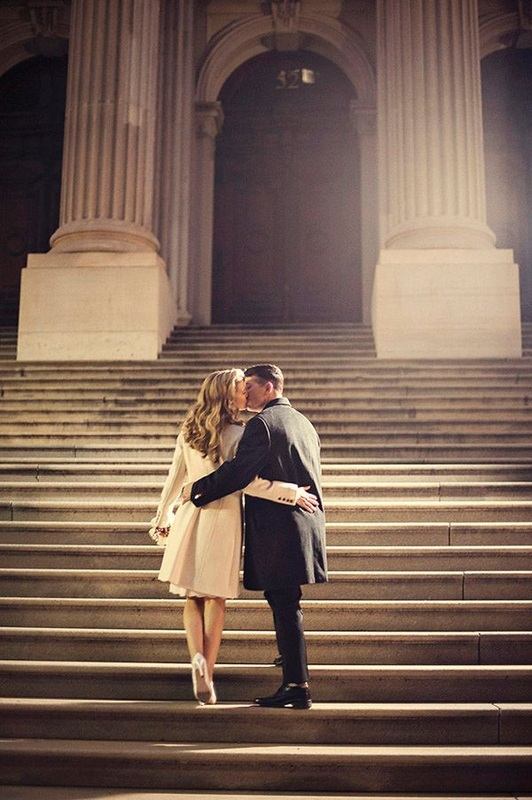
Here's Justin and Mary Marantz's how to video from a recent Walk Through a Wedding episode.  Following the video are a few of their images from real weddings. I love the information they've been sharing through all of their Profoto videos, but a few photographers have commented that they don't reflect what really happens on the day of a wedding. They don't capture the challenge of working through the chaos.

The entire series of Walk Through a Wedding is loaded with great content and from the beginning meant to be educational in helping you develop some great techniques...techniques you could apply to real weddings. In fact, if you watch all of them, one after another, you'll pick up some outstanding ideas to help you raise the bar on the quality of your images. Here's the YouTube link to all of them. 

The images following the video are all from real weddings as Justin and Mary do what they do best, show how they can walk the talk!

As their year long series comes to a close, they need to be on your radar. Follow them on their website and pay attention to their teaching schedule. Then, get yourself signed up for Profoto's FREE newsletter so you never miss what's going on with new products, educational opportunities and special promotions!
Sign Up For Profoto's Free Newsletter

...and when Justin and Mary walk the talk!

Picture
Picture
Picture
Picture
Picture
Picture
Images copyright Justin and Mary Marantz. All rights reserved.
4 Comments

Profoto's NEW Solution for High-Speed Sync

12/15/2014

0 Comments

 
Intro by Skip Cohen

One of the characteristics of a great company, especially in photography today, is they NEVER slow down on listening to their audience and then finding the right solutions! Here's one hot off the press this morning with Profoto's solution for high-speed sync, giving photographers the ability to sync flash with shutter speeds shorter than 1/250 of a second.  

Even better, Profoto's HSS solution is FREE through a firmware upgrade you can download from their site. Just click on the link below and check it out!  


Over and over again Profoto keeps demonstrating their commitment to helping you raise the bar on your skill set.
Make sure Profoto is on you radar, so you're always on top of what's coming next!
Picture
                                                          Perfect exposure at any aperture or shutter speed!

Up until now, HSS solutions have been either consistent but lacking in speed and power, or fast and powerful but inconsistent. Today, Profoto is releasing a new solution that has all of the benefits and none of the limitations.

High-Speed Sync (HSS) is the technical term for syncing flash with shutter speeds shorter than the so-called x-sync, typically 1/250 of a second. It is a useful tool for controlling ambient light and for freezing action. But there used to be limitations.

Current solutions for speedlights give you a fairly even exposure. But it does so at the expense of speed and power. Previous solutions for larger flashes were faster and more powerful. But the exposure could differ as much as two f-stops in a single shot.
Picture
Picture
Picture
Profoto’s new HSS solution for the B1 Off-Camera Flash has all of the benefits and none of the limitations. The B1 itself is about ten times as powerful as the average speedlight and fast enough to keep up with your camera. With the new HSS upgrade installed, you switch to HSS Mode with a simple button-press. You will then be able to shoot at shutter as fast as 1/8000 of a second.

But it does not stop there. Profoto HSS is a unique, patent-pending technology, providing an extremely fast series of flash pulses. What this means in practice is that you get an extremely consistent exposure with no measurable variation over the image.

In other words, Profoto HSS is fast, powerful and consistent. This opens up completely new light shaping possibilities for Profoto customers. For instance, you can now shoot with a large aperture in bright conditions to get a shallow depth of field and get that perfect deep blue sky. Or capture super crisp action in mixed light conditions without getting motion blur from ambient light.

Profoto HSS works for both Canon and Nikon and has been tested for all common camera models.

Profoto HSS is available through a firmware upgrade. Go to www.profoto.com and download it for free. Once installed, HSS Mode is activated with a simple button-press. It is very easy, and there is no need to change the flash bulb. Also note that you can use Profoto HSS with TTL, making it fast and easy to do fast paced action shots or daylight backlit portraits with large apertures.
Click to visit www.profoto.com
0 Comments

The Wide Zoom Reflector - Spicing Things Up

12/12/2014

0 Comments

 
Intro by Skip Cohen

I chose to share this particular video because I love the fact that the photographer, Andrea Belluso not only demonstrates the reflector, but shares a little of his thought process along the way. There's a lot of great information packed into just five minutes.


One of the things I enjoyed most was looking at Andrea's galleries and especially this statement that comes up immediately on his site:


"To be a professional photographer is not to have just one look and one lighting in one's pictures, but it is the ability to be able to communicate the client's message and sell the client's products with the best possible lighting according to the client's needs and demands, without ego and without pretentiousness."

There's so much content available to help you build your skill set and produce stunning images in the Profoto blog. Check it out and also visit your Profoto dealer on the latest in great lighting products - all dedicated to the quality you need to present in every image!
Written by Fredrik Franzén

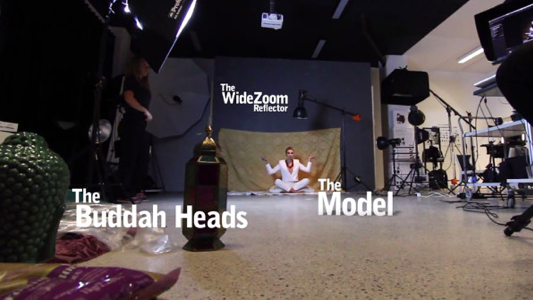
Andrea Belluso is an experienced photographer with more than three decades in the business. Once a month, Andrea takes us behind the scenes of a recent shoot to share some of the knowledge he has gained over the years. This time he shows us how to use the WideZoom Reflector in a creative, out-of-the-box way.

I was recently approached by the staff at Klassik Magazine asking me to do a fashion story based on the official trend forecast for 2015 stating that India will be a great source of inspiration. I gave the brief some thought and realized that I wanted to shoot different kinds of images but with a consistent look and feel – as one normally does in an editorial fashion story. I also knew I wanted a hard light with a lot of contrast and dramatic shadows.

There are a number of Profoto hard reflectors that can do this. But for this particular shoot I chose the WideZoom Reflector. The WideZoom Reflector creates a wider, more even light than any other Profoto hard reflector. For this reason I often use it as a background light. But on this shoot I decided to use it in a non-traditional way. I used it as a sidelight. This allowed me to create the heavy shadows I needed, while at the same time spilling some nice light onto the background. Also, using the same Light Shaping Tool in different ways for different shots would help me achieve the consistent look and feel I was going for.

Picture
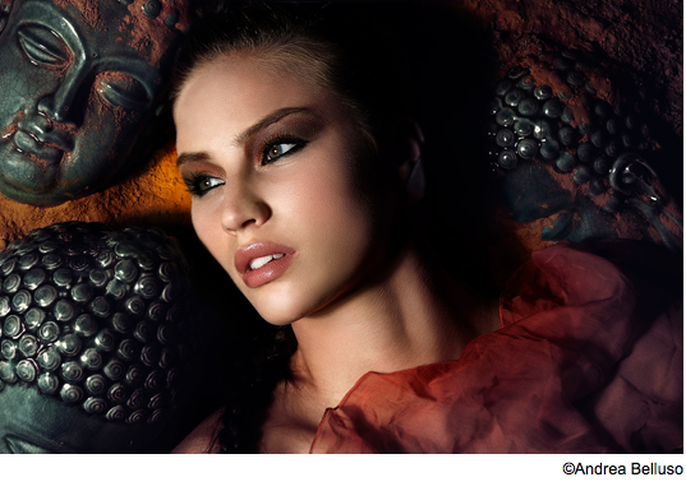
The headshot of the model lying on a bed of spices with the Buddha heads next to her was shot with just a single light source: a D1 monolight equipped with a WideZoom Reflector. Shaping the light with the WideZoom Reflector gave me a nice and even light even on the spices and on the Buddha heads.
Picture
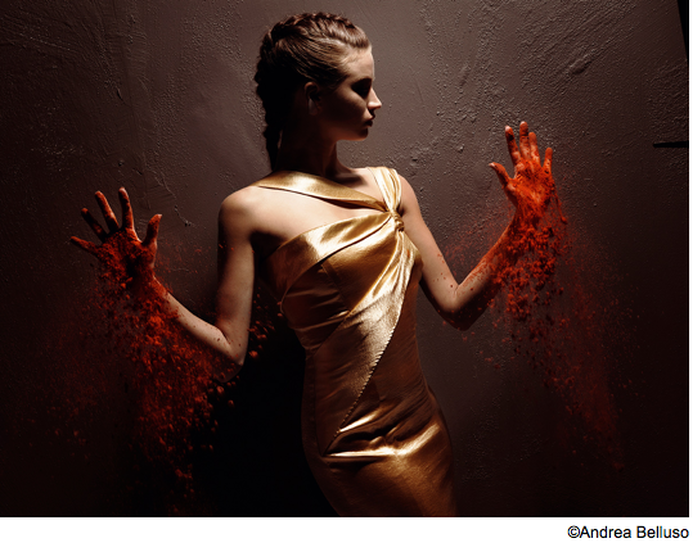
The same goes for the picture where the model is standing in front of a brown wall, throwing a handful of spices. Once again, I had a D1 with a WideZoom Reflector as my sidelight, creating me a nice and hard but even light on the model and on the spices.
Picture
Picture
Picture
Picture
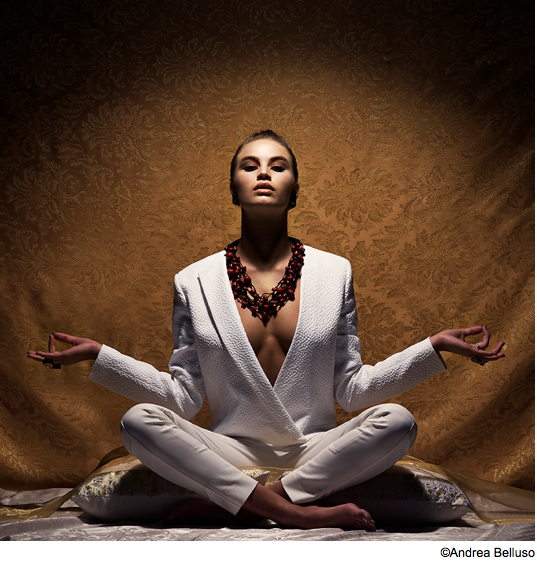
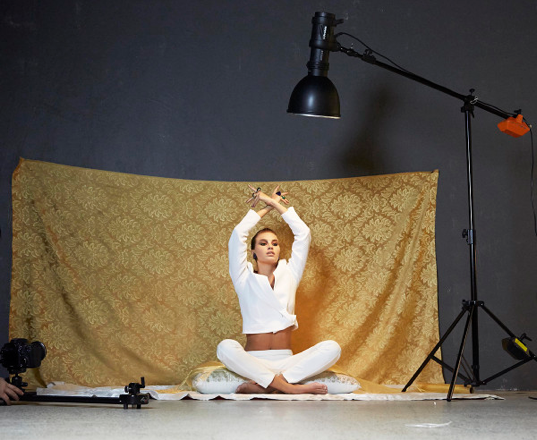
The picture with the model sitting in lotus position was also shot using just a single D1 with a Widezoom Reflector. But in this case the light was positioned above the model. She was sitting very close to wall, and the D1 was positioned just above her, also very close to the wall. This created the shadows that fell nicely on the model and on the background too. As mentioned before, this is far from the wide and even light spread you commonly associate with the WideZoom Reflector. The reason for this unusual effect is, of course, that I placed the light so close the model.

Again, using the WideZoom Reflector as a sidelight or for creating intense shadows and a dramatic falloff is not something I usually do. But by understanding the properties of a certain tool, you are free to bend the rules and use the tool in a creative, out-of-the box way. I believe this kind of thinking is a great recipe for spicing up your lighting. Plus, the job gets a lot more fun when you do not always stick to the beaten track.

Ciao,

Andrea Belluso

Check out more of Andreas work on his website.


0 Comments
    Picture
    Picture
    Picture

    Archives

    November 2017
    October 2017
    September 2017
    August 2017
    July 2017
    June 2017
    May 2017
    April 2017
    March 2017
    February 2017
    January 2017
    December 2016
    November 2016
    October 2016
    September 2016
    August 2016
    July 2016
    June 2016
    May 2016
    April 2016
    March 2016
    February 2016
    January 2016
    December 2015
    November 2015
    October 2015
    September 2015
    August 2015
    July 2015
    June 2015
    May 2015
    April 2015
    March 2015
    February 2015
    January 2015
    December 2014
    November 2014
    October 2014
    September 2014
    August 2014
    July 2014
    June 2014
    May 2014
    April 2014
    March 2014
    February 2014
    November 2013
    October 2013
    September 2013
    July 2013

Categories​

Business
Marketing
Technique
Sales
Fast Food Fridays
​

Podcasts

Tamron Recipes 
Beyond Technique
Why?
Mind Your Own Business
Pro Photographer Journey

 Partners

Tamron
PhotoTexting

​Lumix

Marathon Press
​Platypod
©  2019 Skip Cohen University
  • Home
  • SCU Blog
  • Our Podcasts
  • About Us