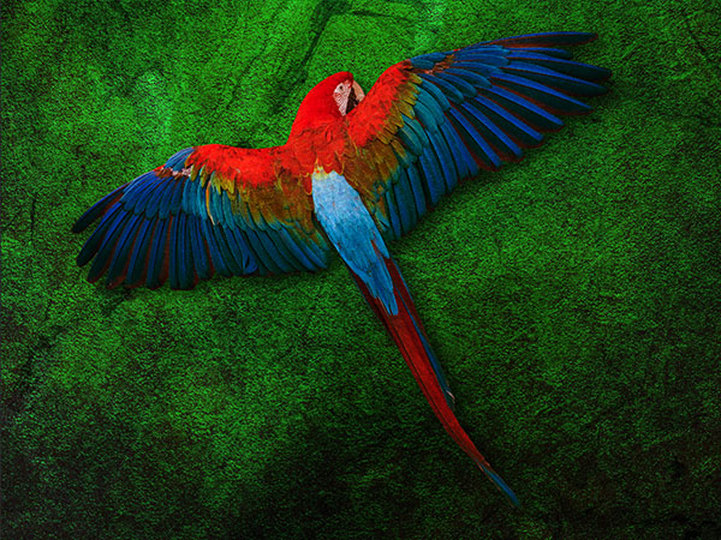
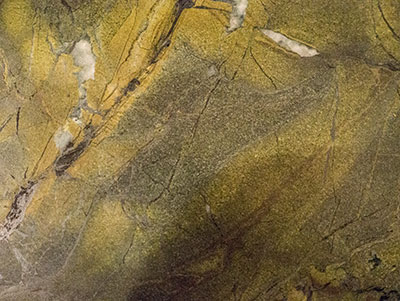
 by Bob Coates Yahoo! The wings of the macaw spread as if in answer to the wish I’d just made for something more than a static pose. I am constantly looking for raw materials for use in my artwork, even on vacation. The Sarasota Jungle Gardens was a great place for colorful subjects. When shooting for main subjects for my art I try to make sure the depth of field makes it easy to extract. I want enough DOF to have the subject in full focus with detail, but the background area surrounding the subject is softer leaving a contrasting edge for easy extraction. Here’s an overview of how I use multiple photos to create images with a painterly feel. First, work is done on isolating the macaw from the background. In this case I used the Magnetic Lasso Tool to make the initial selection followed by some clean up with the Lasso Tool. After the selection is made Photoshop’s Refine Edge is enlisted to do final tweaks by contracting the selection slightly and feathering the edge. When blending images into new backgrounds a slightly softer edge helps with making the placement appear more natural. The background was created by placing a stone texture on the top layer in Overlay Layer Mode. A Layer Mask shields the macaw from this layer’s effects. The macaw was copied, set to Hard Light Mode and merged down into itself to add snap and intensify color. A drop shadow was added and helps give a sense of depth. Two copies of a texture layer were pressed into service set with the Difference Mode. A Layer Mask of the macaw was added at 50 percent opacity to one of the layers. One layer flipped 180 degrees to make it slightly different so the two layers would interact. A green layer was added under the stack to control the final color. This works because none of the layers is in normal mode. If the color of this bottom layer is changed the overall color of the background would change not the color of the macaw. If color was controlled by a layer on top of the layer stack a mask would be needed to shield the bird. 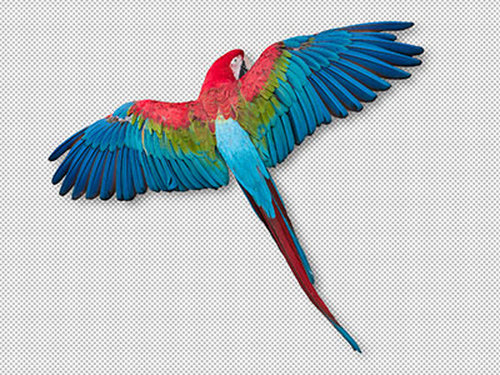
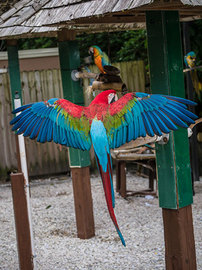
Macaw isolated from background
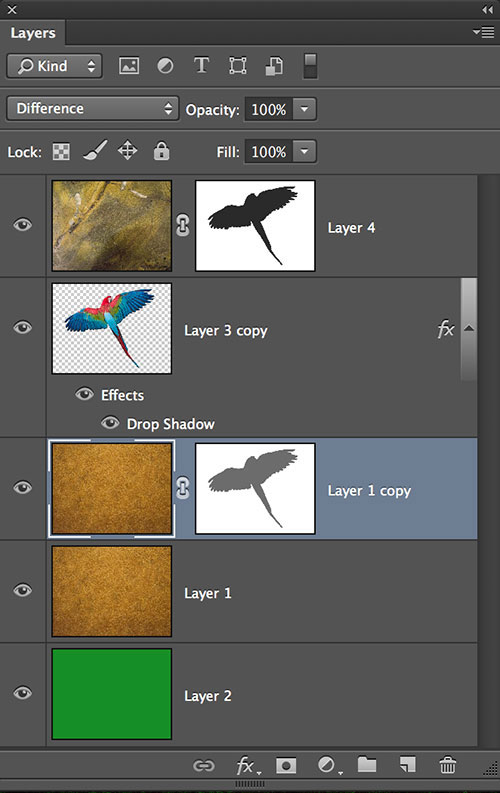
Screen capture of the Photoshop's Layers Palette
The final image!
On holiday with my camera is now a treat rather than a struggle. The small size, light weight and files that don’t fall apart when I try and push them, make the Micro 4/3rds format my choice for shooting. The Lumix GX7 is my favorite with an f2.8 35-100 zoom. Having the camera available without shoulder aches and pains allows me to capture many more images. A small waist pouch from ThinkTank Photo holds my additional lenses, spare batteries, cards and a mini tripod so I’m ready for just about anything that presents itself during the day. Bob Coates has been a good friend for a lot of years and there's an interesting thing that happens with friends in the photographic industry: you get to watch them grow as artists. You have a front row seat on the constantly changing landscape of creative tools they're using and their continuously growing skill set. Most of our favorite images of Bob's have been created in the last couple of years.
Interested in seeing more of Bob's work, check out his fine art site and follow his new blog. You'll never be disappointed. Skip Cohen
0 Comments
Intro by Skip Cohen Right off the bat somebody is going to take off my head and claim this is simply too basic for the professional community that makes up the majority of SCU's readership, but there are two things I love about this post. First, it's a great reminder of a series of simple rules at getting better indoor images through the holiday season and sorry, there are a few of you out there who could use a refresher course. Second, I love the way Rob has explained the process. It's perfect for his own blog to serious hobbyists and even better for many of you who won't have the time to explain to your teenager or an elderly family member how to beef up the quality of their photographs. In college I took a speech class once and the hardest assignment was telling somebody how to put on a coat assuming they didn't know what a coat was, what sleeves were or which was the top or the bottom. There are times when photography isn't much different - as professional photographers you do things so instinctively that you don't do a very good job when it comes to explaining the process. A big thanks to Rob for today's Luminary Corner post and to what's become all of our favorite camera gear, the LUMIX system. Check out more of Rob's terrific advice on his blog, visit his website and if you're looking for a unique trip at an even more unique price, check out Rob's adventure to Costs Rica! Follow him on Facebook and Google+ too. It’s that time of year again! The time of year when (if you’re not already) you become the family photographer. You have the best camera in the family and all those fancy lenses, so you’re expected to capture all of the great moments in all their glory. Many photographers feel anxiety during the holidays because they will be shooting indoors. You can crank up your ISO and use the fastest lens you have, but at the end of the day a little flash can make a big difference. Even if you keep the flash on the camera you can make some great holiday photos. Here are a few tips to take the fear out of making your own light. 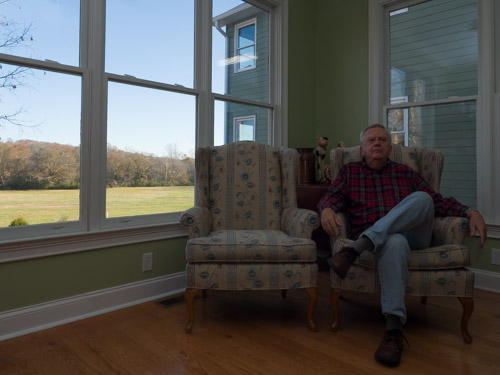
Manual exposure for the ambient light without the flash
Shoot in manual exposure mode. Generally we want to add flash to the existing ambient light in a natural way. Set the exposure in your camera so that the ambient light is under control so you can add flash to your taste. If you let the camera pick the exposure it will make different decisions based on the background of your subjects. Start by setting the ISO around 400 and set the shutter speed to your camera’s x-sync speed. Depending on the camera this is usually 1/160-1/250 sec. This is the fastest shutter speed you can sync with your flash, and it will give you the best chance of freezing the action of all of the holiday excitement. Next, set your aperture value so the ambient light is underexposed by 1 stop. This will help your subject pop against the background when you add the flash. If you can’t get the exposure you want with your maximum aperture, try raising the ISO to get the exposure you want. Most cameras these days make great photos up to ISO 800 and beyond. Let your flash help you. When I’m shooting a family event I generally have the flash on my camera’s hot-shoe and set to TTL auto. This allows the camera and the flash to have a conversation and adjust the flash power depending on the ambient light and the distance to the subject. You can adjust the power of the flash to your taste, and the flash will add your adjustment automatically as the shooting situation changes. Bounce your flash. One of the advantages of shooting a family event indoors is that there is usually a white ceiling a few feet overhead. This gives you a great tool for bouncing your flash. When you point your flash at the ceiling and bounce the light toward your subject you effectively increase the size of your hot-shoe flash. This larger light source is softer and generally prettier than blasting someone in the face with direct flash. Use a bounce card. Many speed lights these days have a built-in bounce card. It’s that little white plastic card that slides out from behind the light. If your flash doesn’t have a built-in card, simply use a rubber band to hold a small card behind the flash head. This little bounce card reflects a bit of light toward your subject to fill in the shadows when you are bouncing the flash off of the ceiling. This can help reduce harsh shadows and brighten your subject’s eyes. Think about white balance. Your hot-shoe flash is daylight balanced. If you’re shooting indoors with a lot of window light, the color of your flash will probably match the ambient light just fine. If you’re shooting indoors with mostly lamp light or other artificial light you can change the color of your flash to match the ambient light. To change the color of your flash you use small pieces of thin plastic film called gels. I recommend one of the gel kits you can buy because they are inexpensive and will give you lots of options. I usually find that a 1/4 or 1/2 CTO (color temperature orange) gel works perfectly in most household situations. You can either use gaffer’s tape to attach the gels or use one of the fancy velcro sets that’s available. 
Same exposure value with the on-camera flash added and bounced off of the ceiling

Since the exposure is set manually the value won’t change whether I'm shooting two people...
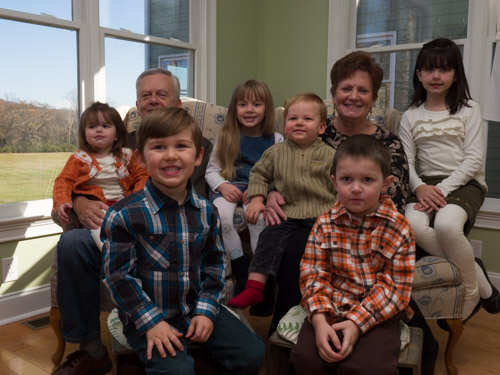
…or a small group
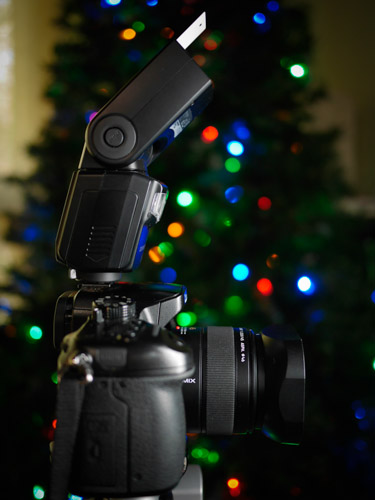
I usually use a 45 degree angle when bouncing the flash
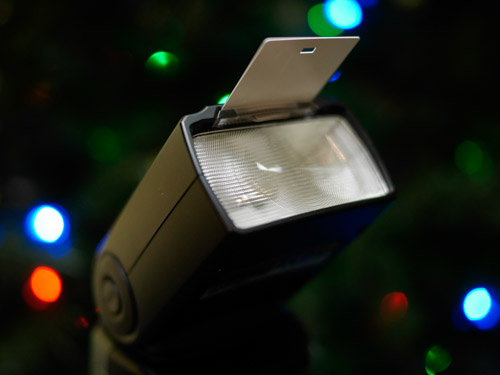
Use the built-in bounce card or add your own with a rubber band and a business card
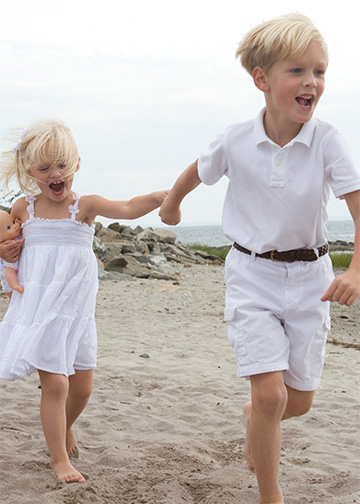
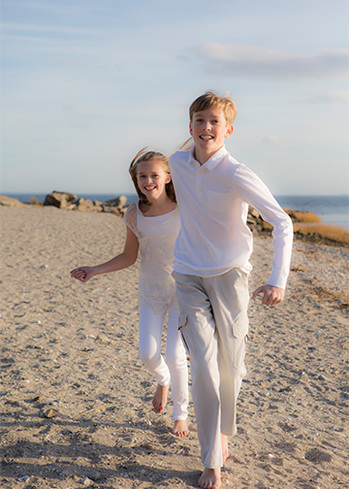
Get some practice. Many of us will be attending holiday parties and a family member’s house that we visit regularly. If you will be visiting Grandma’s house before the holidays, bring your camera and flash and practice setting the exposure and adjusting the flash. All the better if you can visit the site of the festivities at the same time of day you will be shooting the holiday party. You might even want to make notes of your exposure values and flash settings. The last piece of advice I’d like to offer is not to stress out over your holiday photos. If you’re not getting the great photos you want, switch the camera to auto and don’t sweat it. It’s great to have beautiful holiday photos, but not at the expense of your enjoyment of the festivities. Try setting up a “studio” at the party where you know you can get a great shot and ask everyone to pose for you. That way you get some great shots without stressing out over your lighting and exposure all day. Don’t forget to have fun and enjoy the party. Intro by Skip Cohen I first met Kristen Jensen this past summer and her background is different from so many artists. Because Kristen spent most of her career in front of the camera she's got an incredible ability to empathize with her subjects and instantly builds that special trust level to bring out the very best in their expressions. Plus, having spent so much time on the commercial side of the business, many of her images have a strong illustrative/editorial appeal - she's able to be contemporary, without being too over the top for her clients, who, as you'd expect, love her! There's a lot in this post with a touch on direct mail and Kristen's approach to a Fall promotional offer to a few quick tips on working with kids and even a little help for client's on graphic design work. One statement Kristen mentions really says it all: "Gaining trust with your client and/or subjects is the trick to taking great photos." From commercial/beauty photographers like Matthew Jordan Smith to Kirk Voclain photographing seniors to William Innes talking about engagement shoots, each one has talked about the importance of trust. Trust and getting to know your subject is a key to great expressions and images! Check out more of Kristen's work on her site and in Panasonic's LUMIX Luminary Lounge. Plus, you'll find some great tips from Kristen in the LUMIX Theater and a very special podcast she did here at SCU last summer.  I just finished sending my last family portrait JPEG to my client this year for their Christmas card. Every autumn, I offer a discounted family portrait session to my clients. I like to send this promotion to my people via good old fashion snail mail. I really think direct mail is on a comeback. Heck, I know when I get something in the mail when someone has taken the time to hand write, I feel special and worthy. Okay, maybe not that great, but it makes a difference in the email blast age we live in. Now, not all clients book a session from ever promotion, but sooner or later the family does book again. At the very least they refer me to a friend and/or book me for another type of shoot that my studio offers. Being an early pioneer of Mom-tography I found family portrait shoots are very creative for me and it is great to be able to book a session with a snow or rain date. Also it is great fun to plan an imaginative story with your client. Although the sessions can be challenging, like when kids of any age don’t want to be photographed. All in all it is very gratifying knowing when you got your shot and you’ve captured something great that will last for generations. It is a “feel-good” shoot and a definite “win-win”. Life became a lot easier once I switched over from my heavy SLR cameras. Once I started shooting mirrorless with the Panasonic LUMIX GH3 I realized the image quality was amazing. As well, I was less worried about lugging around all the extra gear and my back is happy now, too. Another definite “win-win”. The list below is helpful to make things run smoothly from booking, shooting to the follow-up with your family sessions: 1. Book a shoot date-with a weather permitting date as a backup 2. Plan the location of the shoot-have two alternatives (I like to start at the clients home) 3. Coordinate wardrobe with client-have two alternatives. I suggest something color coordinated like natural/neutral fall colors or everyone wears jeans and white shirts. This always depends on the style of the family. 4. Schedule your Family Photo Session with your online hosting service (I use Pictage) 5. Pack at least 2 mirrorless cameras and lenses-feels good to travel light 6. Pack a GH3 Camera with a speed lite for fill-flash and a 25mm f 2.8 lens 7. Pack another GH3 camera with a longer lens. I love the 35/100 f 2.8 8. Set both cameras date, time to sync 9. Set both cameras to shoot rapid fire/continuous-with kids you will need to shoot lightening fast 10. Send a Thank-You and book a post portrait follow-up at your studio within 2 weeks from shoot date. When your clients see the images large they will be more likely to purchase large prints, canvas’ and framed images-which makes you the most profit for least amount of time, btw. 11. Ask your client to write a testimonial about you-don’t be shy 12. Ask your client to refer you to their friends and family-don’t be shy 13. Up sell your client on other types of photo sessions you offer. I offer weddings, business portraits, editorial shoots and advertising assignments. It is amazing that once you do a fantastic job for a family that they will and do refer you to their friends and family. But, often I have been even more fortunate to find that my client has asked me to shoot business photos for them, too. 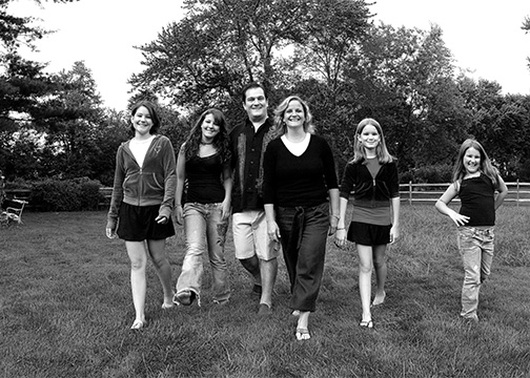 The Bouissou Family 2013, Ridgefield, CT Take the Bouissou family with their four beautiful daughters. I did the typical shot of everyone seated in the grass, but then I asked them to walk for me. When I ask this of clients they usually look at me like I am nuts. Well, after years of modeling I call this the Eddie Bauer-Walk-Through-The-Field shot. I ask the family to walk a couple of times forward then back. It is fun and after they do it few times they actually like it. After this shoot Sarah and Bernard Bouissou (owners of Bernard’s Restaurant) asked me to photograph the two of them for their business website. I then shot food for their website as well. So you just never know what will happen from one family portrait session. 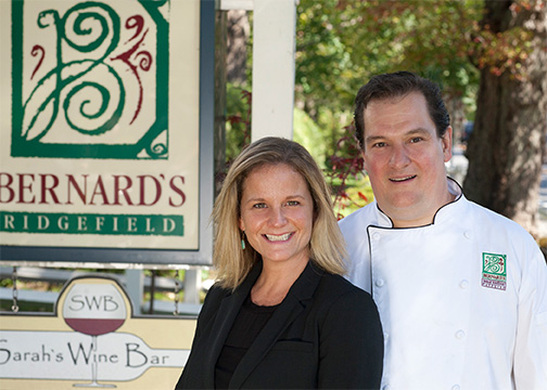 Sarah and Bernard Bouissou 2013, Ridgefield, CT Being a Lifestyle Photographer is pretty cool because I have the opportunity every time I walk out the door to meet my next client. I met Julie Cromwell and her then 9 month old, Jack at the town pool. I was taking my 9 month old son, Noah to the same swim lesson class. We became fast friends and over the years would get the boys together for play-dates and birthday parties. I always tell my clients that they are 99% of the photo and I am only the 1% that happens to be there at the right moment. Julie’s kids, Jack and Erin, are model-like kids. I just photographed the kids again after a four-year break and look how they have grown. I went back to the same beach at the same time and tried to recapture the energy and shot that we all loved years prior. When photographing kids you have to shoot low and fast. Again, I always have two cameras set and ready to go. One with a flash and fixed lens and one camera with a longer portrait lens.(see both shots of kids on the beach).
 Besides the family photos, Julie wanted advice and images for her new business concept. I recently designed her new logo for her business, shot her new updated headshot and we are working on launching her new website this coming year. (see StyleWorx logo and Julie’s headshot. This extra work came to me organically and by keeping in touch with my client on what other services I offer.  Julie Cromwell-Interior Styling 2013 New Canaan, CT In the colder months, I do most of my Family Sessions in my studio. Now….the trick with photographing kids is to have literally everything ready to go. So when your client arrives make sure you have music ready, lights on-and someone home-ha, and cameras ready. Because little people do the funniest things when they don't think you are watching. With children you have to move quickly and it helps if the kids like you. Last week my client brought her daughter Ava, to my studio do a Christmas card. Sounds easy, right? Well, 5 year old Ava was not in the mood to be photographed. She did not want to brush her hair or change clothes. So I first asked her what type of music she loves…done. Then I said that I used to model and be on TV (which I am sure she thought, yeah right granny) and that many people get to sit in my famous makeup chair. Then I whipped out all the flash and glitter i.e.; makeup galore. Well, that was it for Ava. I made a bet that if I could do a little makeup then she could do her own after our shoot. The next thing I offered after the makeup session was a wind machine. She loved it. I made sure my camera was on fire rapid mode and went to town. Ava’s parents were delighted and so was I...that is was over! Just kidding!  Ava Andersen, 2013 KJ Studio, New Canaan, CT Creating a photo session story is what I did for my clients Mirjam and Alain. They wanted to send photos of their boys back to Mirjam’s mother in Germany. Mirjam wanted to show the boys grandparents what an average summer day is like in Connecticut. So together we planned to do a picnic in front of an old barn. It was a perfect day and we all had a great lunch, too! Gaining trust with your client and/or subjects is the trick to taking great photos. What works every time for me is sitting down with my client (s) and simply starting a conversation and getting to know each other. This is what I do right before all my shoots. Sometimes we chat for five minutes sometimes for ½ hour. I find this approach works really well with children as well. I love shooting with my LUMIX cameras. I often tell my friends and clients that a photo shoot with me is just like having a conversation and getting to know each other. Being a Luminary makes that experience even easier. 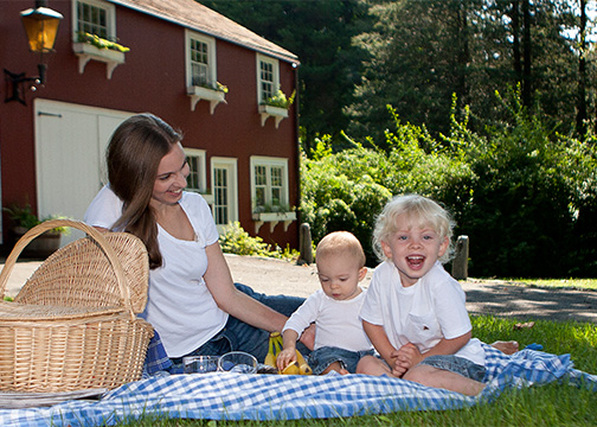 Mirjam and her boys Lucas and Samuel 2013 in Bethel, CT  Handsome Lucus 2013 Bethel, CT Intro by Skip Cohen I'm still amazed at how many photographers don't understand the pure genius of an engagement shoot. While it can represent additional revenue and an opportunity to do more with the images, the real benefit is building trust with your clients. This is about walking in on what's often the most hectic and stressful day in a couple's life and being more than just a familiar face, you're already a friend! It's about building a relationship that in turn yields better more natural expressions and images. William Innes is an outstanding wedding photographer from California and in this special Luminary Corner post talks about the benefits of an engagement session. He hits it hard right off the bat in his guest post with two sentences... "How do I achieve such a great relationship status with most wedding clients? Easy, I make sure they have an engagement session with me." Interested in learning more about William? Check out his website. I can promise you won't be disappointed! 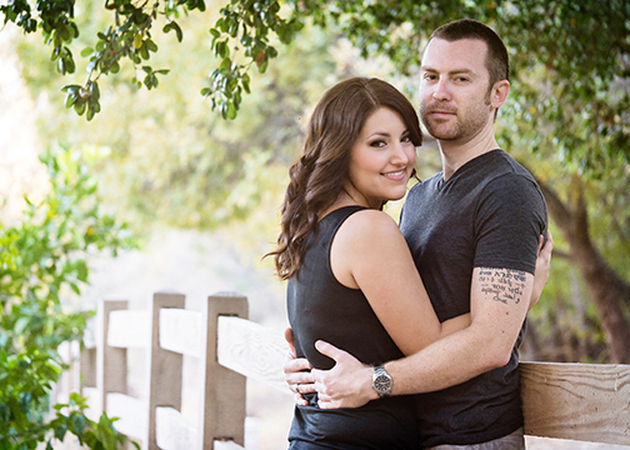 I have just arrived at the hotel where my bride is getting ready with her bridesmaids and family. It’s time to start capturing the wedding day. I knock on the hotel room door and it opens with an excitement and buzz of people getting ready. Make-up artists and hair stylist everywhere – but through all the chaos I hear “hey William is that you”? It’s the bride reaching out like a longtime friend. I approach and give her a hug and tell her how wonderful she looks. This is going to be an awesome day! How do I achieve such a great relationship status with most wedding clients? Easy, I make sure they have an engagement session with me. The benefits of spending casual time with clients before their wedding day are plenty fold. Lets take a look and see what you can expect. The first perk you will gain is an awesome relationship with the bride and groom. Slowly letting the engagement session unfold will give you plenty of time to ask questions and listen to their life story. Be sure to share a few of your own experiences as well. This process will help you reach “friend’ status. When the wedding day arrives both the bride and groom will feel very comfortable hanging out with you – resulting in images that are relaxed and honest. Don’t forget to make the engagement session fun and interesting – nobody wants to spend time with a bore!  Spending causal time photographing your couple will also tune you into any special situations you need to know about on their big day, such as do they blink a lot or maybe they have a side that looks better. Be sure to note this for further reference. 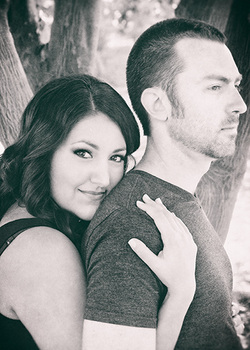 Another great thing about these types of sessions – they can produce income for your studio. Charging for sessions is a great way to increase sales as well as offering some cool products such as canvases or my favorite – a customized sign-in guest book for their wedding that contains engagement images. I also find these sessions can also be a great valued added product Use them in negotiations during the sales process to help book more weddings. It’s a “win-win”. Your clients get a session and you get an opportunity to develop a relationship. All of these images are from a session I photographed three weeks ago. I now shoot these sessions using my Lumix Micro M43 GH3 camera. The size and weight of the gear enables me to bring a body and 4 or 5 lenses and not be bogged down. (All I use is a small Vanguard messenger bag). Moving quickly and easily (flowing) is the secret to great engagement sessions. Images copyright William Innes. All rights reserved.
Introduction by Skip Cohen Panasonic's technology is without question changing the parameters of creativity. Thanks to the LUMIX system photographers today have some of the most creative tools in the history of photography. In this new post, Bob Coates shares one of his most favorite features of the new GX7 - panoramics and in-camera stitching. Bob is definitely somebody who should be on your radar. Check out his blog for professional photographers and his fine art page. Also, check out his commercial website or contact him directly, [email protected]. 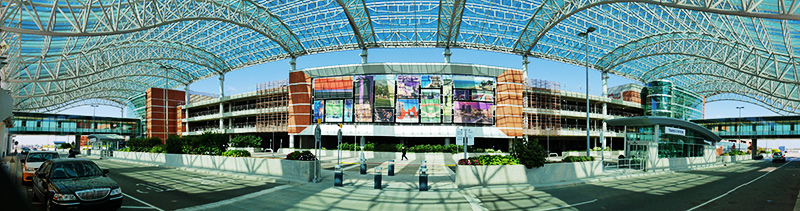
Grand Rapids Airport
I've been having a blast with my Lumix GX7. And, what I thought was going to be just a traveling camera is now being used for about 85% of my pro captures. Viewing the world in a different way is one of the reasons I love photography. Panoramic images show slices of the world that others haven't seen. This leads to one of my favorite features in the GX7 - the in-camera panorama stitching. Where I used to take multiple images and download them and process using either Photoshop or Autopano Pro and go through a fair amount of post processing to get to the final product I now have the ability to see the finished file immediately on the back of the camera. This saves time and gets me firing those panos more often. Some tips for getting the best panos from the camera.
There is a small preview in the viewfinder to help you see what is being rendered by the camera. If you go too fast or too slow or the camera can't make the pano because there is not enough detail for the stitching to take place, the camera tells you right away so you can start again. Have fun trying all the new features available in the GX7. Panorama stitching is only one... 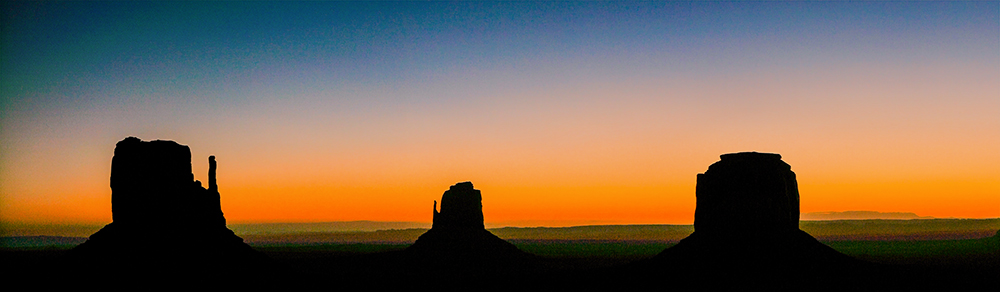
Monument Valley Sunrise
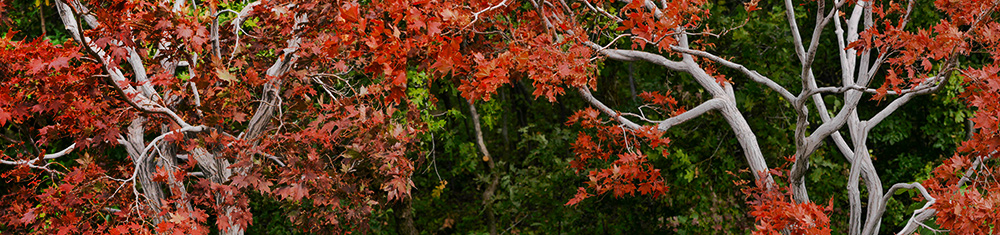
Red Butte Arboretum
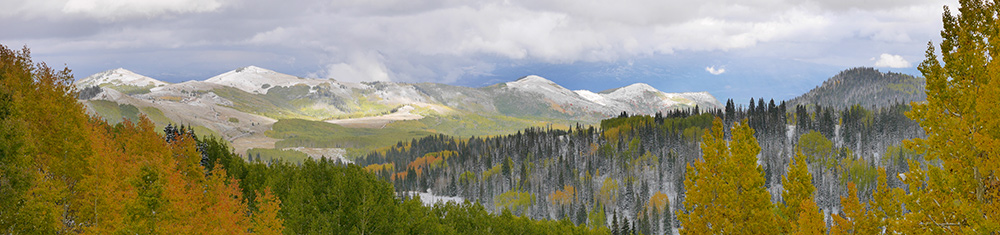
Guardsman Pass
Images copyright Bob Coates. All rights reserved.
|

© 2019 Skip Cohen University