|
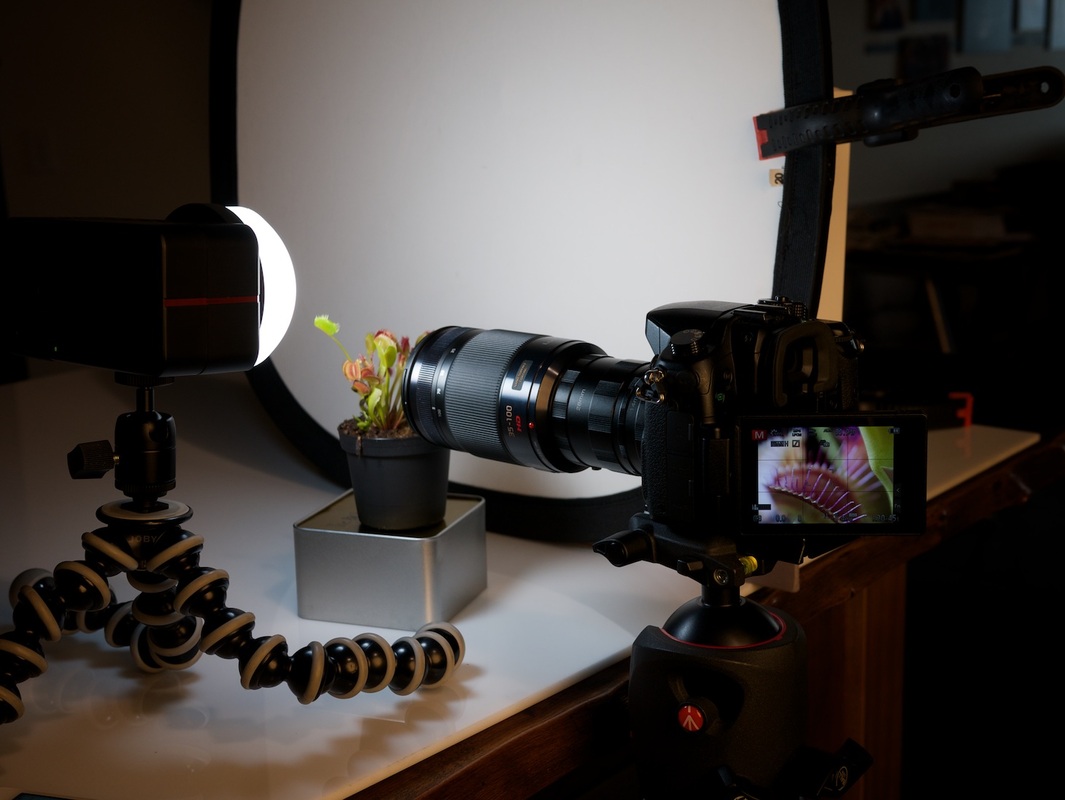
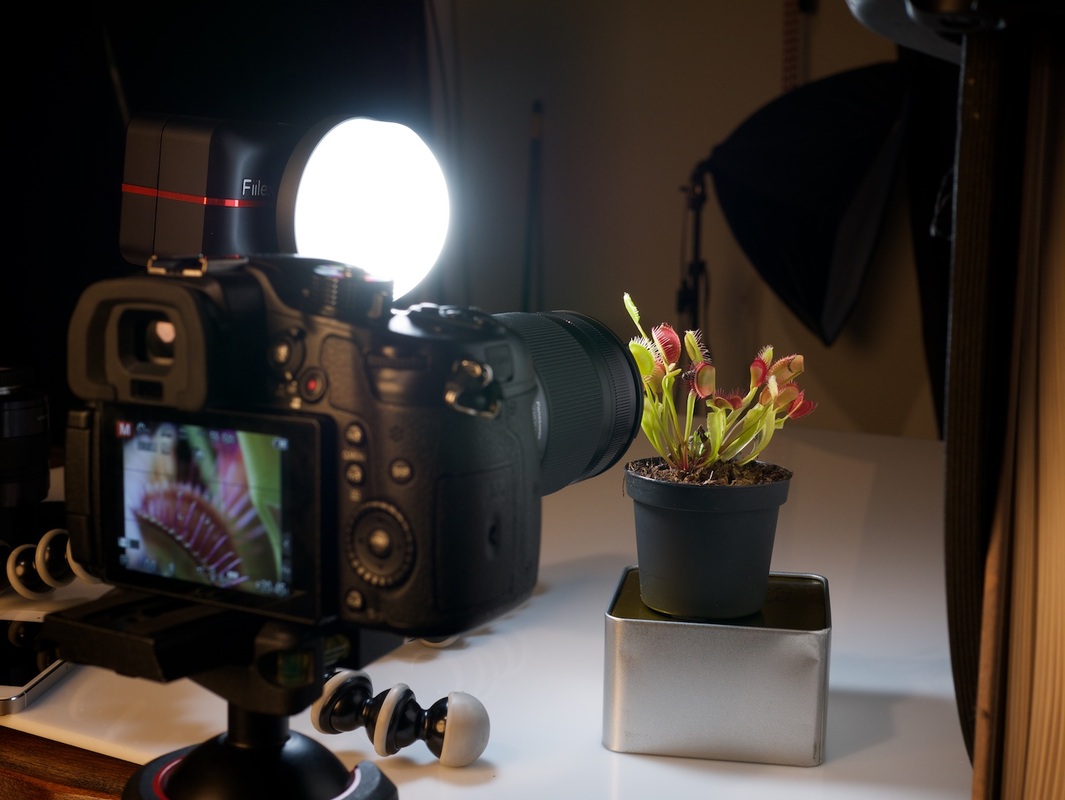
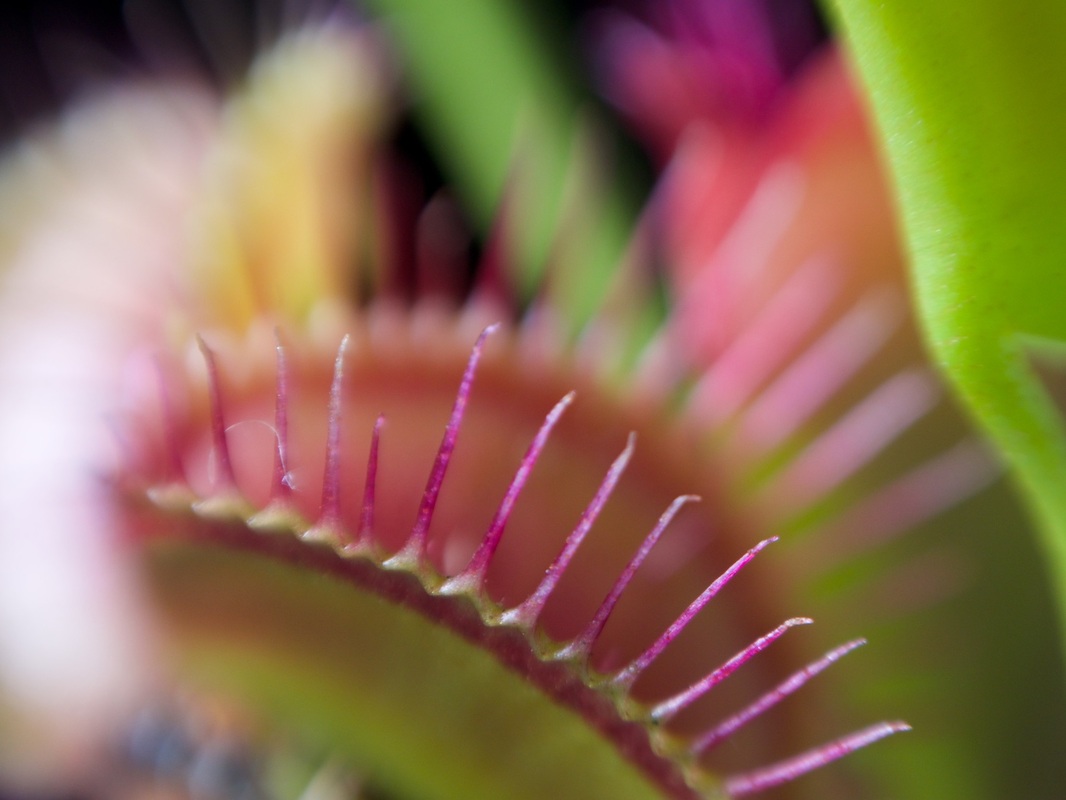
Intro by Skip Cohen Over and over again I've talked about the diversity of Panasonic's LUMIX Luminaries. They're a remarkable group and today's post is a prime example of Joseph Linaschke's love for the craft along with his abilities as an outstanding educator. For more tips on shooting macro and close-up photography, be sure to check out Joseph's lynda.com training “Photography 101: Shooting Macros and Close-Ups” . If you’re not already a lynda subscriber, you can watch his course FREE for seven days. Joseph should be on your radar. Check out his website, his blog and follow him on twitter. You'll also find more of his work along with the other Luminaries in the LUMIX Luminary Lounge. by Joseph Linaschke Everyone loves macro photography. After all, what's not to love? You get to see a whole different world that, as it turns out, lives right under your very nose! Flower, bugs, textures… the sky (or, the ground) is the limit. And in many cases, when you get really close, you'll see things you may never have known existed before! Macro photography can become an expensive hobby, however. Good macro lenses usually start around $500, and go up from there. If macro is something you just want to dabble in, that's a lot of cash for a lens that may sit in your bag the majority of the time. Fortunately there's a shortcut into this world, using something called Extension Tubes. An extension tube looks like a lens, but has no glass in it, and all it does is put some extra distance between any of your existing lenses and your camera's sensor. As it turns out, the farther your lens is from the sensor, the closer that lens can focus on a subject. And the best part is, extension tubes are very, very cheap! I bought a set of three “dumb” Fotodiox tubes (which can be stacked into various lengths) for only $16 on amazon for my Panasonic LUMIX cameras. (You can also buy extension tubes that maintain all focus and exposure control… for 5x as much money. Even though that’s still well under $100, if you want to go really cheap, read on. If you don’t mind spending the money, read my fellow Luminary Bob Coates’ article, also on this site, on using those higher end extension tubes However if you're using a LUMIX, or almost any modern mirrorless camera, you'll find a unique technical challenge with these cheaper tubes, which takes a little back story to understand. Depth of field (how much is in focus at once) is controlled by your lens aperture; the more it's open (a smaller f-number), the shallower your depth of field. In macro photography, you usually want to "stop down" your lens at least half-way so you can get a bit more in focus at once (we could be talking mere millimeters here). Traditional lenses have a mechanical ring on them that when turned, physically closes and opens the aperture, changing our depth of field. Some modern cameras however employ a "drive by wire" solution, where the aperture is electronically opened and closed, not mechanically. This is fine when shooting normally; you'd never know the difference. But when that lens is not electronically connected to the camera — as it isn't when using extension tubes which are essentially dumb, light-tight tubes — you no longer have aperture control. The default position is wide open, meaning you have minimal depth of field. With an extension tube in place, this can be so incredibly shallow that it becomes difficult or even impossible to get sharply focused photos. Fortunately, there's an easy work-around. Here's how you trick your lens aperture into a partially closed position. I have tested this on Panasonic LUMIX, Olympus, Sony and Fuji mirrorless cameras. 1. With your lens on the camera normally, put the camera in manual exposure mode. 2. Set the aperture you want (let's say f/11) and a shutter speed of at least a few seconds. Press the shutter button. 3. The shutter will open and the lens will stop down. Now's your chance. Before the exposure ends, and without turning the camera off, remove the lens. The camera will immediately close the shutter, but since it lost the connection to the lens, the lens will stay stopped down! 4. Put your lens, that's now locked into f/11 (or whatever you chose) onto your extension tubes, and shoot away. To change the aperture, you'll need to put the lens back on the camera normally (at which point the aperture will immediately open back up), and repeat the process at another f-number. While this is clearly an inconvenience, it works, and allows you to use those inexpensive extension tubes to make a jump into macro photography, no matter what kind of camera you use. Images copyright Joseph Linaschke. All rights reserved.
1 Comment
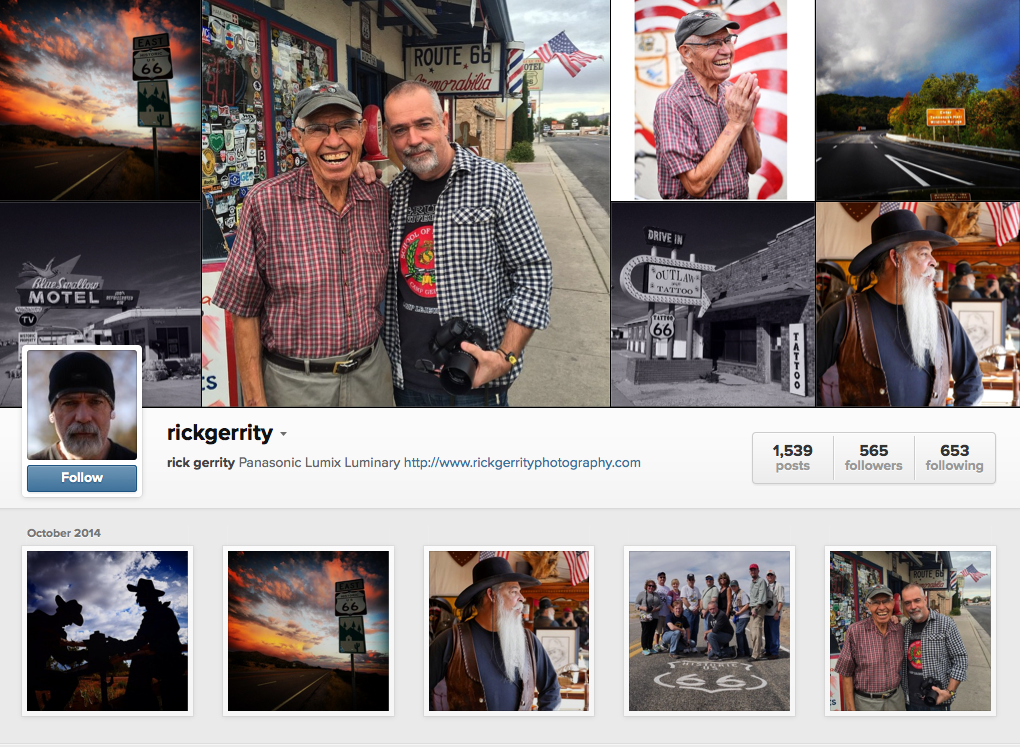
Today's Luminary Corner puts good buddy, Rick Gerrity in the spotlight. I've written a lot about the diversity of Panasonic's Luminaries. No statement could be more true than what Rick said in his quote below about transforming seemingly ordinary moments in extraordinary images! "Rick has been a published, professional photographer based in the NY/NJ metro area for over 25 years. "I specialize in people, product, location and street photography throughout the US and Canada and I have a passion for for transforming seemingly ordinary, everyday moments into extraordinary images." His images of people include Paul Newman, Sylvester Stallone and Oliver Stone, as well as real-life reflections of street life in America's cities and towns, which he calls, "Hybrid photography at its best. Video and stills combined for the ultimate storytelling experience." Rick's commercial images include work for BMW, Panasonic, Canon USA, IBM, Sony and Oleg Cassini. His is the owner of Gerrity Photographic Inc. and Rick Gerrity Photography." Interested in seeing more of Rick's work, check out his website. Even better, stop by the Panasonic booth if you're headed to PPE next week and you'll have a chance to talk with Rick directly. This is a pretty remarkable group. They're talented artists and you can get to know all of them by visiting the Lumix Luminary Lounge. Images copyright Rick Gerrity. All rights reserved.
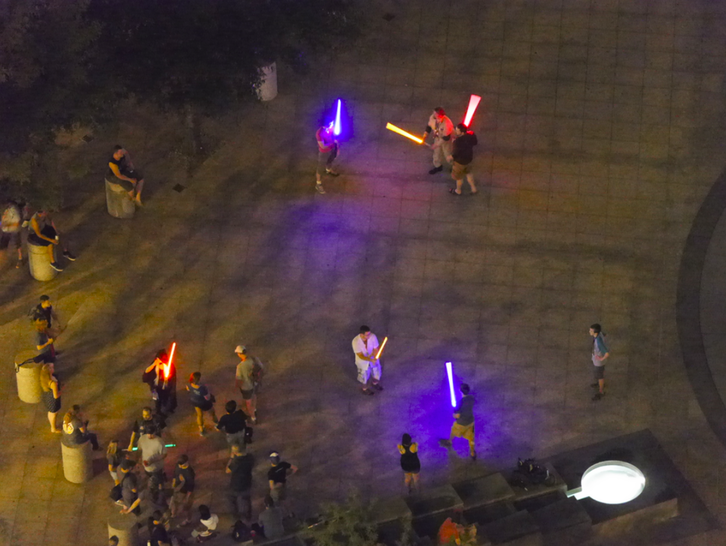
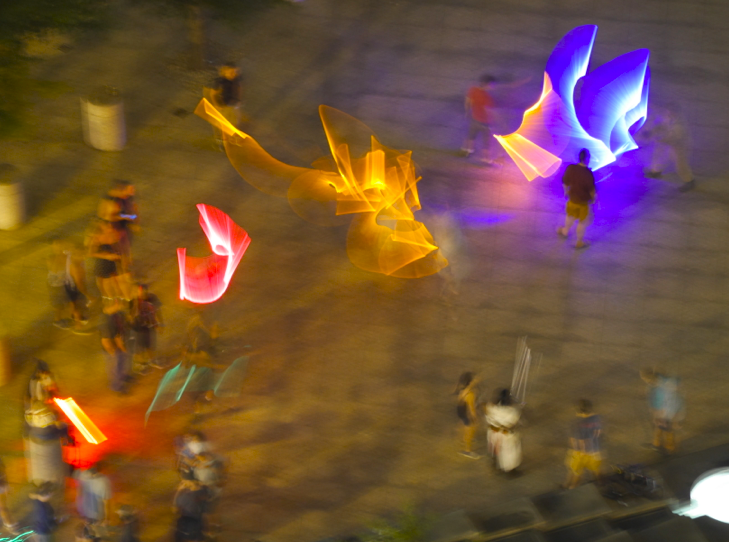
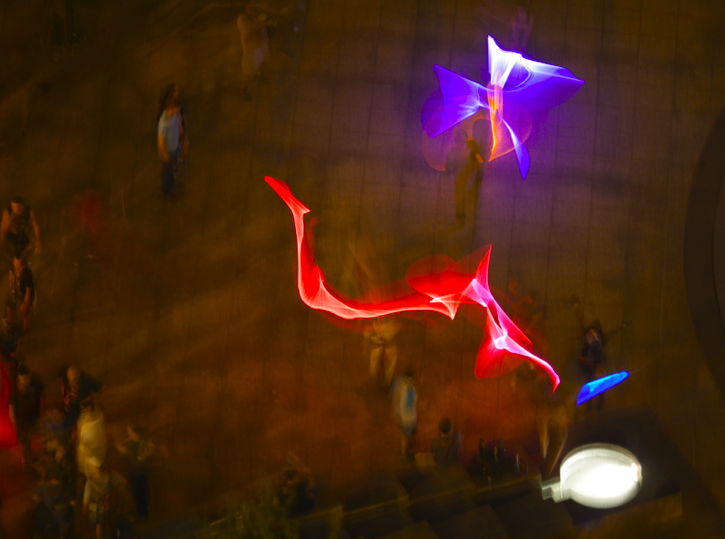
Like any post I write myself in Luminary Corner, I need to remind you of my profile in professional photography. While I know more than I let on, I do not make a living as a photographer. My background is in marketing and business, "seasoned" with my passion for the craft. I'm the industry's biggest groupie and thanks to career paths at Hasselblad and Rangefinder/WPPI I've been privileged to work with some of the finest photographers in the world. Last September we attended Dragon Con in Atlanta and I've already shared a lot of images with you in previous posts. It's one of the largest sci-fi conventions in the country. Pick any character from any book, movie, comic book or video game and odds are somebody was in costume paying tribute. Sixty thousand people invaded Atlanta across five hotels this past Labor Day. Today's post is going to give you a little different perspective and demonstrate one of the points I love about the GH3, it's capabilities in low light. At Dragon Con we were on the 22nd floor of the Hyatt. At 11:00 pm one night I was out on the balcony and saw lights dancing around in a park below. There were a half dozen guys from Dragon Con battling it out with light sabers. The images below are hand held with the GH3 and a LUMIX 150mm zoom lens. I shot wide open and took the ISO to the max on the first one (12800). While it's not anything that would win awards, if I were doing surveillance work it would probably pass! This was shot at 1/15th of a second. Then I started playing with the ISO dropping it down to 800 and 200...and adjusting the aperture as well. The blur in the light in the bottom right corner is the result of being without a tripod, a necessity on these longer exposures. I spent enough years in research during my Polaroid days to recognize that none of this is scientific, but keep in mind it was dark...I was on the 22nd floor...and had I had a tripod the images might even make it to being respectable. Also, the original images are slightly sharper, since these are screen shots and easier to post as smaller files.
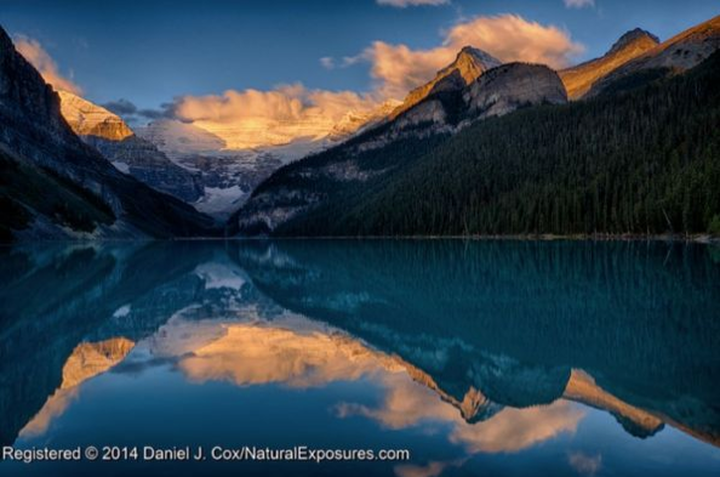
Now imagine what this camera is like when photographing a wedding reception! You'll find a number of posts from the Luminaries talking about shooting in low light, especially William Innes using the GH4 at weddings. What a kick working with LUMIX gear is. I love the fact that Panasonic is leading the way with mirrorless technology. Intro by Skip Cohen I love being able to share these excerpts from Dan Cox's LUMIX Diaries. First, every image is a terrific representation of why LUMIX cameras are being called "game changers" and second, I'm traveling vicariously along with him on each of these trips! This is just an excerpt from October 1, but it's got some great suggestions, including how he likes to set up HDR. Dan's complete series is just a click away and well worth taking the time to read! Dan should be on your radar. Check out his website at NaturalExposures.com. It's your link to everything he's working on, workshops, projects and his team. October 1, 2014 Yesterday was rainy and we had to wait for this morning for the spectacular views Lake Louise is famous for. We weren’t disappointed! The image below was shot just out of the Lake Louise hotel, and yes, there were lots of other folks taking in the beautiful scenery. The sun rose this AM at about 7:40 or so, and more than one person had a difficult time hauling their tired bodies out from the opulent bedding the hotel provides. Nobody complained however; the scene was too amazing to complain. For this image I used Nik’s HDR Efex Pro 2. I’m no master at it for sure and if you think this looks like HDR then I’ve failed. Please post your thoughts in the comments. I typically see very few HDR images I really like and subtlety is essential in my mind. But this scene cried out for something other than split neutral grad I’ve used in the past. The technique I use for creating a series of images to run through Nik’s HDR software is this. First I switch over to complete manual exposure. Normally I shoot mostly on Program. Yes, Program, but that’s another story. The first frame I shoot is with my hand over the lens or with a lens cap on. It’s helpful for HDR sequence to have a black frame on the front and at the end. I then set my focus using the AF of the camera. Once the focus is set I switch the AF off. The next step is to start exposing the frames. The first exposure is dead on what the camera’s meter suggests, then I shoot three exposures under at 1 stop each. Next I go back up the scale and shoot three exposures over what the camera suggests at one stop each. I should also mention that White Balance is set to cloudy. Finally I finish with another black frame by putting my hand over the lens and shooting an exposure. for now the process is finished. Eventually I select all frames in Aperture and the select Edit In which takes the frames into Nik’s HDR EFIX Pro 2. The rest is computer magic. Within Nik there are lots of choices, most of them as phony looking as an Elvis impersonator so I search for the one that is most realistic. Then I fine-tune the image with some of the options Nik has available. That’s it. Let me know what you think. After the morning we hit the road for our five hour trip to Jasper. The entire day is a series of stops for waterfalls, scenics, restrooms and more scenics. Just as we enter the outskirts of Jasper we see a beautiful bull elk. We end the day with a great shoot just before the light gets too dark to shoot. |
AuthorsWelcome to Luminary Corner. Besides being a recognized member of the professional photographic community, each post author is a member of Panasonic's LUMIX Luminary team. Archives
November 2017
|
© 2019 Skip Cohen University

