|
Intro by Skip Cohen Panasonic's Luminary team is one of the most diverse group of artists in professional photography today. They're always pushing the edge of the envelope with their creativity and this post by my good buddy, Bob Coates, is a perfect example. Back in the film days, shooting infrared was a lot more difficult than it is today with digital technology. Even better is shooting infrared with a member of the LUMIX family of cameras. And, as Bob points out, it's the perfect technique to play with at those times of day when you wouldn't normally be shooting outdoors. Check out more of Bob's infrared images and how-to suggestions on technique by visiting his links below. Put Bob on your radar, along with his blog, Successful-Photographer.com. Then wander over to the Lumix Lounge and meet the rest of the Luminary team! Panasonic isn't just making incredible equipment - they're staying true to their tagline:   A great way to repurpose an older camera is to have it converted to infrared. IR photography opens up a whole new time of day to creativity. Midday, when you normally put your camera up because of the high contrast, is made for IR capture. I had a Lumix G6 converted by LifePixel with a normal Infrared filter and it’s been a blast. You may or not remember the days when infrared was a very dicey way to photograph. Film was very susceptible to fogging with the tiniest exposure to light. The filters used to filter out visible light made focusing very difficult. You often had to remove the filter to focus. Put the filter back on and then make another adjustment because the infrared light focused on a different plane than visible light. 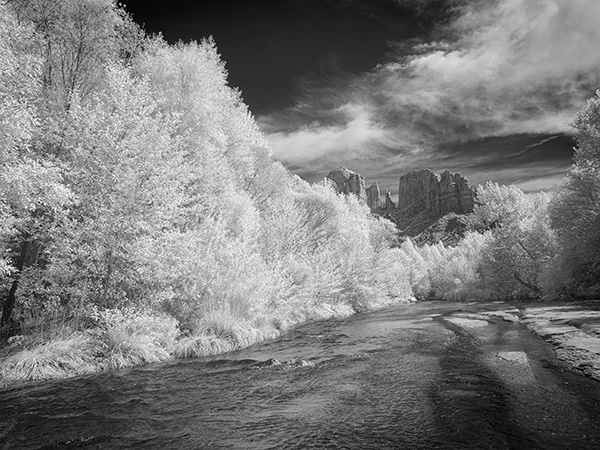 OK enough of the problems of the past. Infrared photography with digital is a blast. If you set your camera to black and white you can get a good idea of what the infrared capture will look like. Focus is a breeze.
I recommend capturing images in RAW plus jpeg and bracketing exposures, especially when you first start out. The final infrared image is created in postproduction and it’s good to have options of density from the different exposures. You can see more about my journey into digital infrared and post processing methods by checking out the links below.
0 Comments
Your comment will be posted after it is approved.
Leave a Reply. |
© 2019 Skip Cohen University