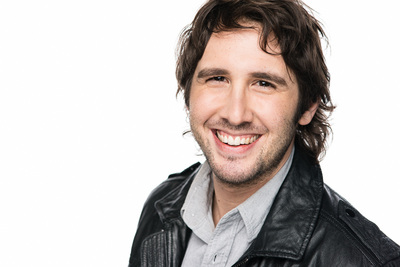
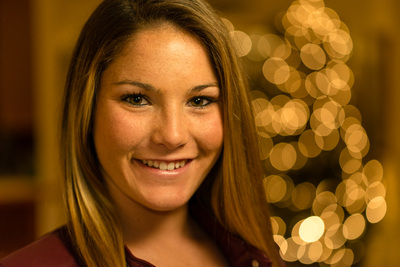
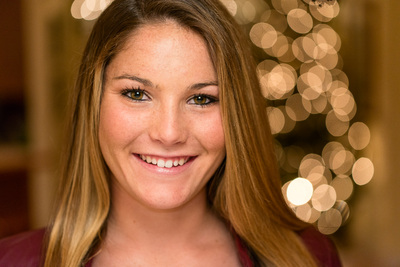
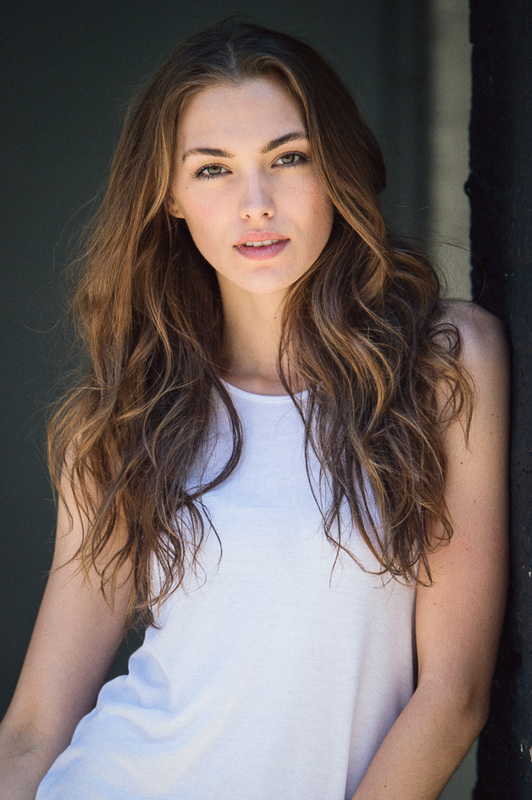
 Intro by Skip Cohen Over the years, dozens of times, I've talked about the best part of our industry having nothing to do with photography, but the friendships that come out of everyone's love for the craft. Thanks to friends at Tamron USA a month ago I had a chance to "spend some time" with Erik Valind...on a couple of phone calls and then a podcast. I was so impressed with the passion he has for imaging that I immediately went out and bought a copy of his book. (Just for the record, it's my idea to give you the link to Erik's book, not his. Just click on the image to the left.) While the subtitle might make it sound like it's a great book for aspiring pros to raise the bar on the quality of their snapshots, it's a solid review of all the basics of great portraiture. Erik hits virtually every aspect of creating outstanding portraits including lighting, cropping, composition and metering, just to name a few - there's nothing he doesn't cover. This post is actually the third component in a trifecta. His podcast continues to explore his passion for imaging and his behind the scenes video with Josh Groban is a kick to watch and better understand the tone Erik and his crew set to get those natural expressions. Looking to see more of Erik's work? Check out his website. A big thanks to Erik for doing this guest post and Tamron USA for their never-ending focus on education. Their products and their focus are helping to raise the bar on image quality every day! Creating great portraits requires a multifaceted approach, which makes the pursuit both difficult and infinitely rewarding. There are certainly a number of technical details that need to be considered to make a person look their best on camera. At the same time, photographing people requires a two-way stream of trust and communication that you never think about when photographing landscapes or products. The marriage of proper technique and communication is what will elevate your portraits to a whole new level, so lets discuss a few tips that'll help you improve both, and have you making great portraits in no time! Natural Expressions - No amount of fancy gear or perfect technique can save a portrait if the subject is upset or uneasy in front of your camera lens. For this reason working with your subject before working with your gear is key. To make someone comfortable in front of the camera they have to be comfortable with you first, so make sure to strike up a conversation before picking up your camera. Ask them about their favorite musicians and play on some familiar jams to put them at ease. Find some things you may have in common and start to establish a rapport. If all else fails give them a prop, which will take their mind off the photoshoot and give them something else to focus on. I recently had the pleasure of working with Josh Groban on a photoshoot for Yamaha Music and I applied all of these tips to get some killer natural expressions. Natural Looking Skin Tones - After all the work to get a good expression you don't want to ruin it by making your subject look unnatural in another way. Proper skin tones are important, no one wants to look blue, bright orange, or blurry. So lets pick up the camera now and set it up correctly. First thing to set is the Picture Style. This is how your camera will process your photographs. Go into you camera menu and select the "Portrait" Picture Style. This will ensure that your images aren't oversaturated and that the sharpness and contrast in camera are flattering. After that you just need to set your White Balance for the setting you'll be shooting in. Auto White Balance will get you close, but I recommend using the presets for best results (Daylight, Tungsten, Fluorescent). These images show how improper White Balance made the girl appear greenish orange, then how the image should look after selecting the proper Tungsten White Balance preset in-camera. As you become more comfortable with your gear you can create Custom White Balance settings with a handy tool like the ExpoDisc . Flattering the Face - Now that the subject is at ease and your camera is set, you need to pick a lens. While wide-angle lenses are great for capturing a landscape or showcasing a location, they can wreak havoc on a persons face. This is because they distort an image causing it to bulge out at the edges. If used up close it'll make someone’s head look like an overinflated balloon... not a good look. To eliminate distortion and to compress a persons face you should use a telephoto lens. My favorite is the Tamron 70-200mm zoom lens. It's versatile, has a fast constant aperture of f/2.8, and is long enough to really flatter a person’s facial features. Here’s an unflattering example of a portrait taken at 24mm, then the same photo taken at 135mm… BIG difference! 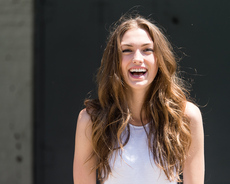 Find Soft Light - After all, photography is painting with light, so the last step is to find the right light for a flattering portrait. Light generally falls into two categories - Hard Light and Soft Light. When you go outside at noon and take a photo you'll get unflattering hard light as seen in this photo. Hard light comes from a small light source that is far away from your subject. It produces harsh shadows that call attention to blemishes and wrinkles. Soft light is produced by large light sources close to your subject. This is where a soft box light modifier gets its name. Any easy way to find soft light without the need for soft boxes and strobes is to simply find shade. Then the sunlight is no longer directly hitting your subject, but bouncing off of large nearby surfaces first, which result in much softer flattering light. Notice the difference in the light on the model’s face as she stands in direct sunlight, then again as she stepped back a few feet into the shade. Following these simple steps you’ll have your subject at ease in no time, and will be creating images that showcase them in the best possible way. Happy shooting! Images copyright Erik Valind. All rights reserved.
0 Comments
Your comment will be posted after it is approved.
Leave a Reply. |
Archives
November 2016
|
© 2019 Skip Cohen University




 RSS Feed