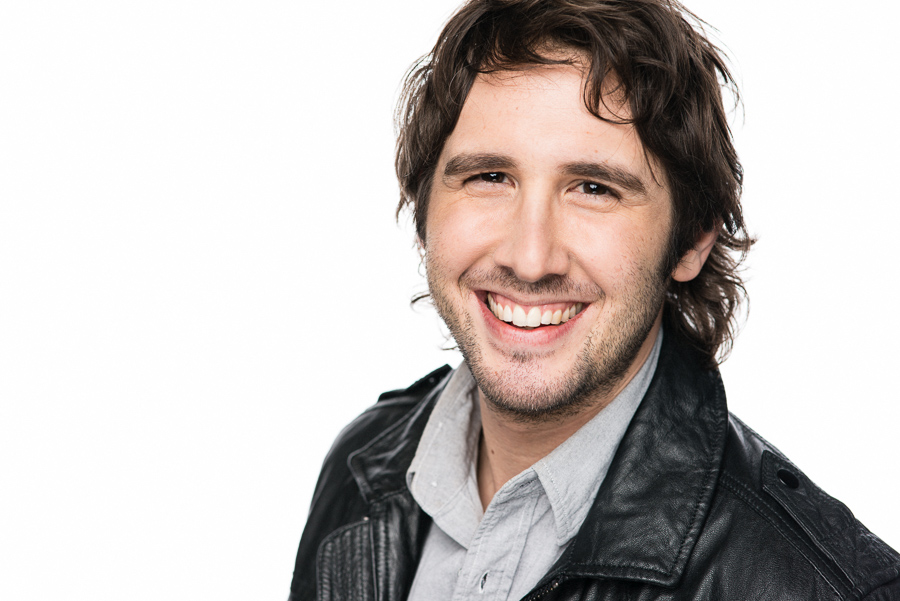
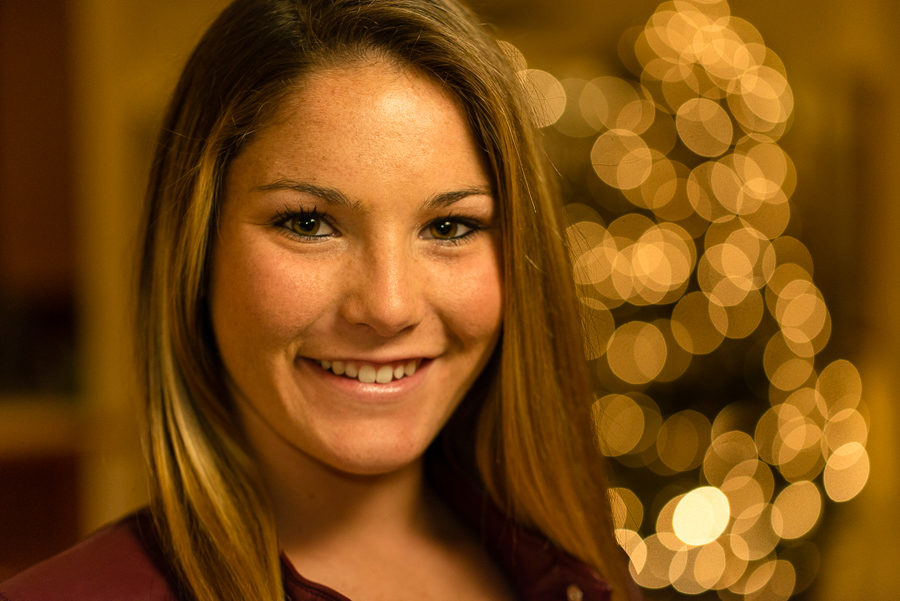
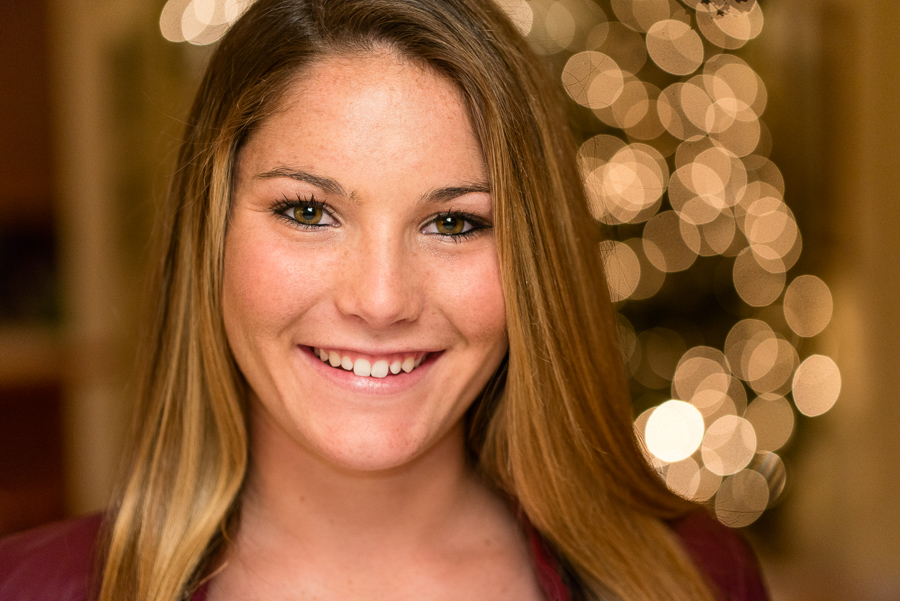
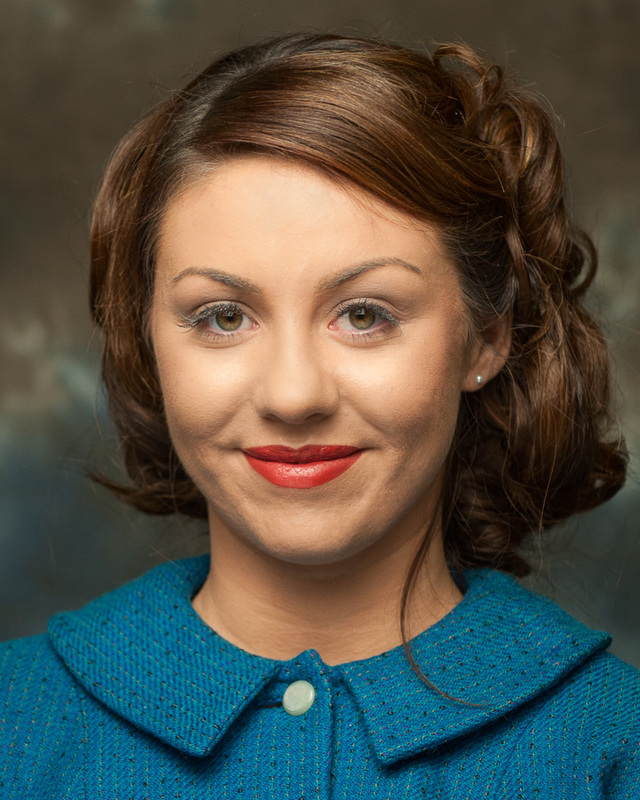
 Intro by Skip Cohen Over the years, dozens of times, I've talked about the best part of our industry having nothing to do with photography, but the friendships that come out of everyone's love for the craft. Thanks to friends at Tamron USA a month ago I had a chance to "spend some time" with Erik Valind...on a couple of phone calls and then a podcast. I was so impressed with the passion he has for imaging that I immediately went out and bought a copy of his book. (Just for the record, it's my idea to give you the link to Erik's book, not his. Just click on the image to the left.) While the subtitle might make it sound like it's a great book for aspiring pros to raise the bar on the quality of their snapshots, it's a solid review of all the basics of great portraiture. Erik hits virtually every aspect of creating outstanding portraits including lighting, cropping, composition and metering, just to name a few - there's nothing he doesn't cover. This post is actually the third component in a trifecta. His podcast continues to explore his passion for imaging and his behind the scenes video with Josh Groban is a kick to watch and better understand the tone Erik and his crew set to get those natural expressions. Looking to see more of Erik's work? Check out his website. A big thanks to Erik for doing this guest post and Tamron USA for their never-ending focus on education. Their products and their focus are helping to raise the bar on image quality every day! Creating great portraits requires a multifaceted approach, which makes the pursuit both difficult and infinitely rewarding. There are certainly a number of technical details that need to be considered to make a person look their best on camera. At the same time, photographing people requires a two-way stream of trust and communication that you never think about when photographing landscapes or products. The marriage of proper technique and communication is what will elevate your portraits to a whole new level, so lets discuss a few tips that'll help you improve both, and have you making great portraits in no time! Natural Expressions - No amount of fancy gear or perfect technique can save a portrait if the subject is upset or uneasy in front of your camera lens. For this reason working with your subject before working with your gear is key. To make someone comfortable in front of the camera they have to be comfortable with you first, so make sure to strike up a conversation before picking up your camera. Ask them about their favorite musicians and play on some familiar jams to put them at ease. Find some things you may have in common and start to establish a rapport. If all else fails give them a prop, which will take their mind off the photoshoot and give them something else to focus on. I recently had the pleasure of working with Josh Groban on a photoshoot for Yamaha Music and I applied all of these tips to get some killer natural expressions. Natural Looking Skin Tones - After all the work to get a good expression you don't want to ruin it by making your subject look unnatural in another way. Proper skin tones are important, no one wants to look blue, bright orange, or blurry. So lets pick up the camera now and set it up correctly. First thing to set is the Picture Style. This is how your camera will process your photographs. Go into you camera menu and select the "Portrait" Picture Style. This will ensure that your images aren't oversaturated and that the sharpness and contrast in camera are flattering. After that you just need to set your White Balance for the setting you'll be shooting in. Auto White Balance will get you close, but I recommend using the presets for best results (Daylight, Tungsten, Fluorescent). These images show how improper White Balance made the girl appear greenish orange, then how the image should look after selecting the proper Tungsten White Balance preset in-camera. As you become more comfortable with your gear you can create Custom White Balance settings with a handy tool like the ExpoDisc . Flattering the Face - Now that the subject is at ease and your camera is set, you need to pick a lens. While wide-angle lenses are great for capturing a landscape or showcasing a location, they can wreak havoc on a persons face. This is because they distort an image causing it to bulge out at the edges. If used up close it'll make someone’s head look like an overinflated balloon... not a good look. To eliminate distortion and to compress a persons face you should use a telephoto lens. My favorite is the Tamron 70-200mm zoom lens. It's versatile, has a fast constant aperture of f/2.8, and is long enough to really flatter a person’s facial features. Here’s an unflattering example of a portrait taken at 24mm, then the same photo taken at 135mm… BIG difference! 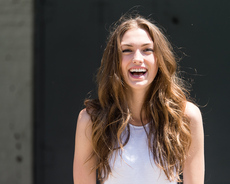 Find Soft Light - After all, photography is painting with light, so the last step is to find the right light for a flattering portrait. Light generally falls into two categories - Hard Light and Soft Light. When you go outside at noon and take a photo you'll get unflattering hard light as seen in this photo. Hard light comes from a small light source that is far away from your subject. It produces harsh shadows that call attention to blemishes and wrinkles. Soft light is produced by large light sources close to your subject. This is where a soft box light modifier gets its name. Any easy way to find soft light without the need for soft boxes and strobes is to simply find shade. Then the sunlight is no longer directly hitting your subject, but bouncing off of large nearby surfaces first, which result in much softer flattering light. Notice the difference in the light on the model’s face as she stands in direct sunlight, then again as she stepped back a few feet into the shade. 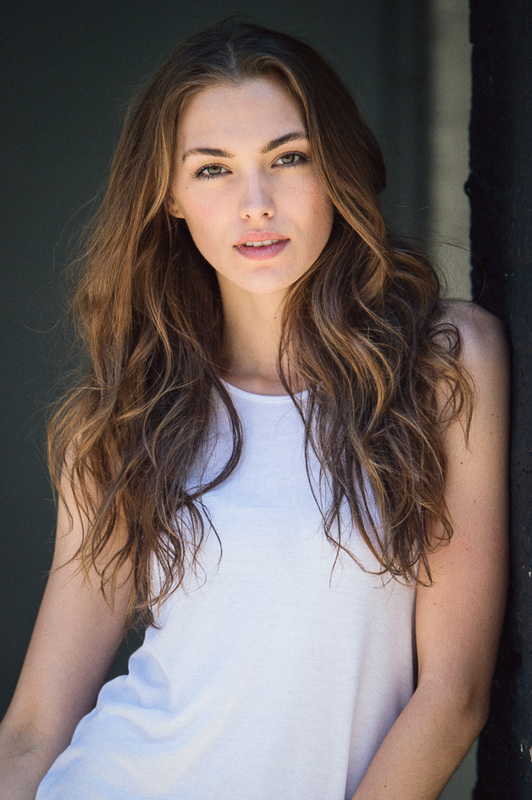 Following these simple steps you’ll have your subject at ease in no time, and will be creating images that showcase them in the best possible way. Happy shooting! Images copyright Erik Valind. All rights reserved.
0 Comments

Intro by Skip Cohen The most fun aspect of social media for me is the "social" side of it. I'll regularly pick up the phone and track down somebody who I've met on line. Well, meet a new buddy, Ken Jancef. He followed me on Twitter the other day and I simply followed him back. I got a kick out of a number of his images, which were mostly sports and asked him if he'd be willing to do a guest post. Numerous times I've tried to capture sports images, with minimal success. Practice really does make perfect, but as good buddy Roberto Valenzuela has said, "...only if you're practicing it right!" With my experience with sports it's all about ongoing education, but Ken made the best point of all in this guest post. "...love what you shoot. Be passionate about it. Your passion will show in your work." Ken's only been shooting sports as a business for five years, but his passion truly comes through in this guest post and he's got some great advice to share. You'll find more of his images on his Flickr pages and if you want to follow him on Twitter, he's just a click away. 
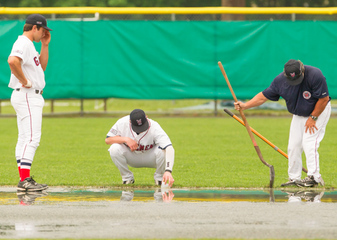 I like sports. OK...I LOVE sports. Any kind of sports really, but what I love even more is to capture sports. The diving catch in the outfield, the game winning goal, the wreck in Turn 3, the high school underdog basketball team making it to the playoffs, or the look on a child’s face getting an autograph from his favorite player. I’ve always dreamed of being the guy in the bright orange or yellow vest, tons of cameras strapped all over me, running around trying to get THAT shot, making the cover of Sports Illustrated. I have been a casual photographer for more than 25 years, but have been a serious sports shooter for about 5 years now. I love everything about sports photography, especially interacting with people on and off the field. I not only shoot what’s on the field, but what's off the field as well… the coach talking to a player about a big play; baseball players cleaning a field after a rain storm, because they have no grounds crew; even players interacting with each other during down time in a game. That side of sports photography, sometimes, can be more compelling than shots from the game itself. It gives the sport a more human quality, showing the players are people just like the rest of us. And, as a spectator, you don’t often get to see a lot of that, the focus is usually on the game itself. One of the hardest things to master in sports photography is timing. Sure, you can set your camera to burst mode, rattle off a ton of shots, but if you don’t know what you're shooting, then all of those shots mean nothing. So, shoot the sports you love. If it’s a sport that you don’t know, read up on it, research it, take a bit of time to see what it’s about. I often shoot Minor League Baseball games. If I don’t know the opposing team well, I’ll get on their web site to see what players they talk about the most. If there is one tip I can share and it applies to every specialty… love what you shoot. Be passionate about it. Your passion will show in your work. If you’re stuck, don’t be afraid to ask for help. I know I have so much more to learn, and I can’t wait to be taught! 
All images copyright Ken Jancef. All rights reserved.
Intro by Skip Cohen I've worked with so many of the members of the Tamron staff over the years, but it wasn't until the SCU blog, that I had a chance to meet, either in person or in cyberspace, some of the finest artists in our industry. Meet travel photographer, Michael Snell. Michael's based in Kansas, but a quick tour through his galleries and you'll soon realize how much time he spends outside his home state. Michael's work has appeared in National Geographic publications, Travel+Leisure, Moon Handbooks, Rough Guides, Away.com/Orbitz, Tamron publications, USA Today, Forbes.com, CNBC.com, Meredith books, AAA publications, Midwest Living, Kansas! Magazine and the Kansas Getaway Guide, Michigan Travel Ideas, and many other books, calendars, magazines and online resources. What I enjoy the most about this post is Michael's reminder of how to build the story. It doesn't matter if you're a wedding or travel photographer - the true impact of your work will be in your ability to tell the story. It's a short post, but packed with a giant thought, pay attention to the details. Check out Michael's galleries and you'll see some stunning images from all over the world! A big thanks to Michael for taking the time to do a blog post and to TamronUSA for their never-ending focus on education! 
 I consider myself a travel photographer, but that says more about where I shoot than what I shoot. My subjects vary from people to landscapes, wildlife, food and architecture — basically anything you might expect to see in a travel magazine or guidebook. Travel images are intended to tell the story of a place and to create a desire in the viewer to learn more about the destination or to even want to visit for themselves. Any good story is more than just an overview, however. Details are generally what really build the flavor and texture of a story. It’s true for a novel and it’s true for a photo essay. Whatever kind of photographer you are, when you are building a multi-image package — whether it be for a travel magazine or a wedding album — you can achieve greater depth by using both wide and tight compositions. And you don’t necessarily need to carry a lot of gear to do so. All of the images in this post were shot in Spain over the last two months with a single Tamron 18-270mm zoom lens to illustrate that point. Wide shots are great for initially establishing where you are, and what your story is generally about. A broad, wide-angle scene overlooking a village and the surrounding countryside would fit this description. Next, come in tight for architectural details, portraits of locals, plates of food or a beautiful flower and you’ll begin to build on your story and add the details that draw the viewer in. If you are shooting for a publication, your art director will welcome these shots as well, as they will provide a wide variety of layout opportunities. 


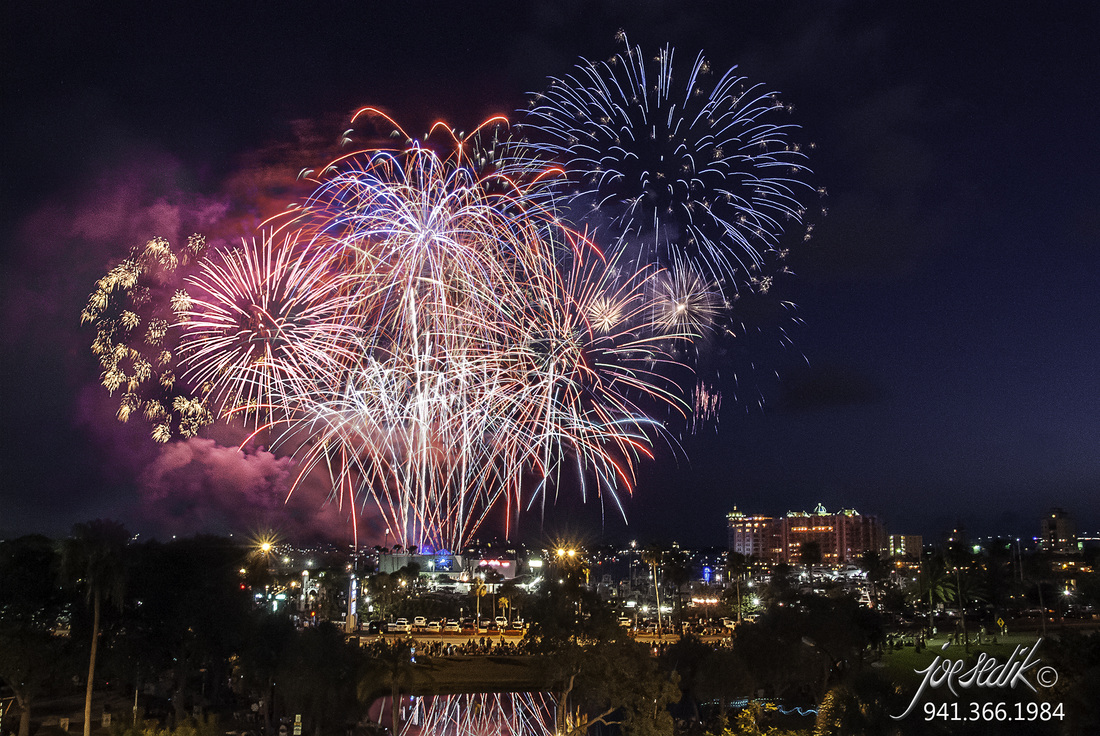
It's not a guest post, but it is a guest "shot" by my buddy Joe Sedik. Up until Joe sent me this image, I was probably the only blog in photography without a fireworks shot for July 4th! This one is especially fun to share with you, because first, it's Sarasota and I live here and second, Joe is a great photographer and we share a whole bunch of mutual friends.
We also share 200+ friends on Facebook. I'm not sure, but I think after 150 it mean you're related! Check him out and friend him on Facebook...he's got some beautiful work to share. Intro by Skip Cohen I've written several posts about Panasonic's LUMIX system, along with a lot of great information from their Luminaries in Luminary Corner. This is a little different spin on the GH3, when good friends Pat Fournier and Brian Malloy had a chance to put it to the test on a maternity shoot that was anything but traditional. This is one of those cameras that every time somebody uses it they seem to find one more advantage in the design and versatility. Recently we had the opportunity to test out the Lumix GH3. When we picked up the Lumix GH3 our first impression was “WOW, it’s so light, how can something this small stack up against our big trusty DSLR’s?” The camera is a dream to hold and shoot. What it lacks in weight, it makes up for in maneuverability and image quality. Asssignment: Maternity shoot on the beach and in the water.  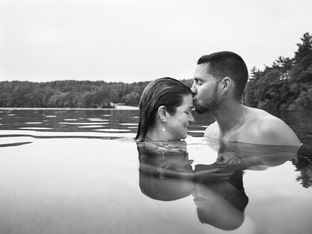 My partner Pat and I had clients who wanted to create some memorable images just before the birth of their twin daughters. Normally we would shoot with at least a couple of DSLR’s and an array of lenses. This time, though, the only thing we grabbed from our camera bag was the GH3 and a reflector and headed off to the beach. Talk about being FREE! No weight, no bag, no OCF, just a lightweight body, a 2.8 lens and a flip screen that let us create shots that would have been difficult to capture with a traditional DSLR. Shooting with the GH3 is effortless. The one feature we absolutely loved was having the swivel touch screen monitor. By having a monitor that swivels out, we were able to shoot at angles that would have had us lying in the water up to our shoulders, not something you’d want to do with a DSLR. Using the flip out screen, we were able to compose and see what we ordinarily wouldn’t have seen with our faces squeezed up to a traditional viewfinder. It was a welcome relief to shoot with a camera that was so lightweight and responsive.  We found we were able to make more of a connection with our clients , since we weren’t hiding behind a big DSLR. This is a feature we hadn’t anticipated having any impact on the shoot, however it turned out to be one of the most important features of the camera. All of these images are from the shoot. Next up, is the GH3 and our experience of shooting with the GH3 at a wedding! What an amazing piece of gear this camera is! Images Copyright Fournier & Malloy Photography
|
Archives
November 2016
|


 RSS Feed
© 2019 Skip Cohen University